Birthday
In this tutorial, we'll walk through the process of collecting customer birthdays and setting up a multi-stage birthday triggered journey.
Strategy
This guide is focused on the operational aspects of configuring a birthday-triggered journey in Rejoiner. If you're in the early phases of planning your birthday program, start with this strategy-focused resource:
Creative
You'll build your templates using our Advanced HTML/CSS Editor or the Drag and Drop Editor.
Collecting Birthdays
Customer birthdays can be collected by Rejoiner in a few different ways. In all cases, birthdays must be formatted as YYYY-MM-DD.
-
REST API: You can use the
customerendpoint of our REST API to update a customer'sbirthdate. -
JavaScript API: You can use the
setCustomerDataendpoint of our JavaScript API to update a customer'sbirthdate. -
Custom List Field: If you're manually uploading customers adding new subscribers to a specific list, you can sync a subscriber's birthday using the `birthdate' field. This field will sync to the customer's profile.
-
Manage Preferences: Customers can manually input their birthdate from their Manage Preferences page.
Configuring the Journey
First, click Journeys in the main navigation. Then, click Add New Journey.
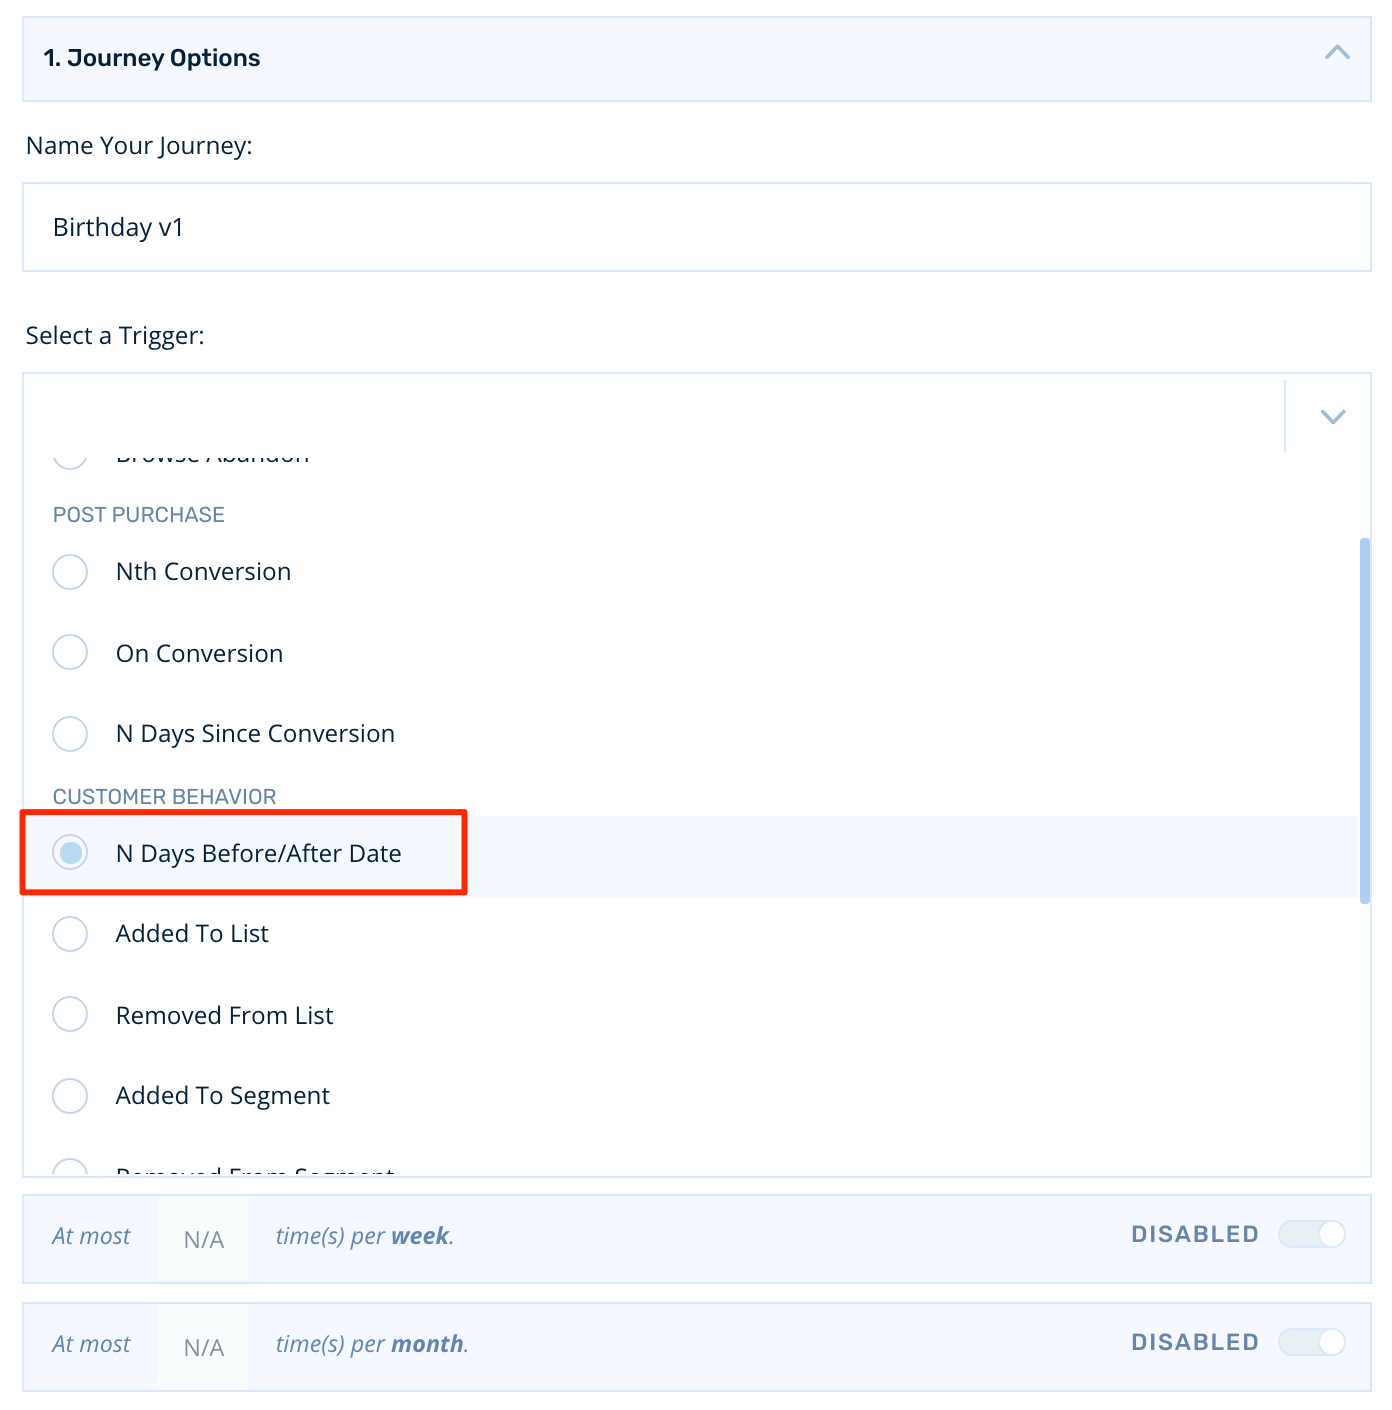
Start by naming the Journey something like, "Birthday v1".
Then, select the N Days Before/After Date trigger:
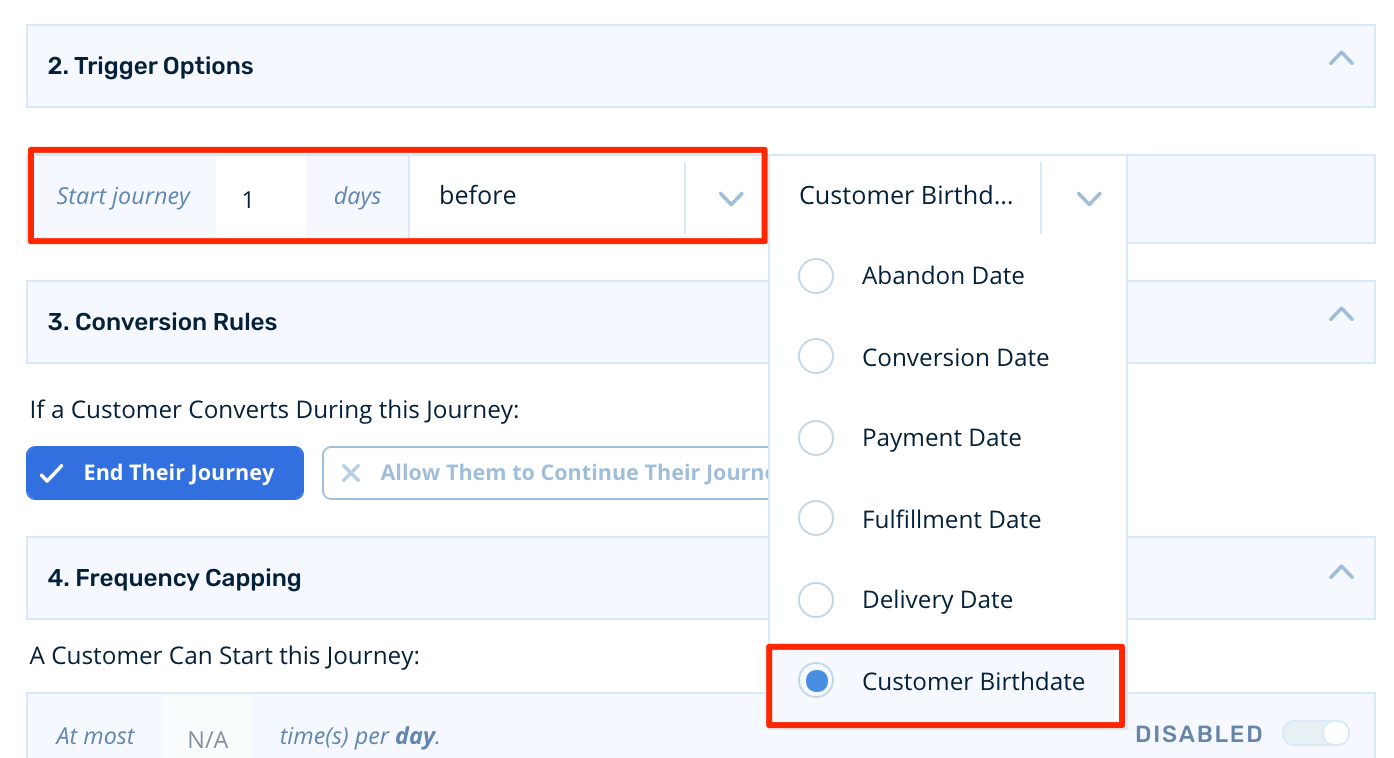
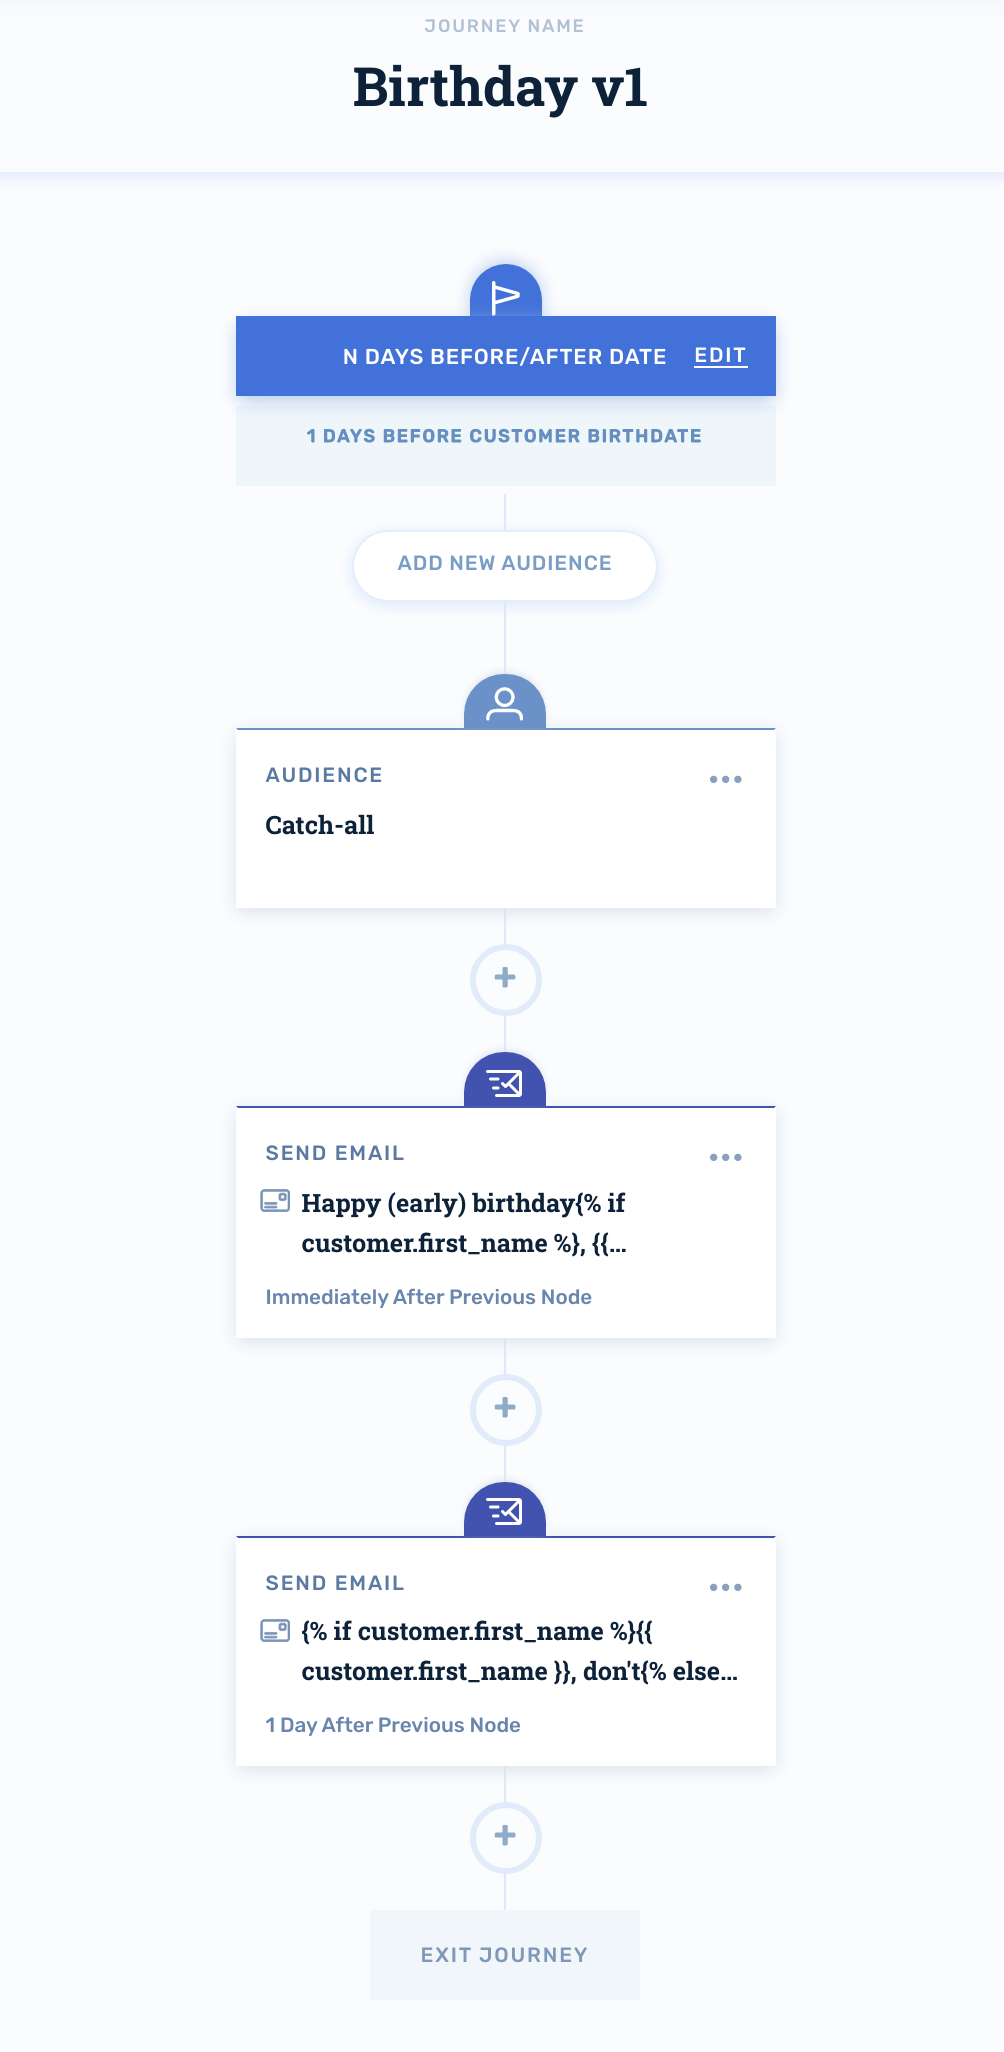
Next, let's set our trigger to start the journey 1 day before the customer's birthdate.
Conversion Rules
In this case, we want the journey to end if the customer converts, so we'll leave the conversion rules setting in its default state:

Frequency Capping
Frequency capping is built into the fact that customer's can only enter this journey 1 day before the birthdate that is stored on their customer profile.
Building the Journey
Targeting Your Audience
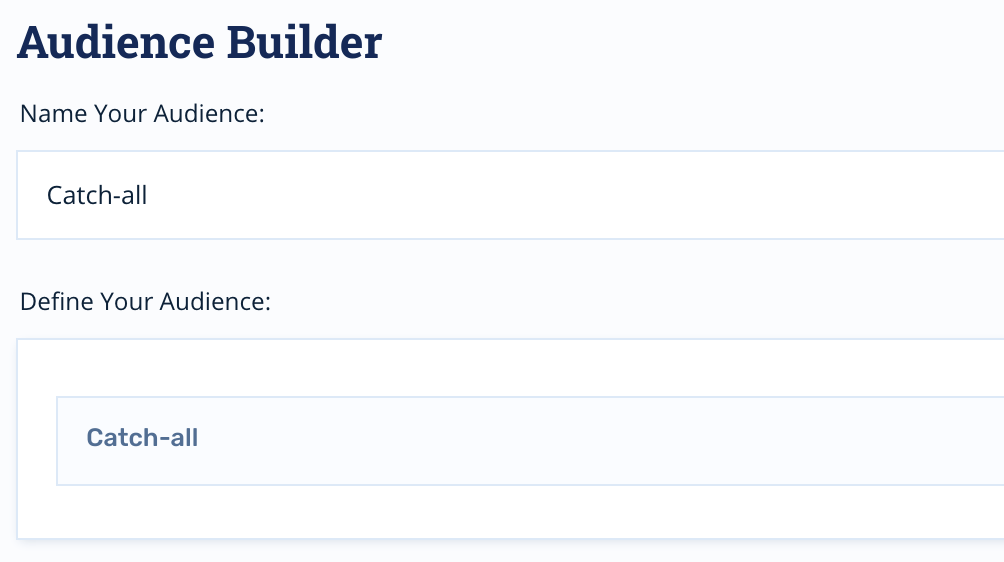
To start, click Add New Audience.
For this birthday-triggered journey, we'll use a Catch-all audience so that every customer who a birthdate value stored on their customer profile will enter the journey.
Positioning Nodes
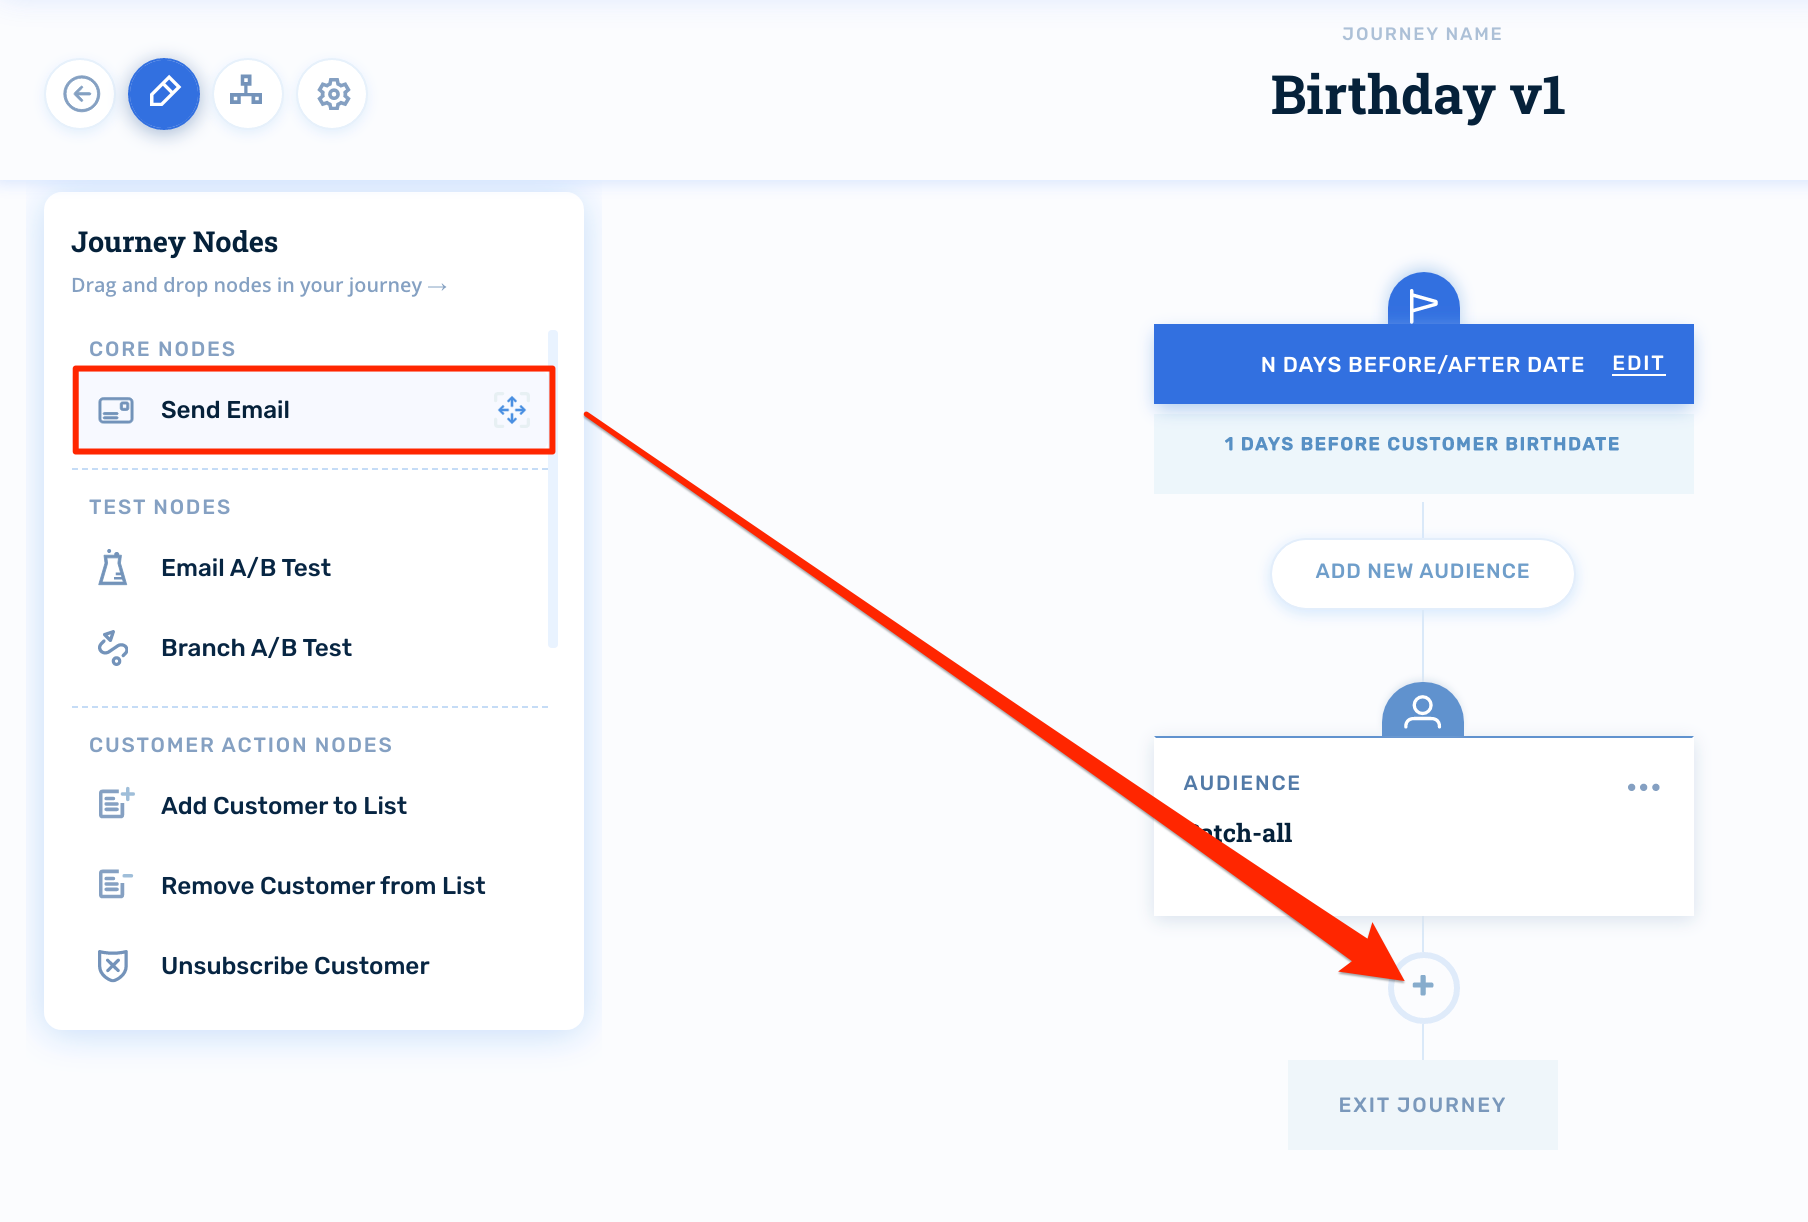
Now that our audience is set, let's set up some email nodes. Click the Journey Nodes icon, select Send Email and drag it into position below the audience:
Configuring Email Nodes
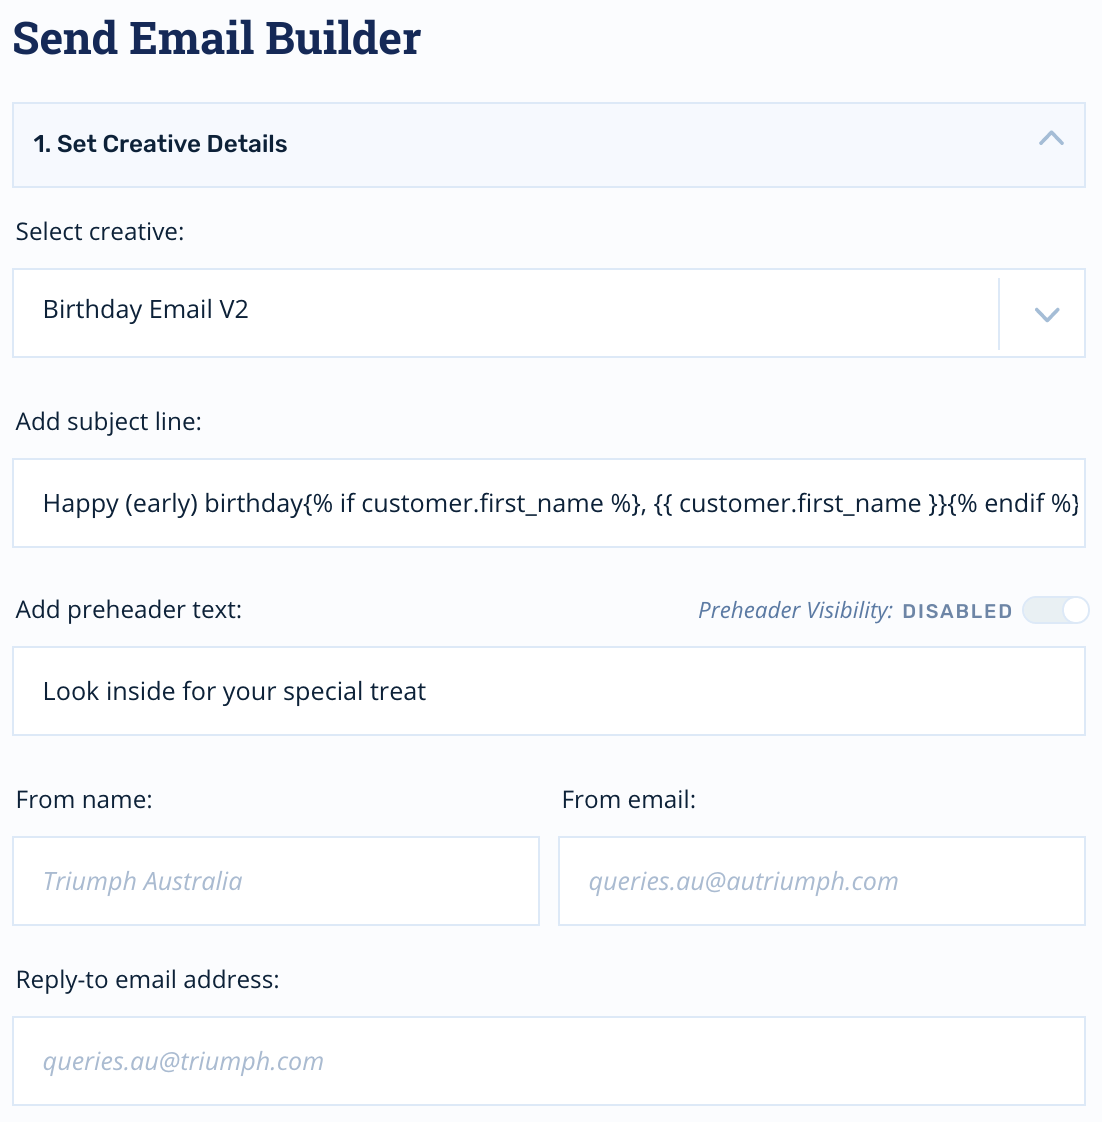
First, you'll select your creative. Then, you'll configure our subject lines and preheaders.
Wait Times
While configuring each email node, you'll set a wait time. This wait time determines when the node will process relative to the previous node.
So, if we set the first email node of our birthday journey to a wait time of Immediately, it will trigger exactly one day before the customer's birthdate.
We could then set up a second email node that waits 24 hours. Ultimately, this email would trigger on the customer's birthdate.
Once you've positioned the nodes and set your wait times, your birthday-triggered journey will look something like this:
Subject Line Personalization
Before attempting to personalize subject lines, review the tutorial on configuring your account's First Name Variable.
You can personalize the subject line with the customer's first name using this conditional:
Happy (early) birthday{% if customer.first_name %}, {{ customer.first_name }}{% endif %}!This subject line would render as, Happy (early) birthday, {First Name}!
Or you could try an approach like this:
{% if customer.first_name %}{{ customer.first_name }}, don't{% else %}Don't{% endif %} miss your birthday treat!This subject line would render as, {First Name}, don't miss your birthday treat!
Activating the Journey
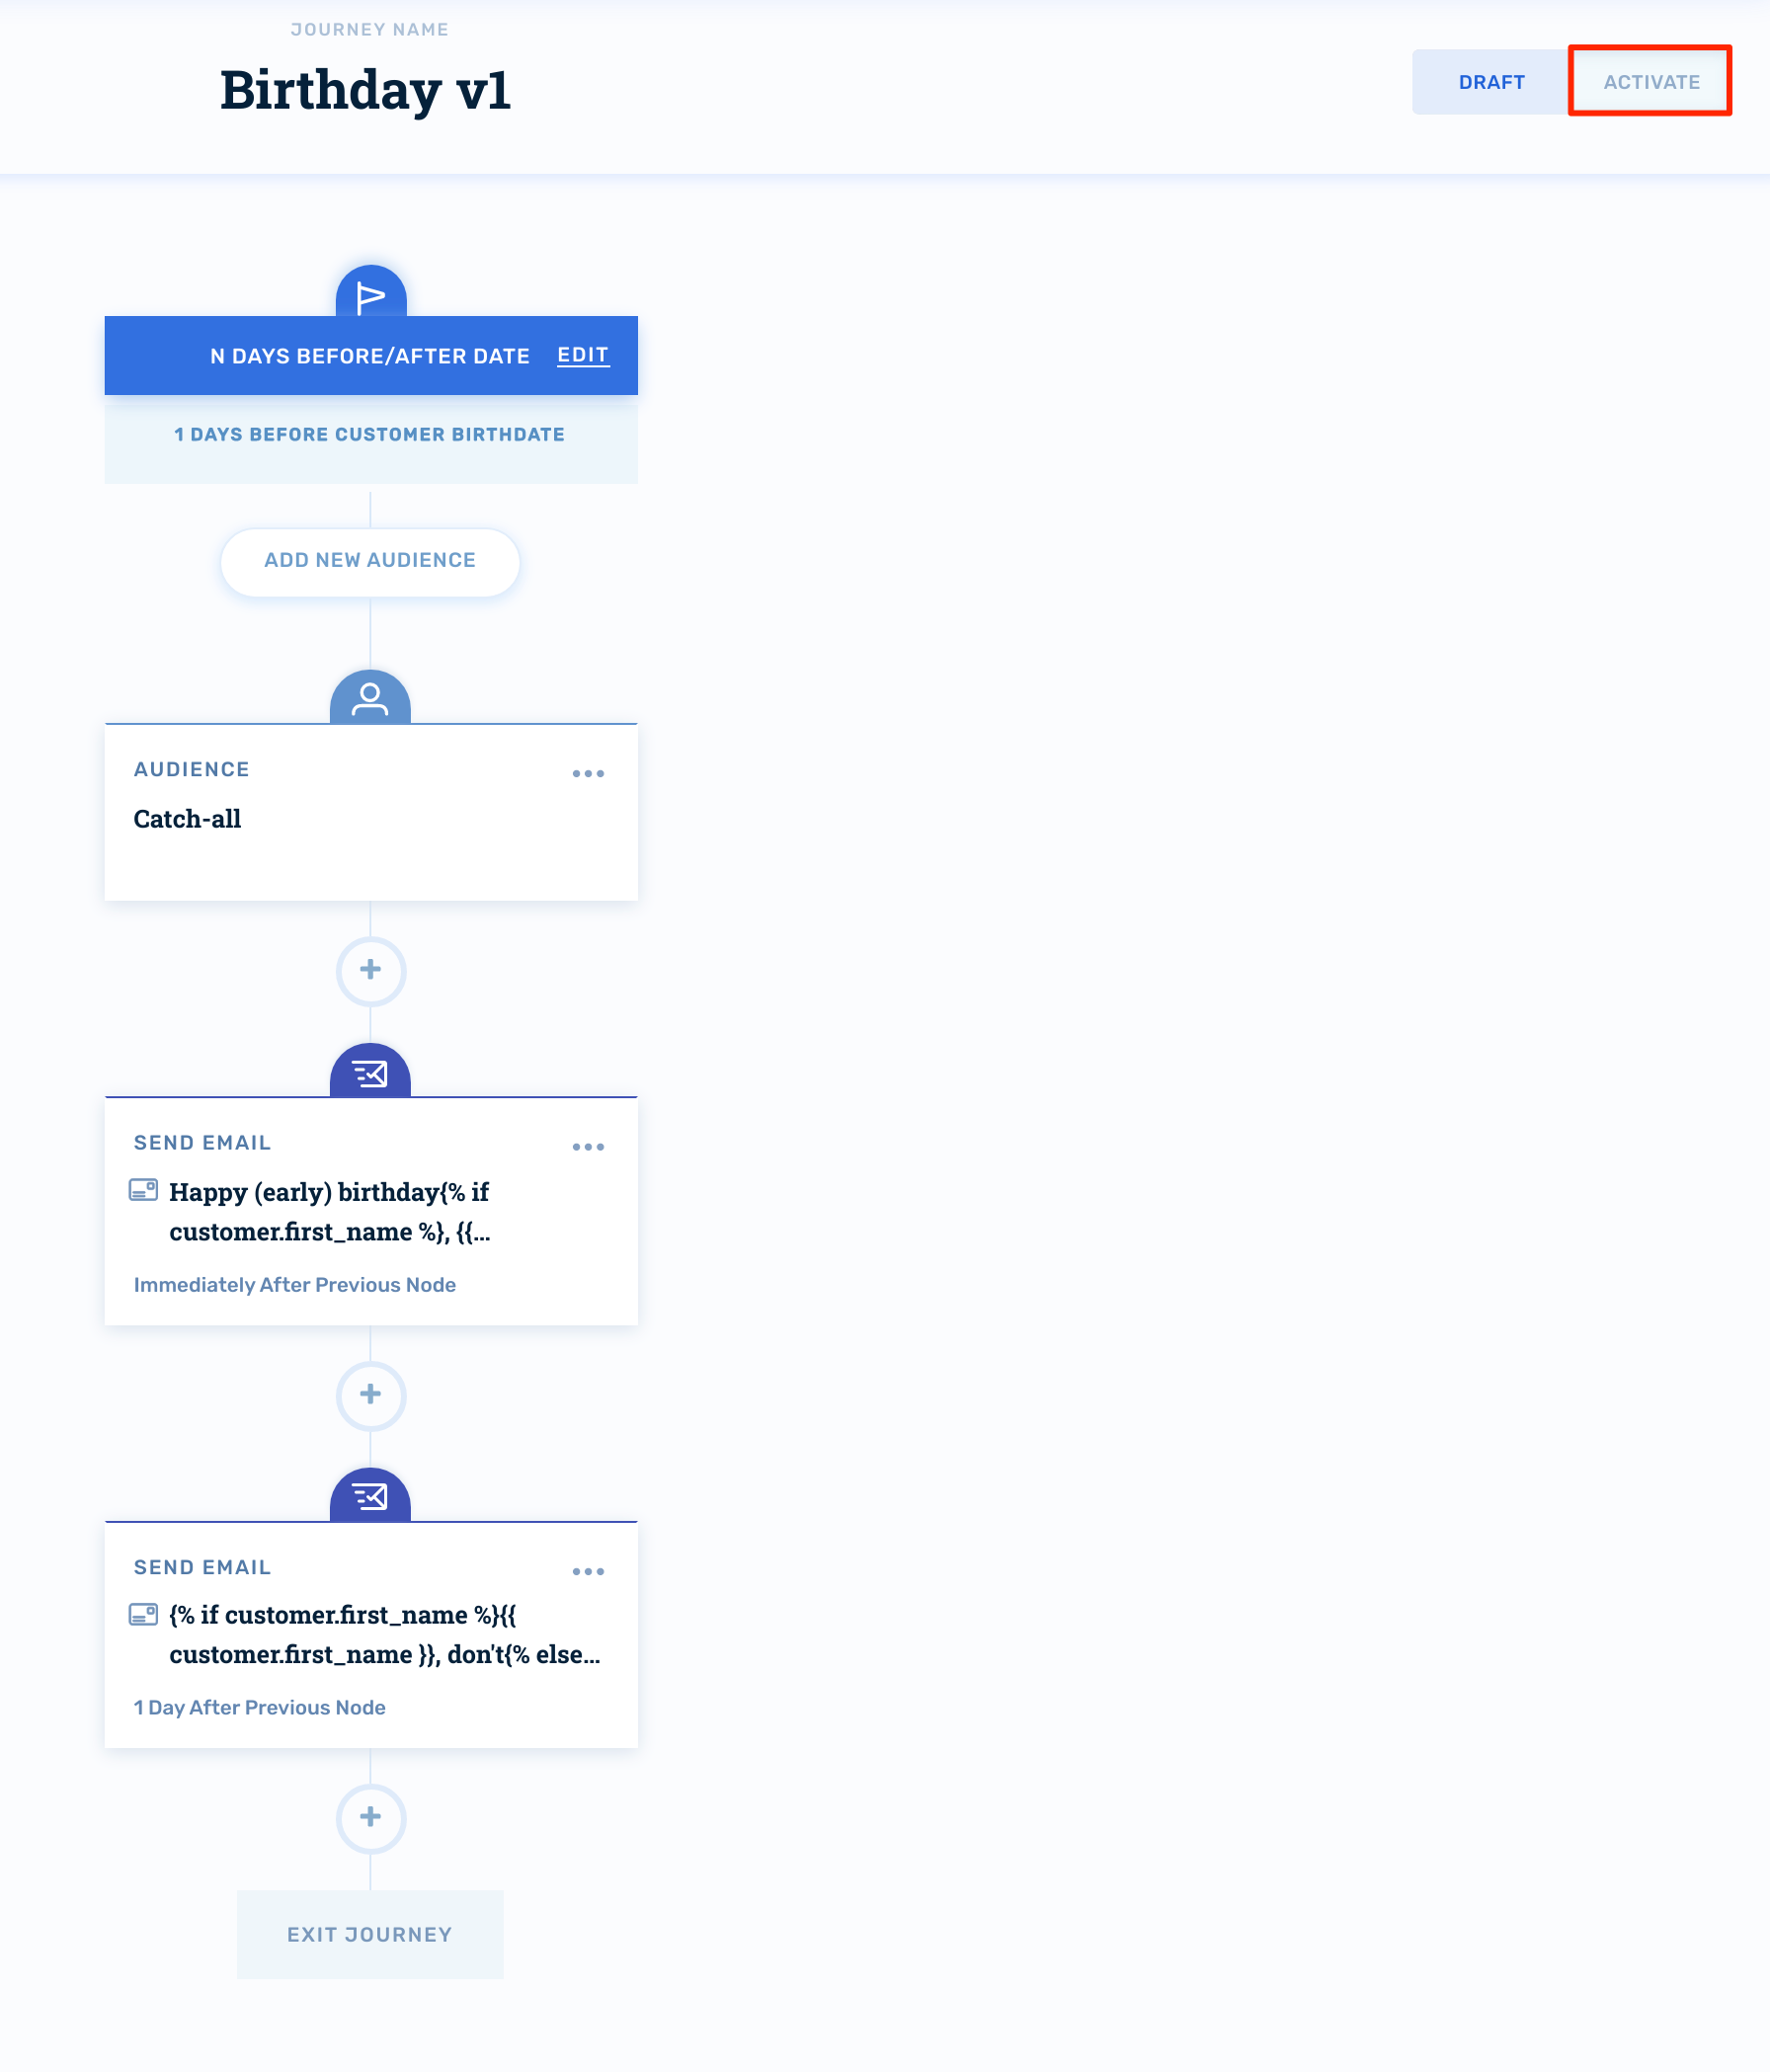
When you're ready to turn your journey on for production audiences, click Activate in the upper-right hand corner:
Updated 4 months ago
