Inactive Re-engagement
You should review the tutorial on building a segment to identify Inactive Subscribers prior to configuring this journey.
In this tutorial, we'll learn how to re-engage inactive subscribers with an automated email once they've been added to a segment. Then we'll evaluate how they interacted with the email and make their customer profile inactive if no engagement was tracked.
Strategy
This guide is focused on the operational aspects of configuring an automated re-engagement email when a subscriber enters your inactive segment. If you'd like to gain deeper insight into why this is a best practice, start with these resources:
- Why You Need to Stop Sending Emails to Inactive Subscribers
- Email Deliverability: Best Practices For Having Your Emails Actually End Up In The Inbox
Creative
You'll build your templates using the Advanced HTML/CSS Editor or the Drag and Drop Editor.
Configuring the Journey
First, click Journeys in the main navigation. Then, click Add New Journey.
Start by naming the Journey something like, "New Subscriber Welcome v1".
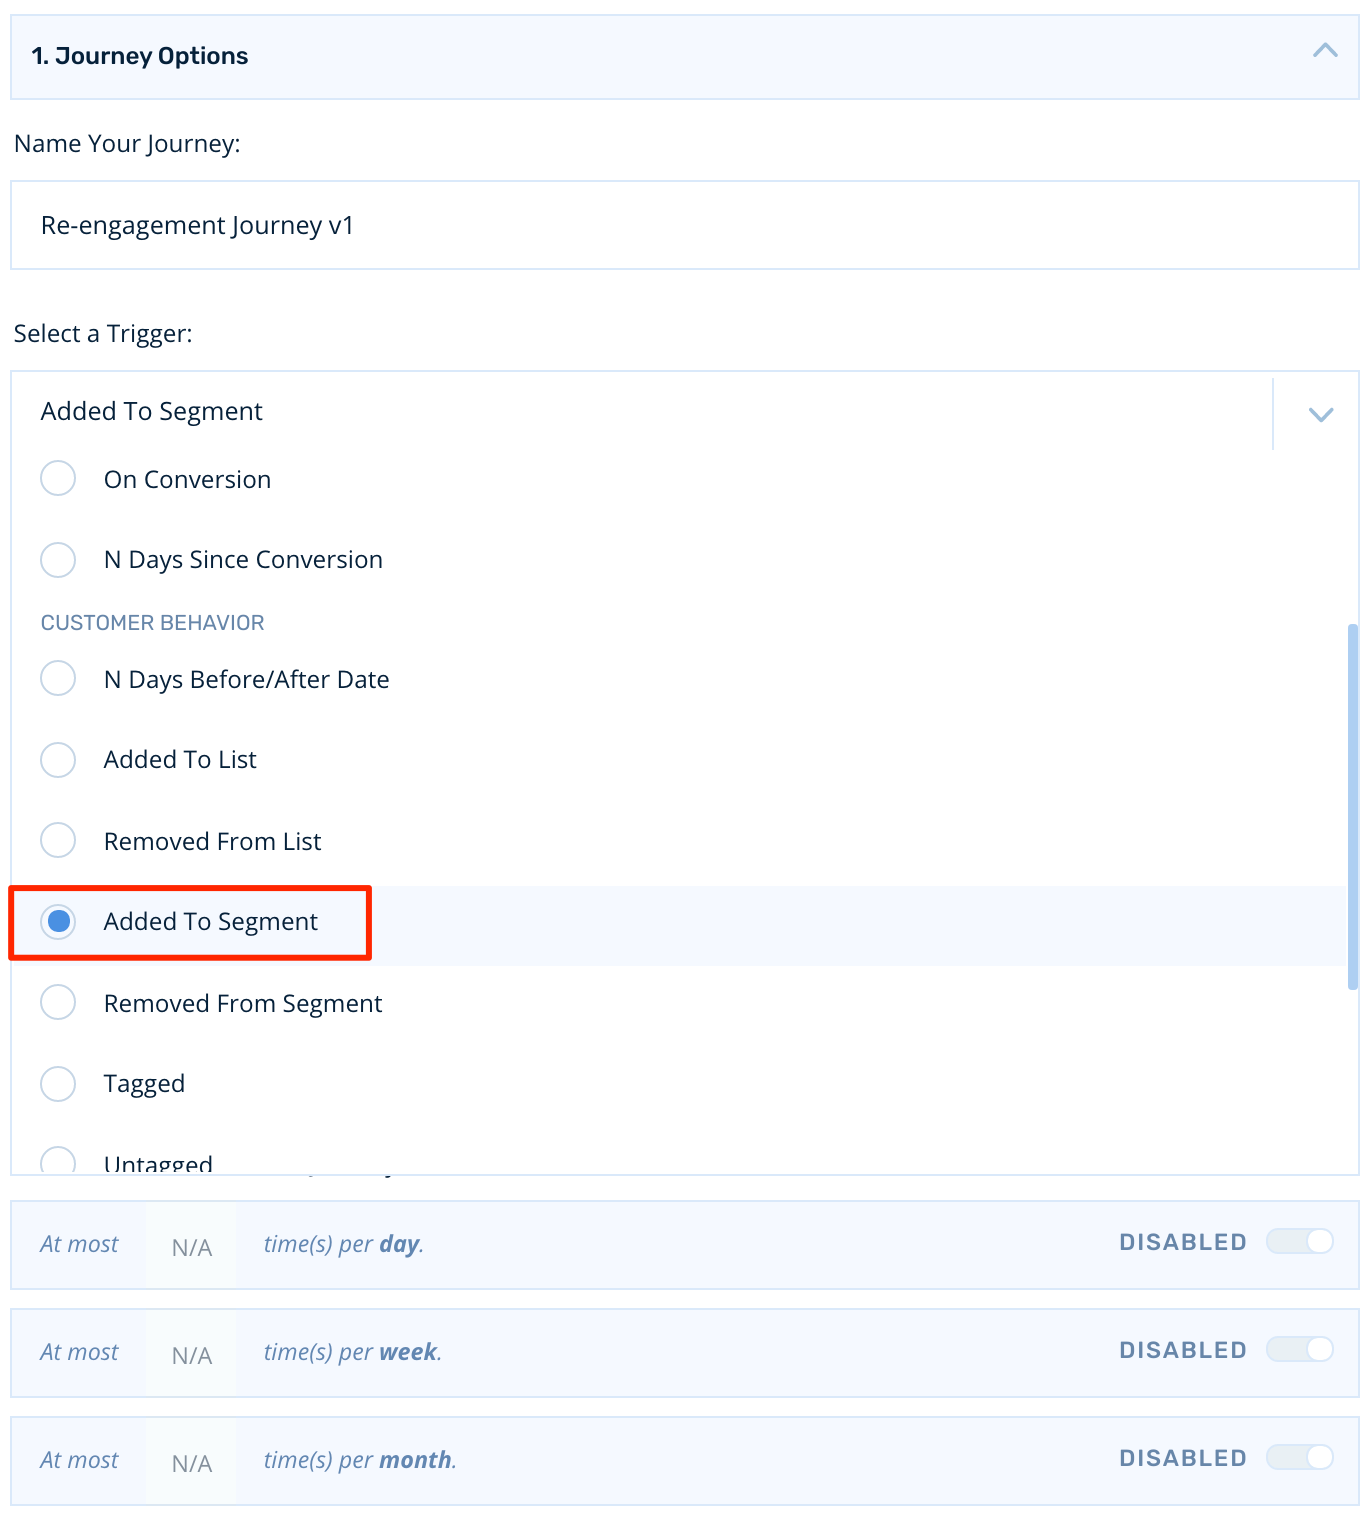
Then, select the Added To Segment trigger:
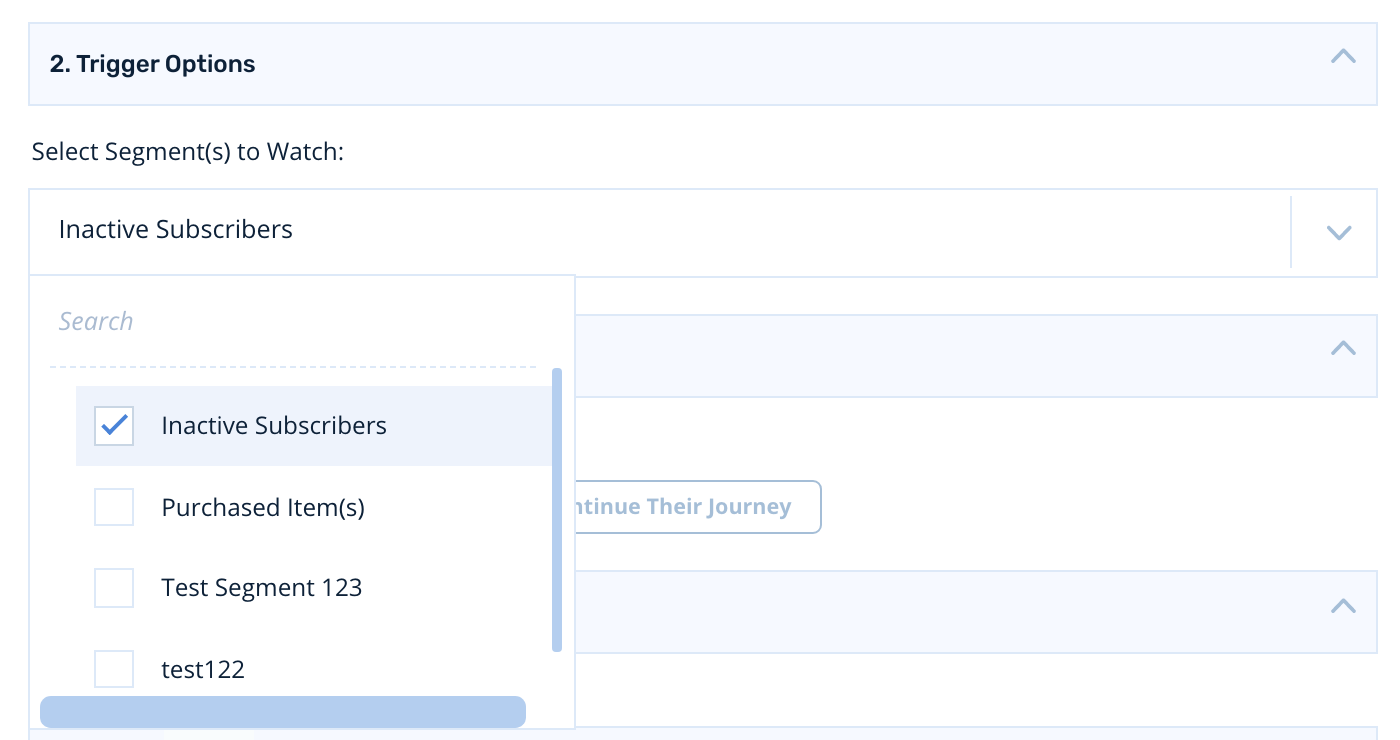
Then, select your inactive segment:
Conversion Rules
We want the re-engagement journey to end if the customer converts, so we'll leave the conversion rules setting in its default state. The customer will exit if they purchase during the journey.

Frequency Capping
The frequency capping for this journey is inherently built into the inactive segment's filters, so we won't need additional frequency capping.
Building the Journey
Targeting Your Audience
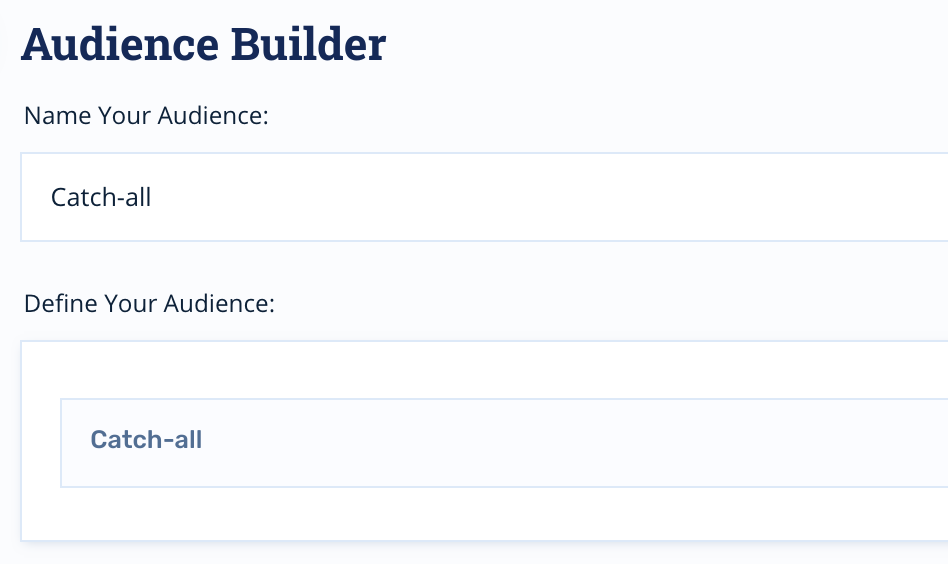
To start, click Add New Audience.
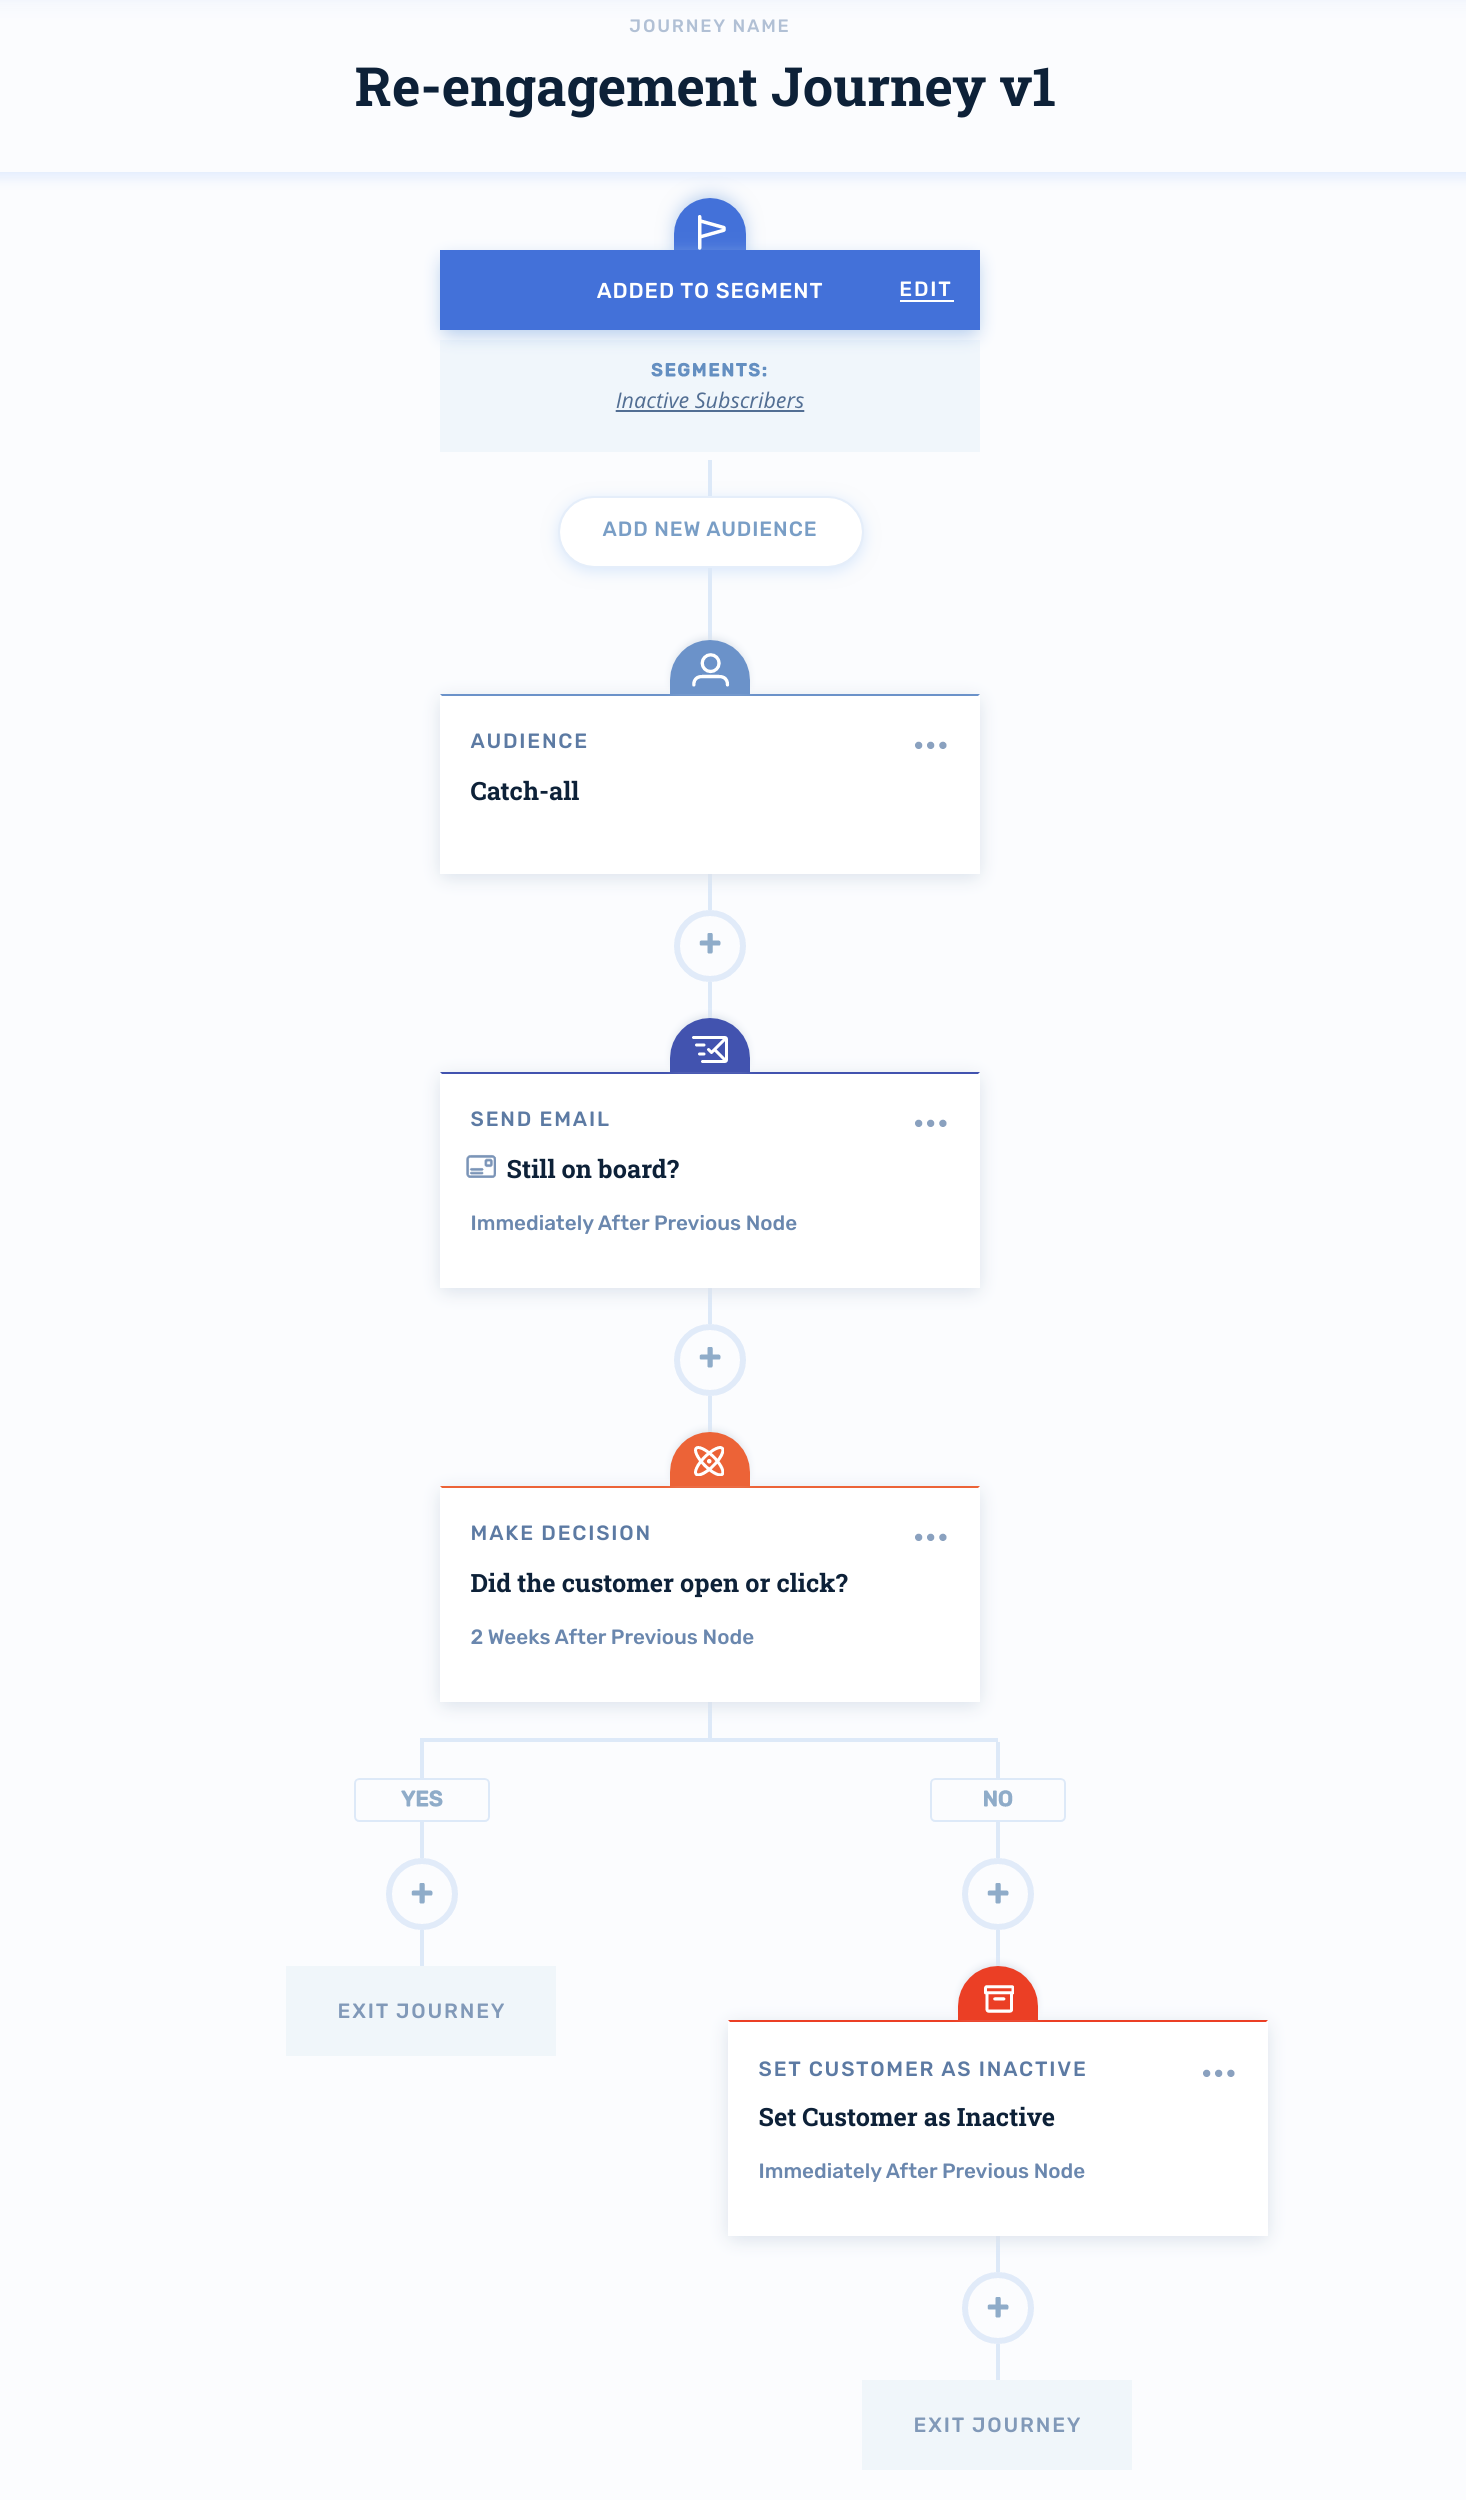
For re-engagement journeys, we recommend using a Catch-all audience. This means that all customers who enter their journey will flow through the same audience.
Positioning Nodes
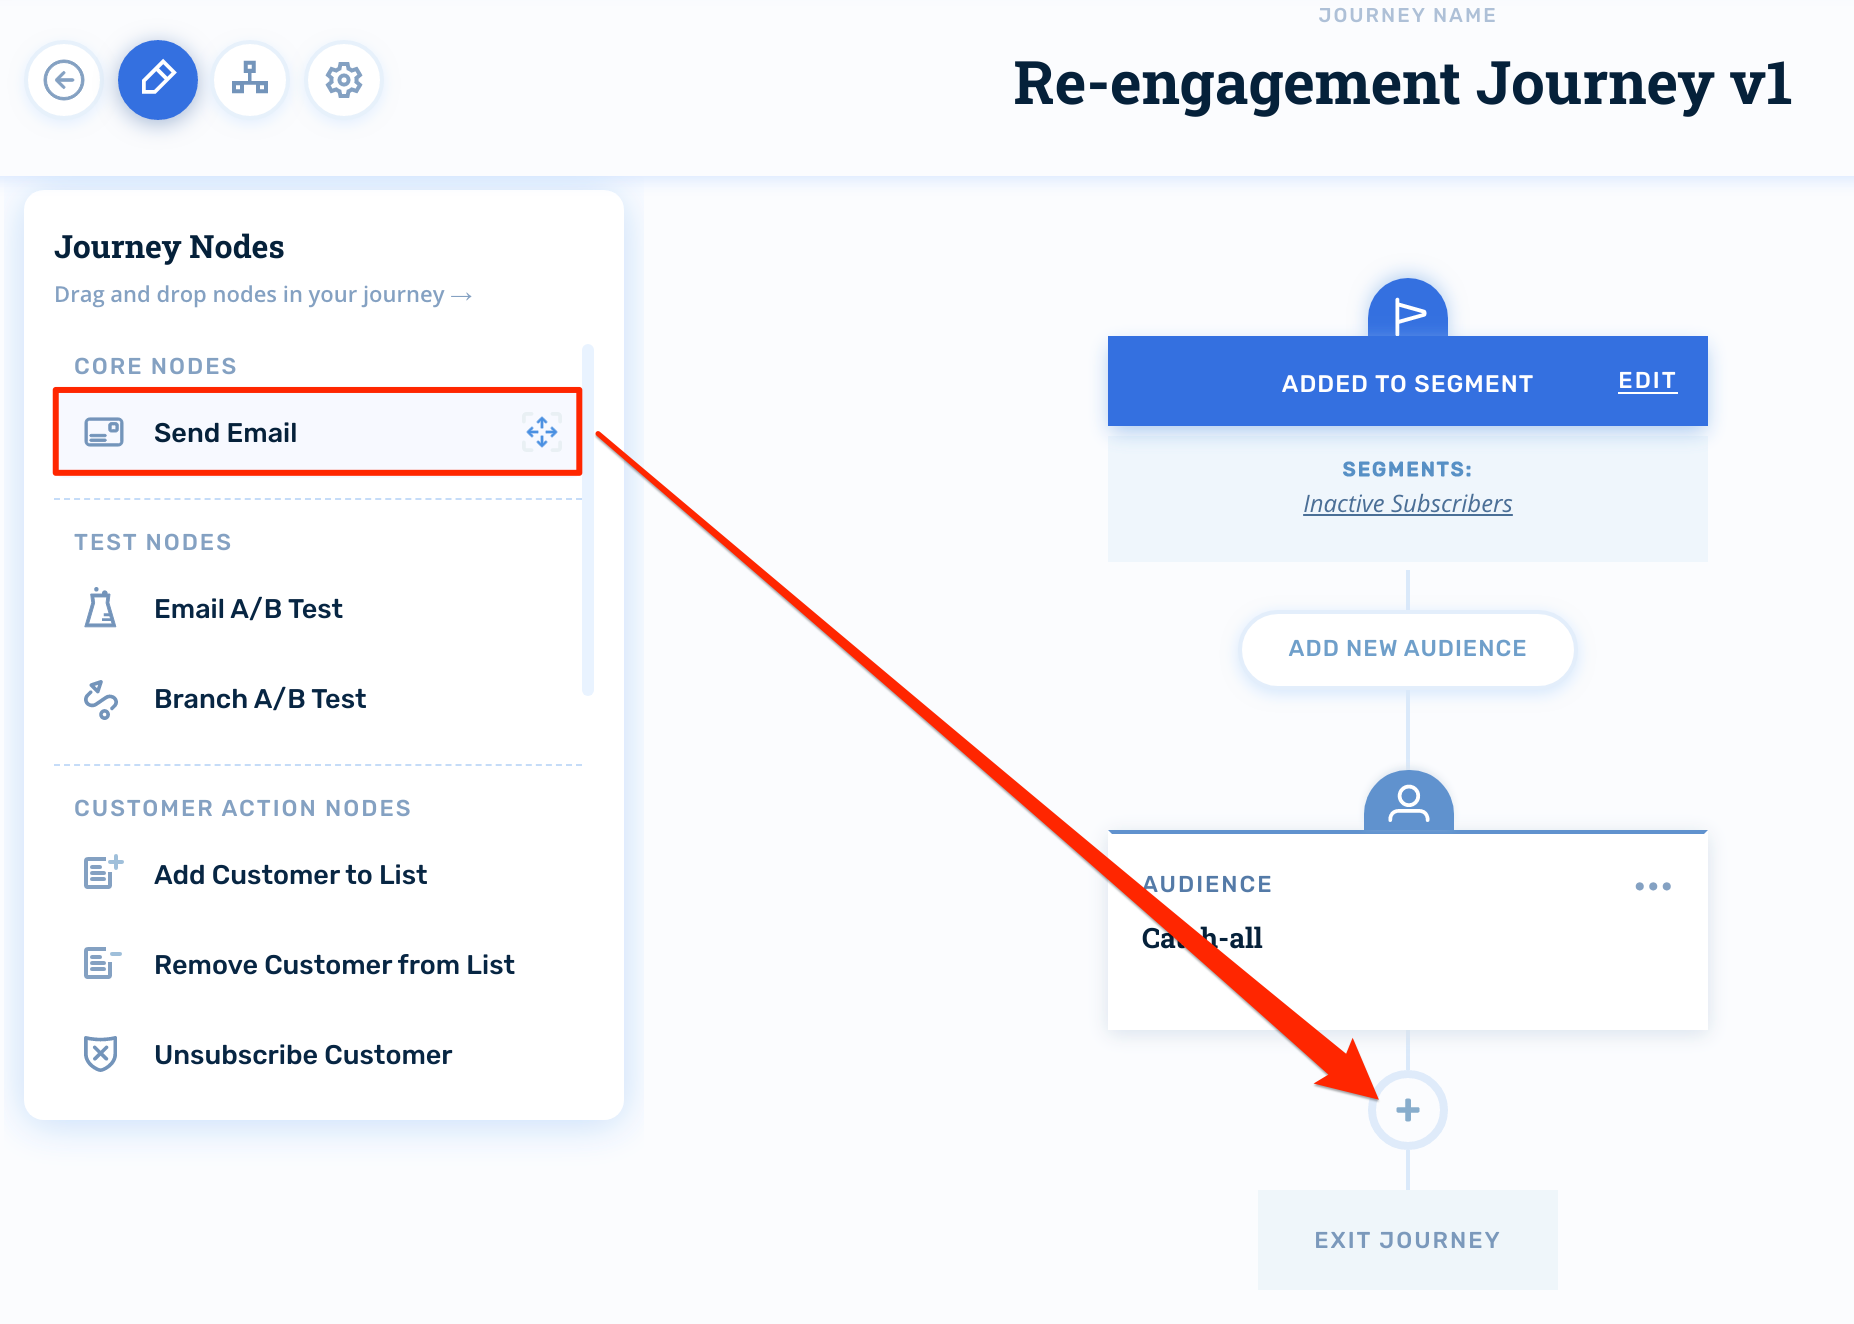
Now that our audience is set, let's set up some email nodes. Click the Journey Nodes icon, select Send Email and drag into position below the audience.
Configuring Email Nodes
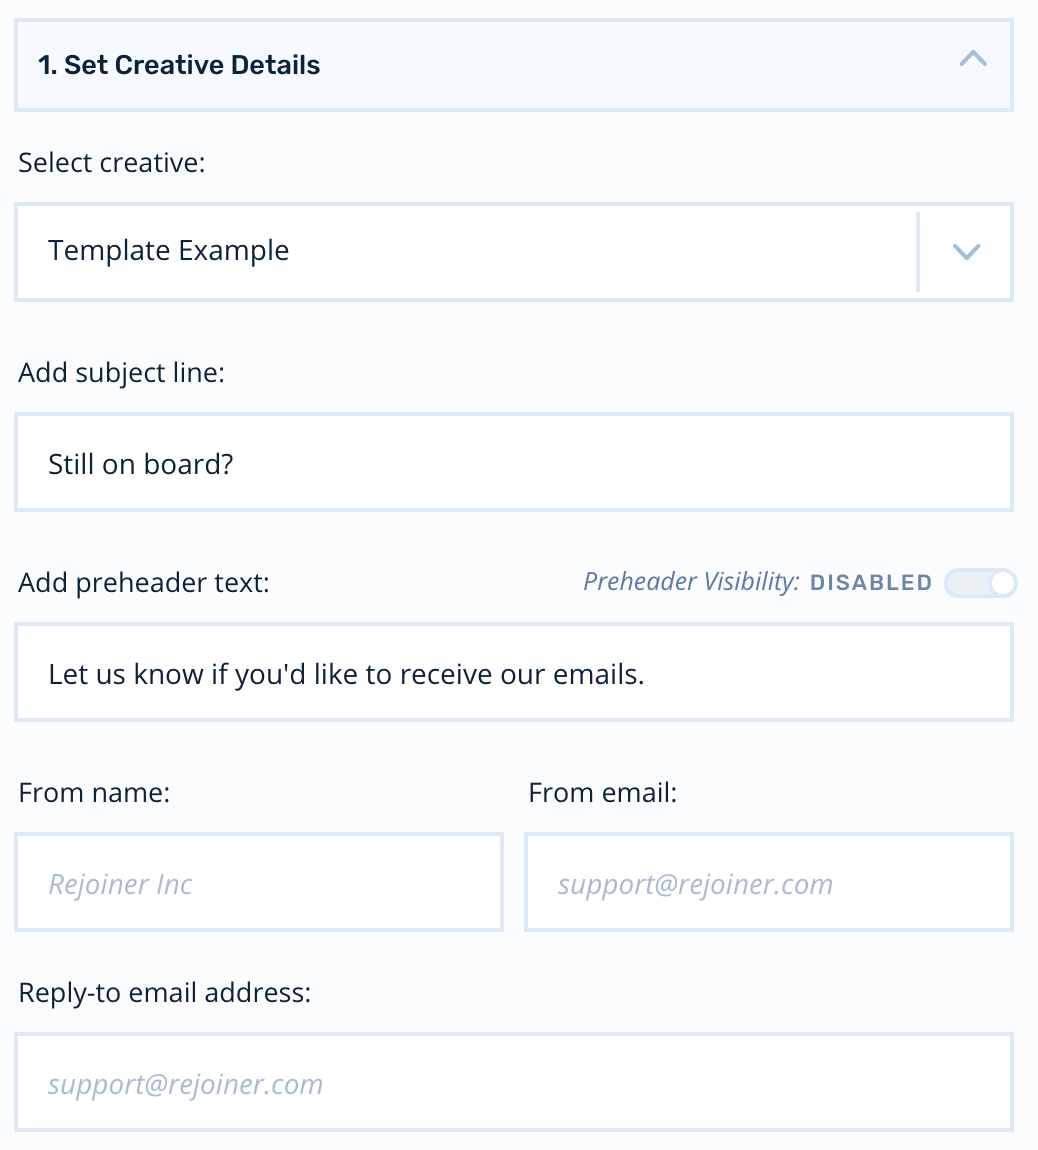
First, you'll select your creative. Then, you'll configure your subject lines and preheaders.
The email node will inherit the default sender information from your account, but you can override this on a per-email basis if you wish:
Wait Time
Since this is a segment triggered journey, we can send the re-engagement email as soon as the customer enters the segment.

Decision Node
Next, we'll use a decision node to evaluate how the customer interacted with the re-engagement email we sent them:
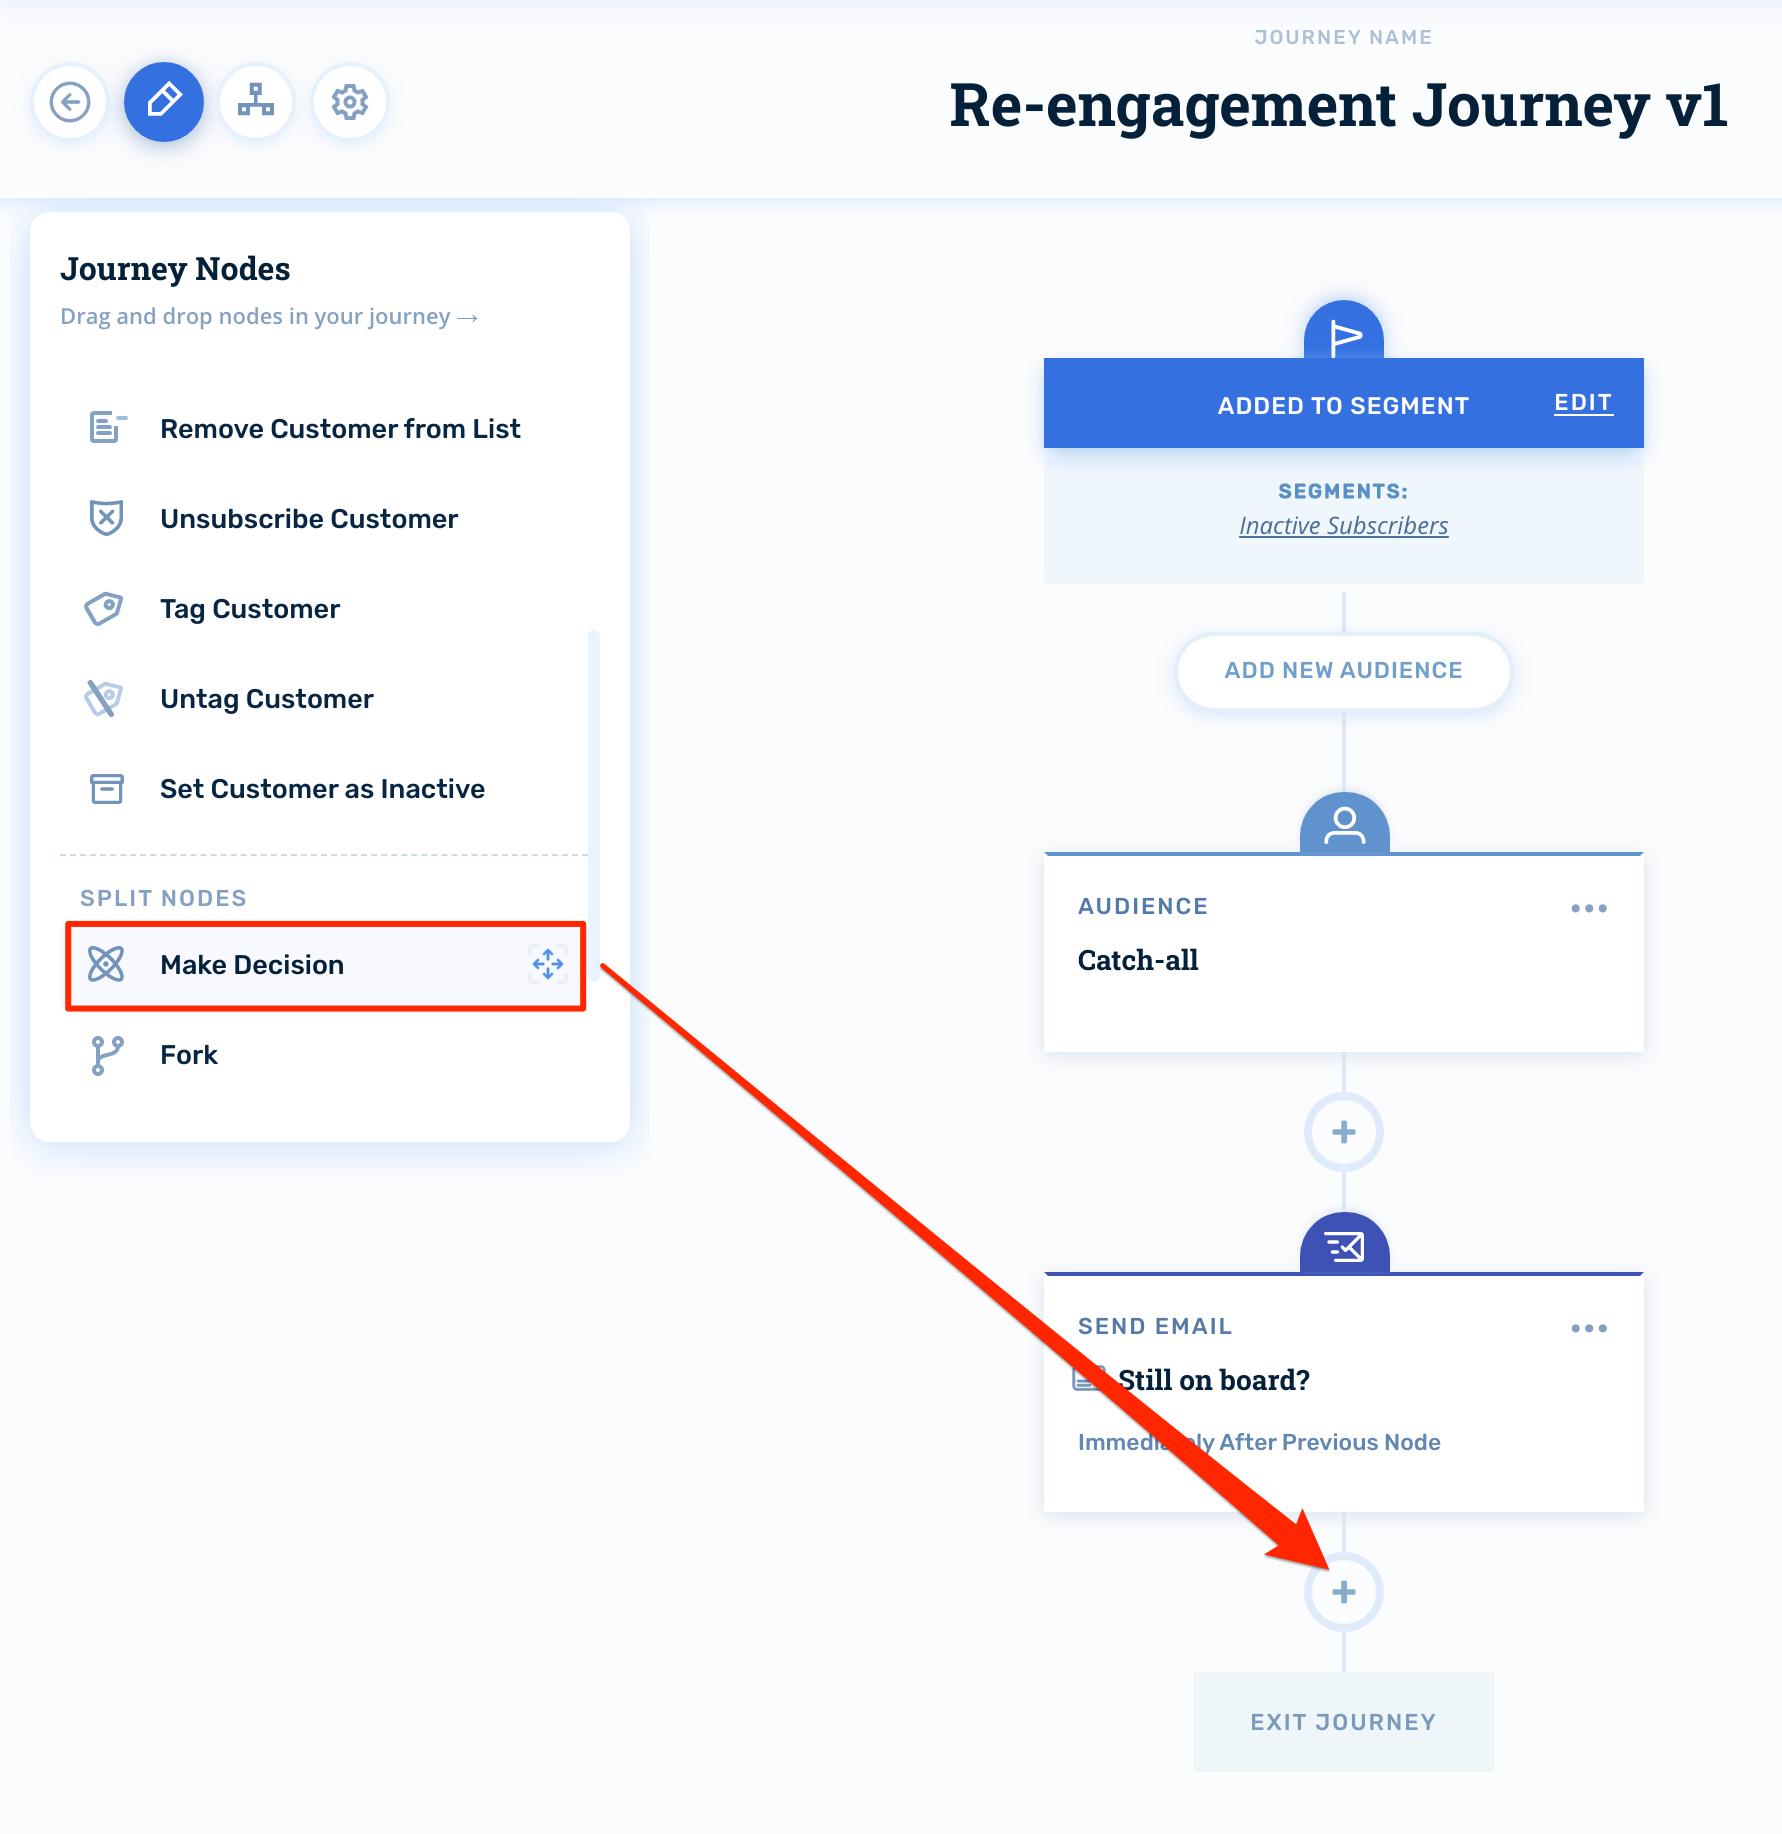
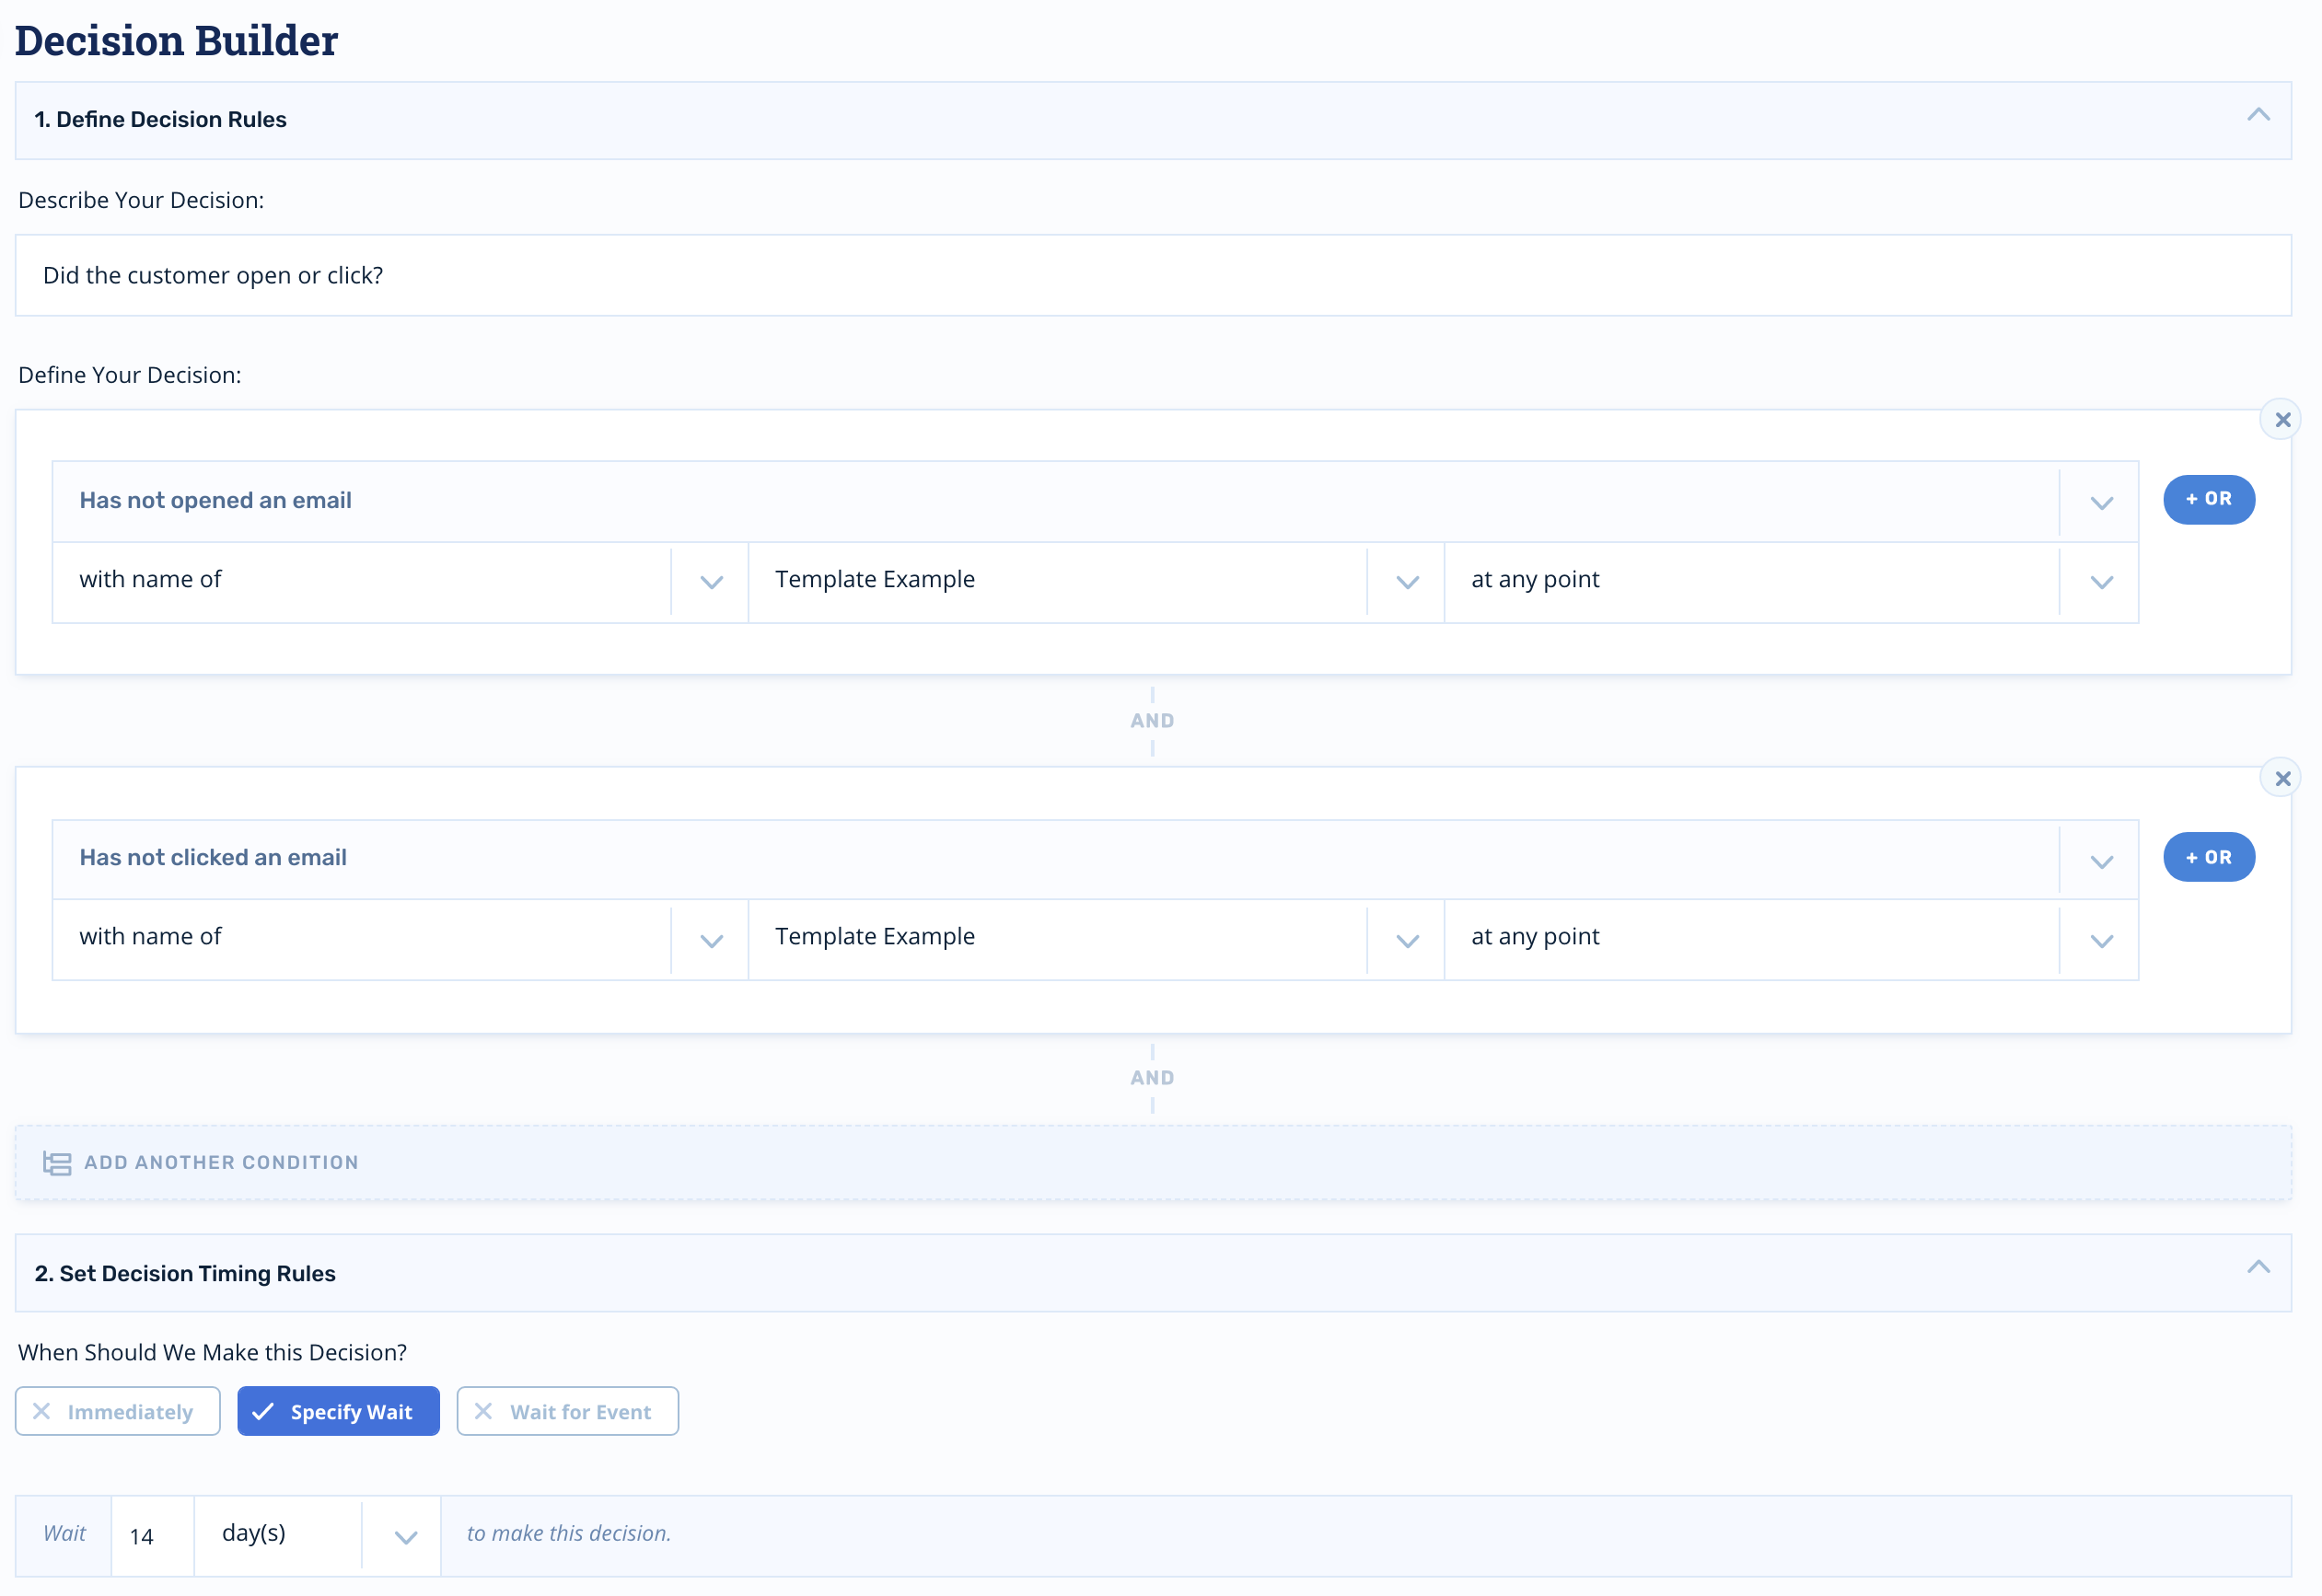
You'll set the decision node to evaluate the Has not opened an email filter AND the Has not clicked an email filter. We only want to set customers who've performed neither action to inactive status.
For the purposes of this example, we set the decision to process 14 days after the re-engagement email was sent:
Finally, we'll add a node that sets the customer's profile to inactive if no further engagement is tracked.
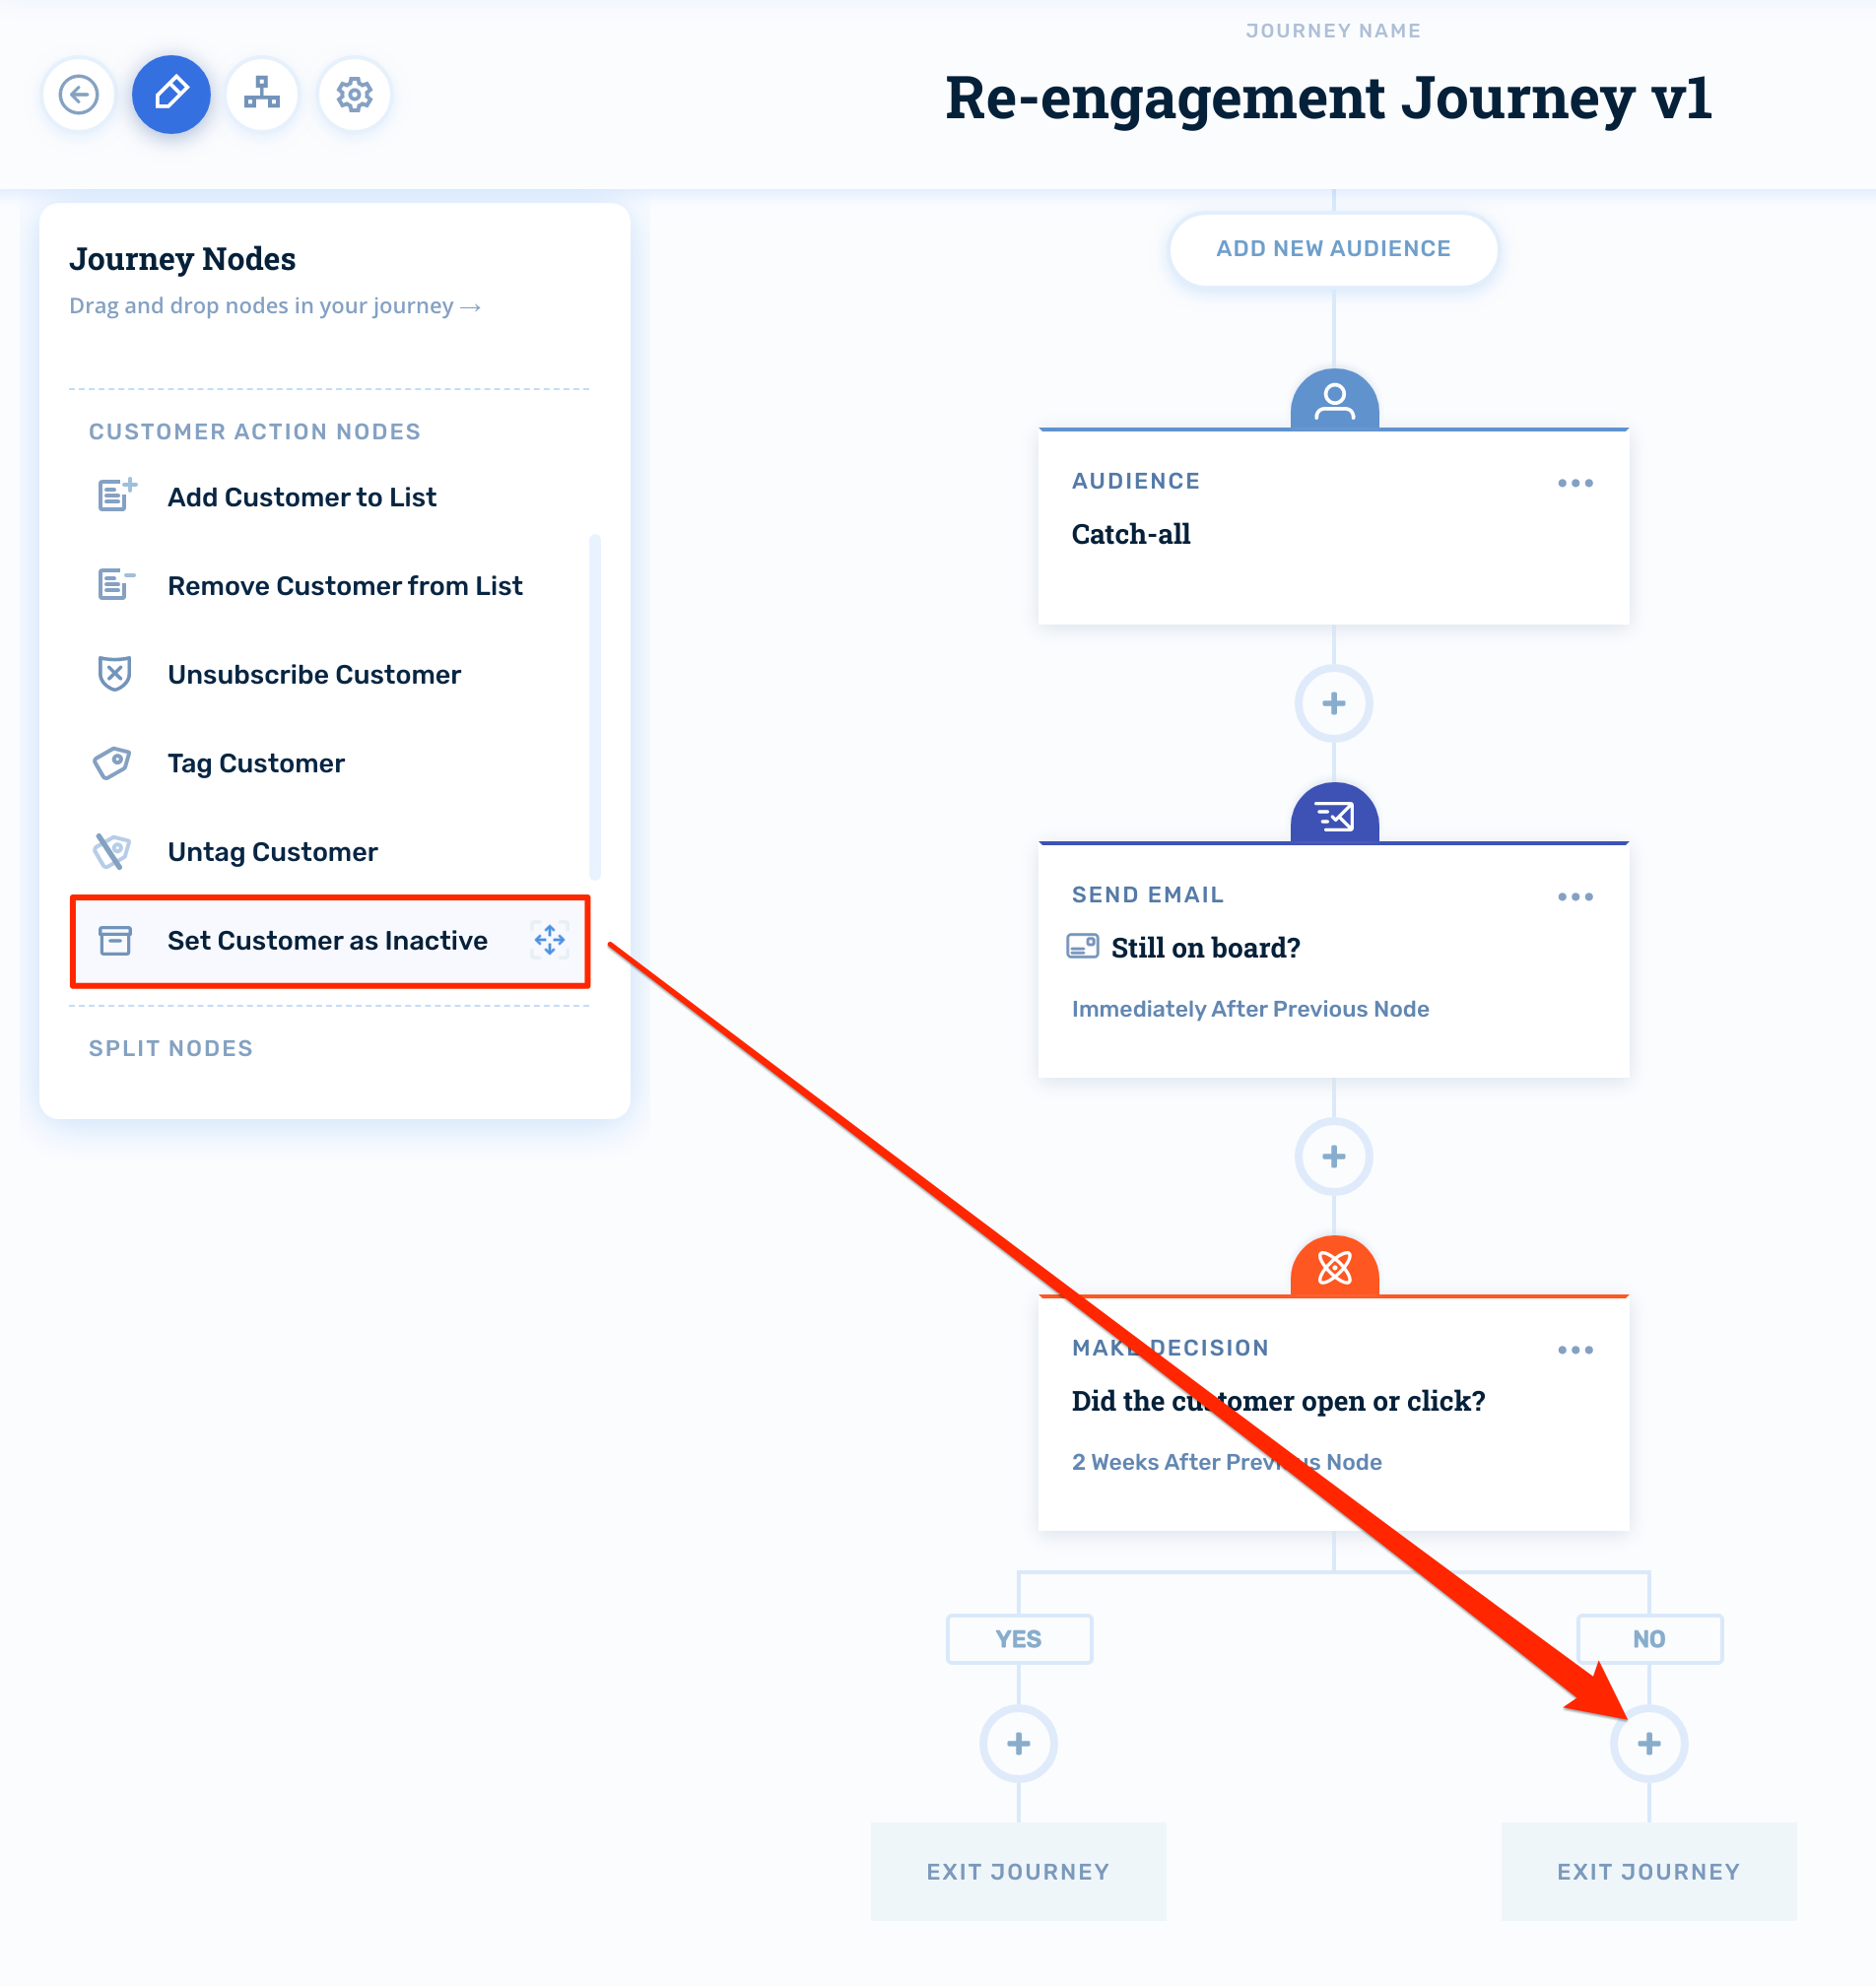
Once all of your nodes are positioned, the final journey will look like this:
Activating the Journey
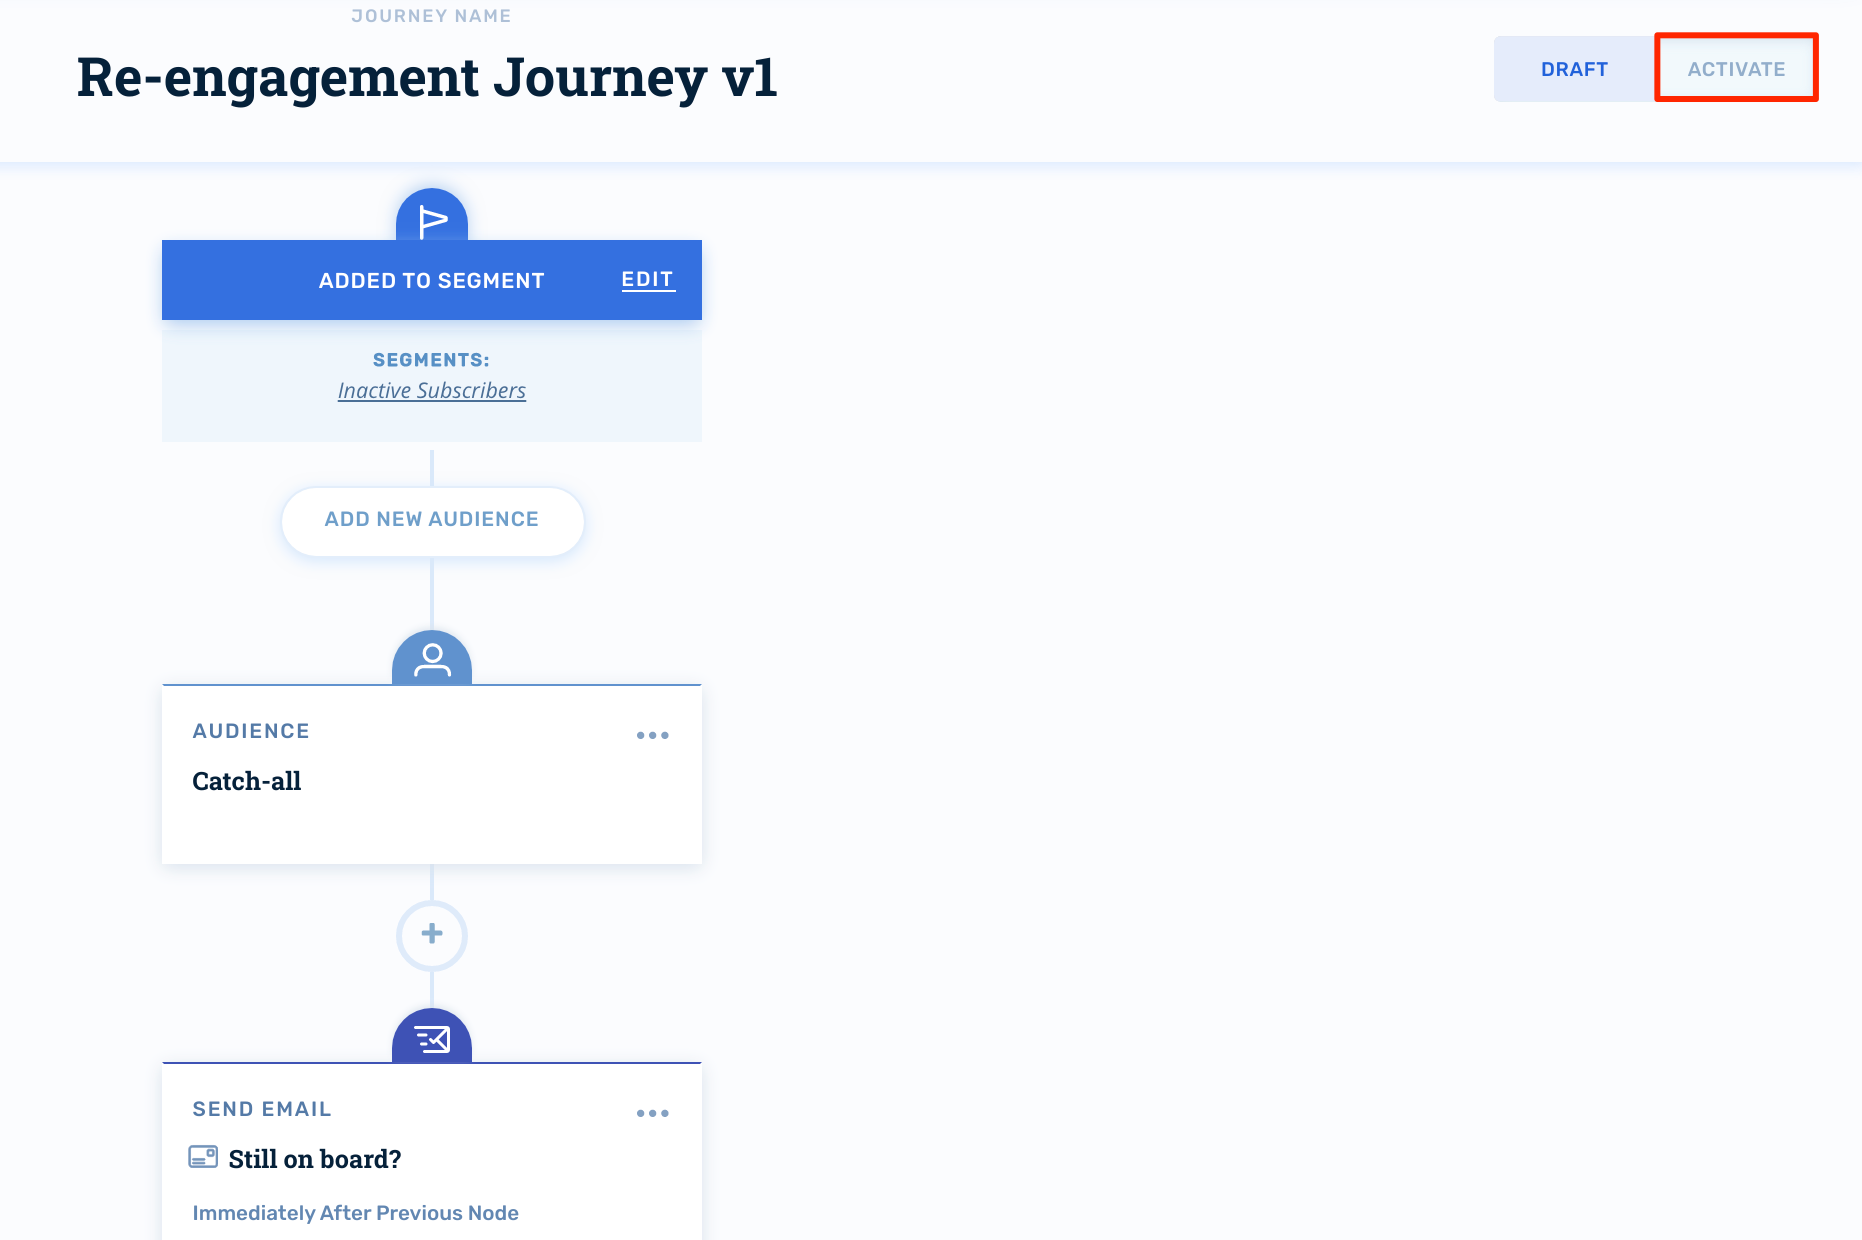
When you're ready to turn your journey on for production audiences, click Activate in the upper-right hand corner:
Updated 4 months ago
