Browse Abandonment
In this tutorial, you'll learn how to set up a 1 step browse abandonment journey that leverages dynamic content injection and personalized recommendations.
Strategy
This guide is focused on the operational aspects of configuring a browse abandonment journey in Rejoiner. If you're re-thinking your overall strategy, start with this resource:
Creative
You'll build your templates using our Advanced HTML/CSS Editor or the Drag and Drop Editor.
Injecting Dynamic Content
Browse abandonment journeys are usually personalized with the items the customer viewed or recommendations related to their browsing history.
If you're coding your templates from scratch, reference our template tag guide to customize the business logic for how viewed items are injected. You can also control how recommendations are dynamically injected using similar constructs.
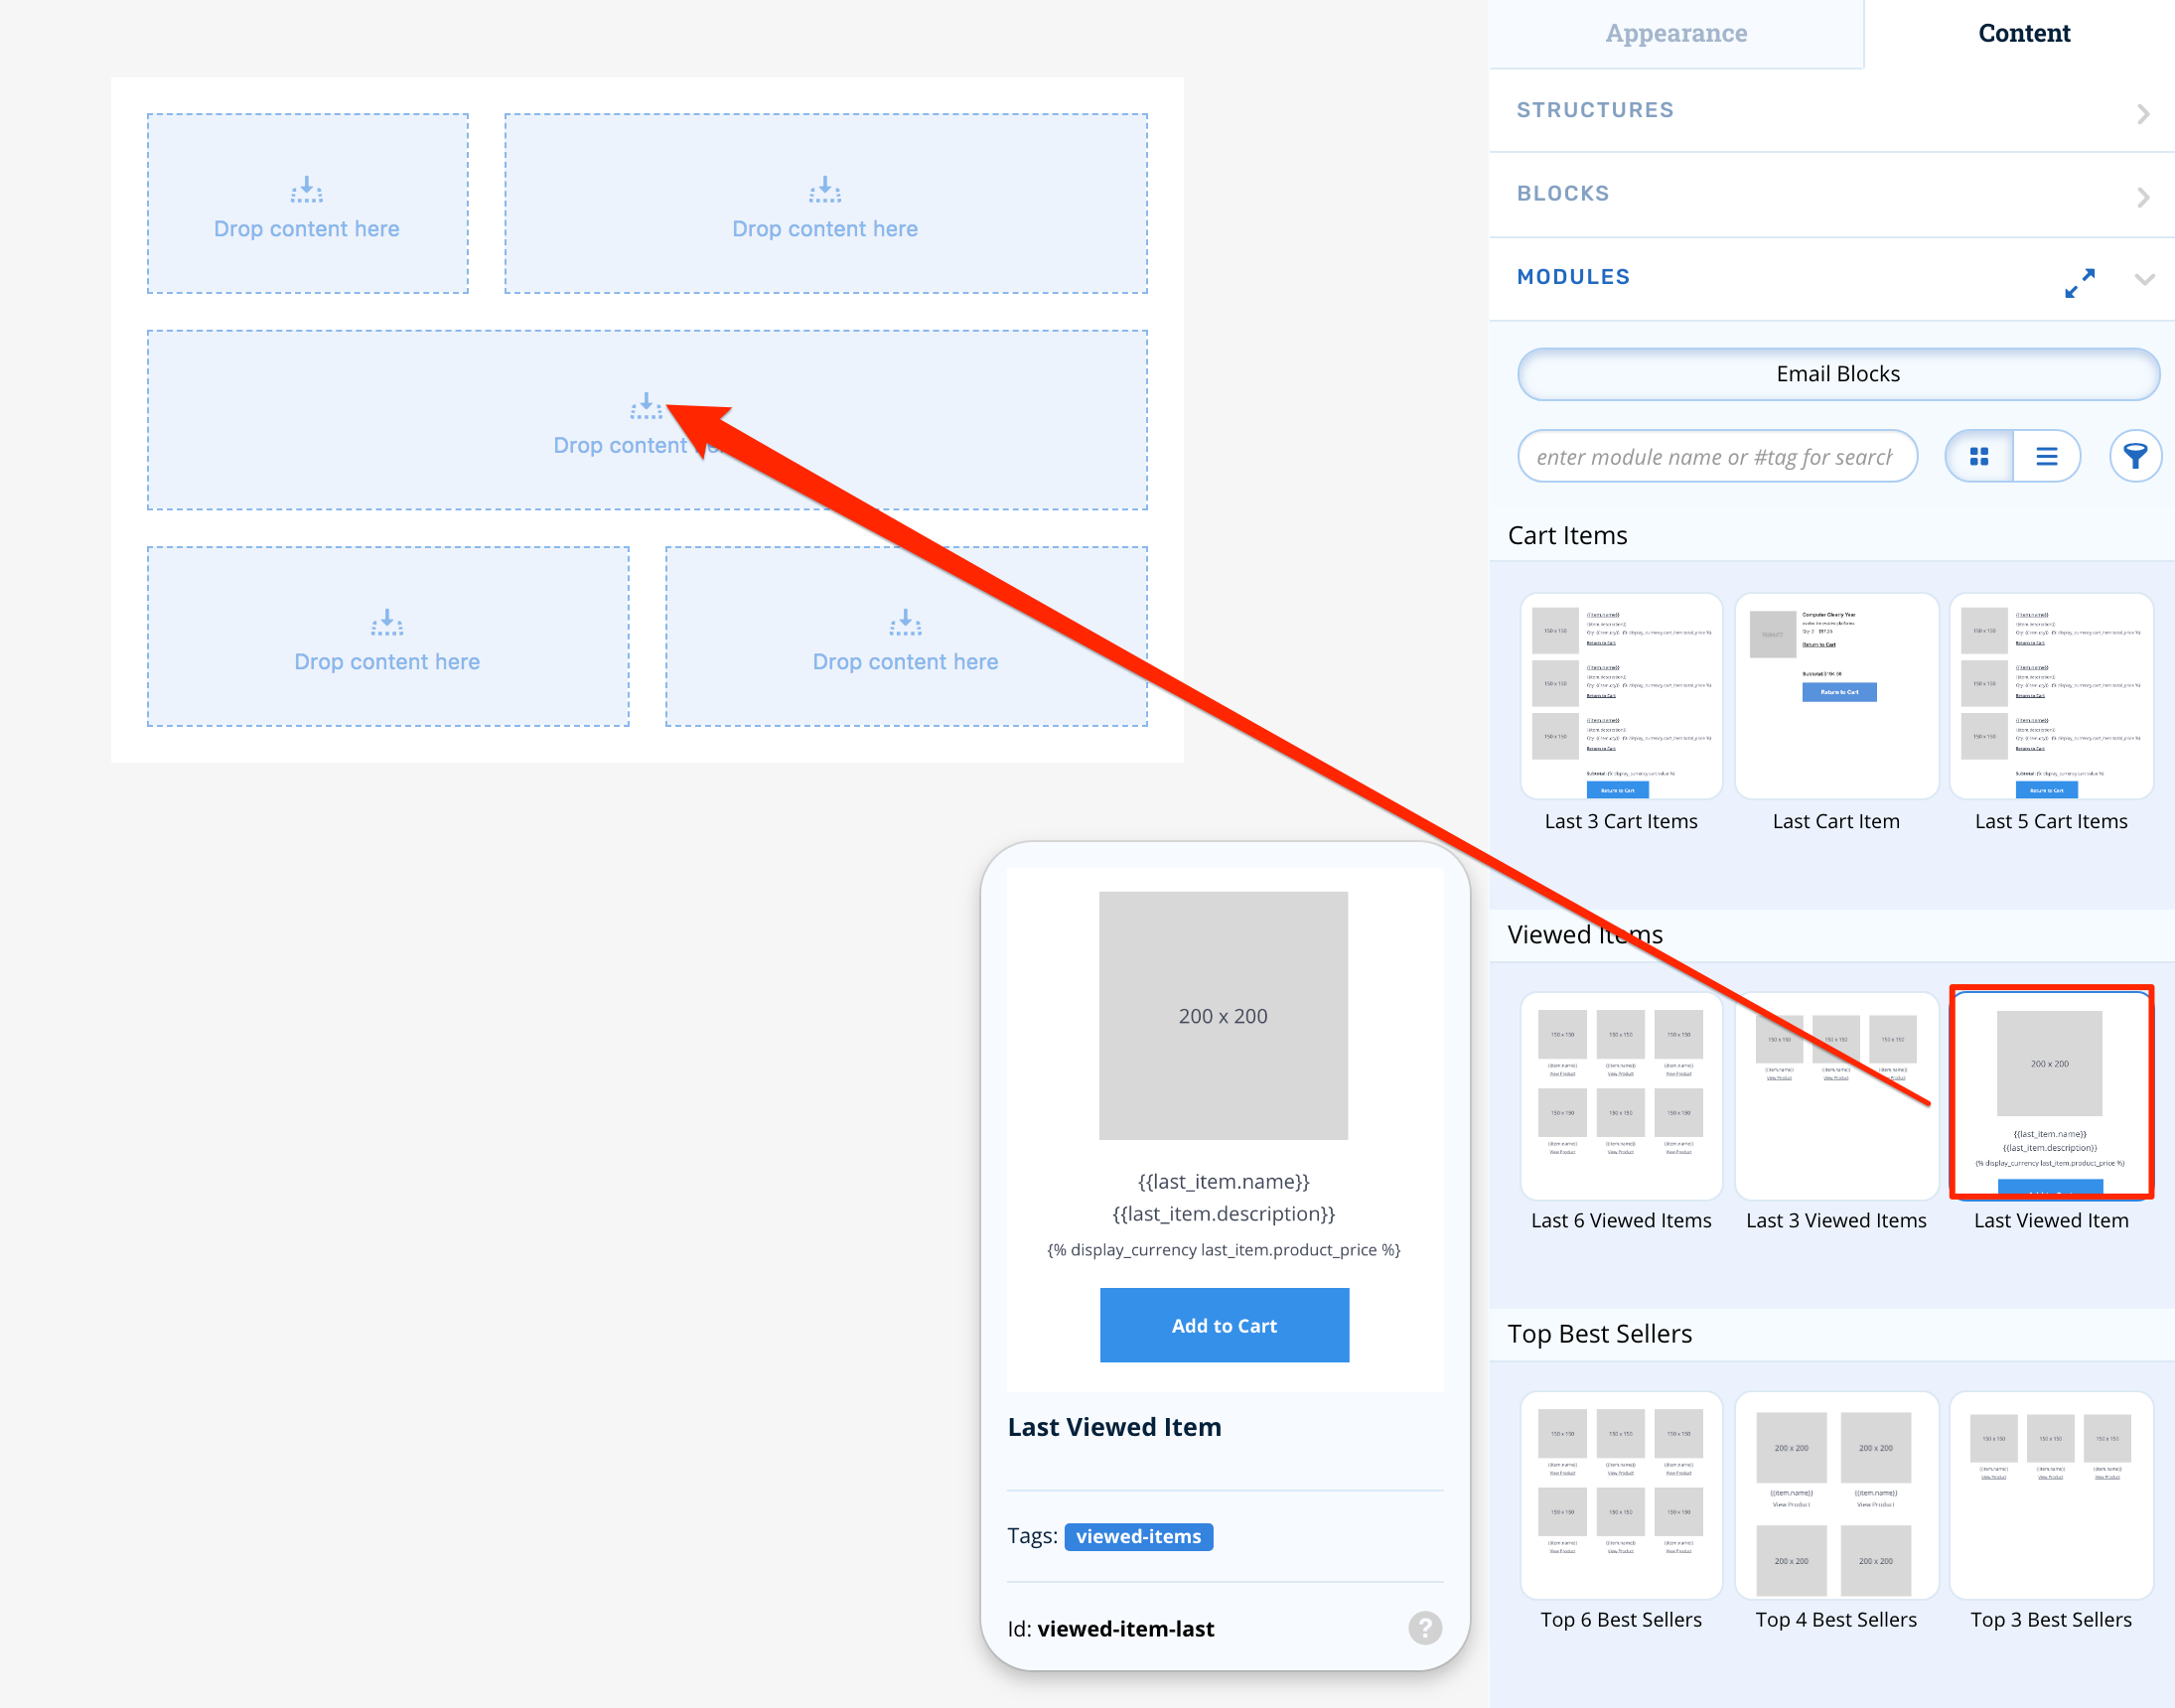
If you're building templates in the drag and drop editor, you can use the built-in Modules for injecting viewed items or recommendations:
Configuring the Journey
First, click Journeys in the main navigation. Then, click Add New Journey.
Start by naming the Journey something like, "Abandoned Browse v1".
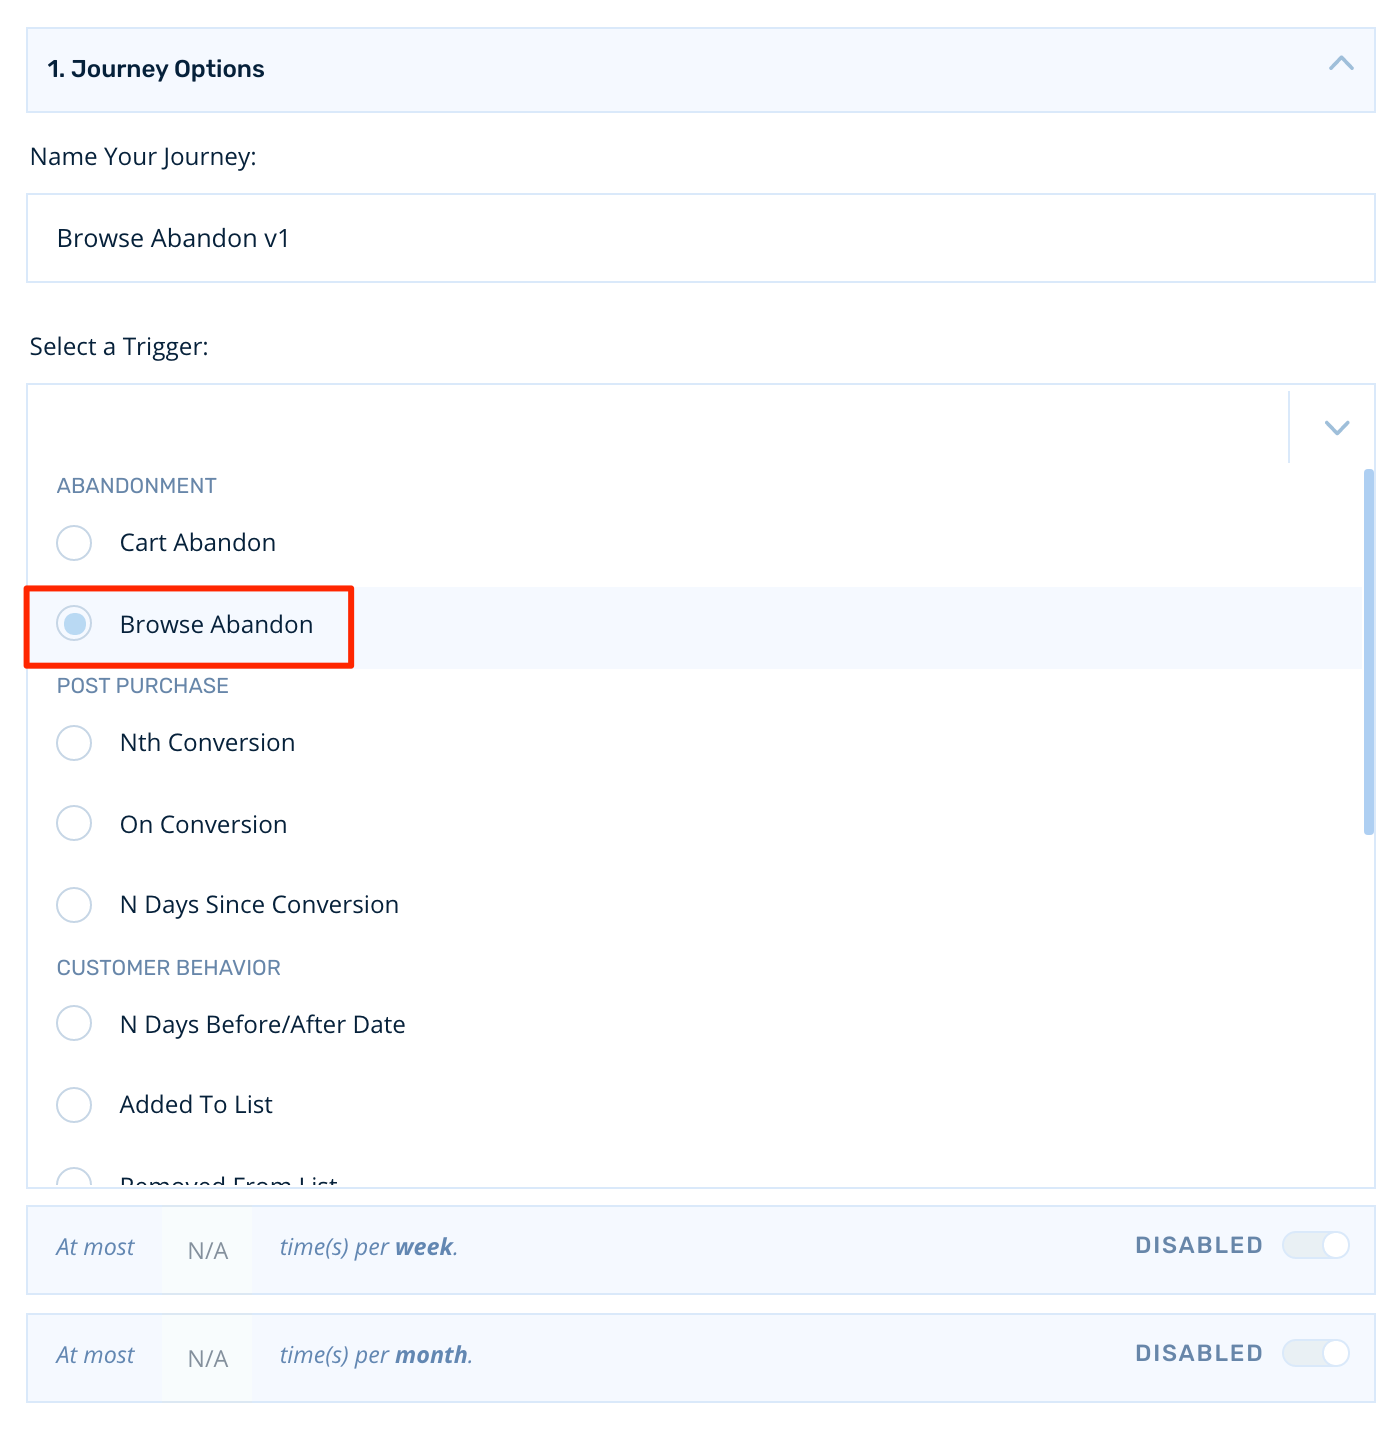
Then, select the Browse Abandon trigger:
Conversion Rules
We want the abandoned browse journey to end if the customer converts, so we'll leave the conversion rules setting in its default state. The customer will exit if they purchase during the journey:

Frequency Capping
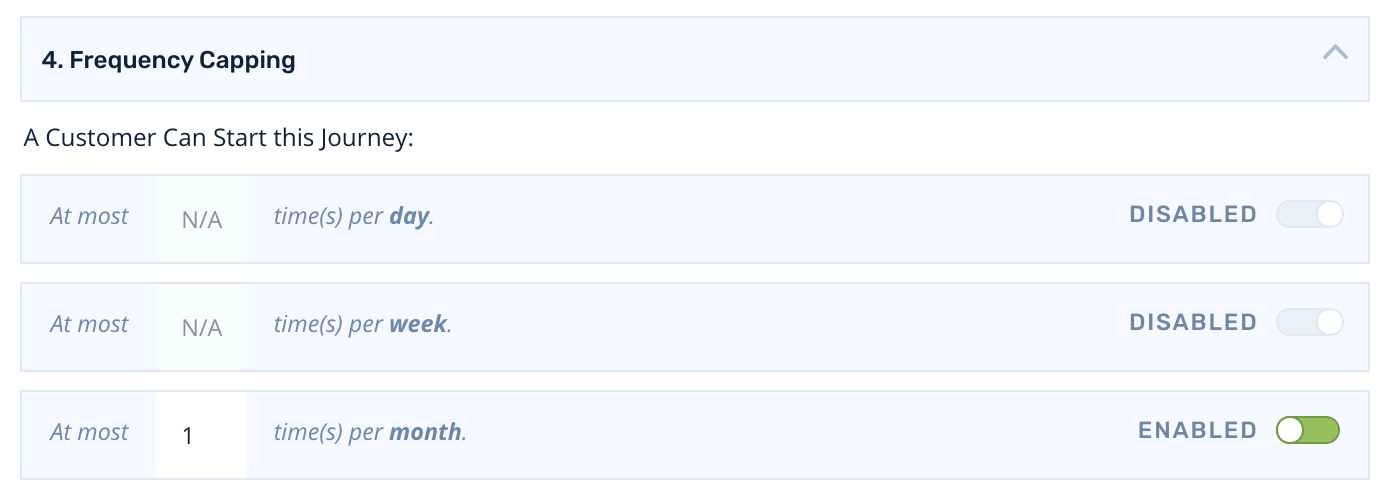
We want to be mindful of situations where high intent customers will abandon several times within a short timeframe, so adding frequency capping to an abandoned browse journey is a best practice. Let's cap the number of times a customer can enter the journey at 1 time per month:
Abandonment Buffer
By default, Rejoiner will wait for 30 minutes of inactivity after a customer's last interaction on your website before calling a session abandoned. You can modify this default setting by clicking Settings in the main navigation and locating the Abandoned Buffer field:

Building the Journey
Targeting Your Audience
To start, click Add New Audience.
For browse abandonment, we want to filter the audience down to customers who have recently viewed product detail pages on your website without a recent purchase.
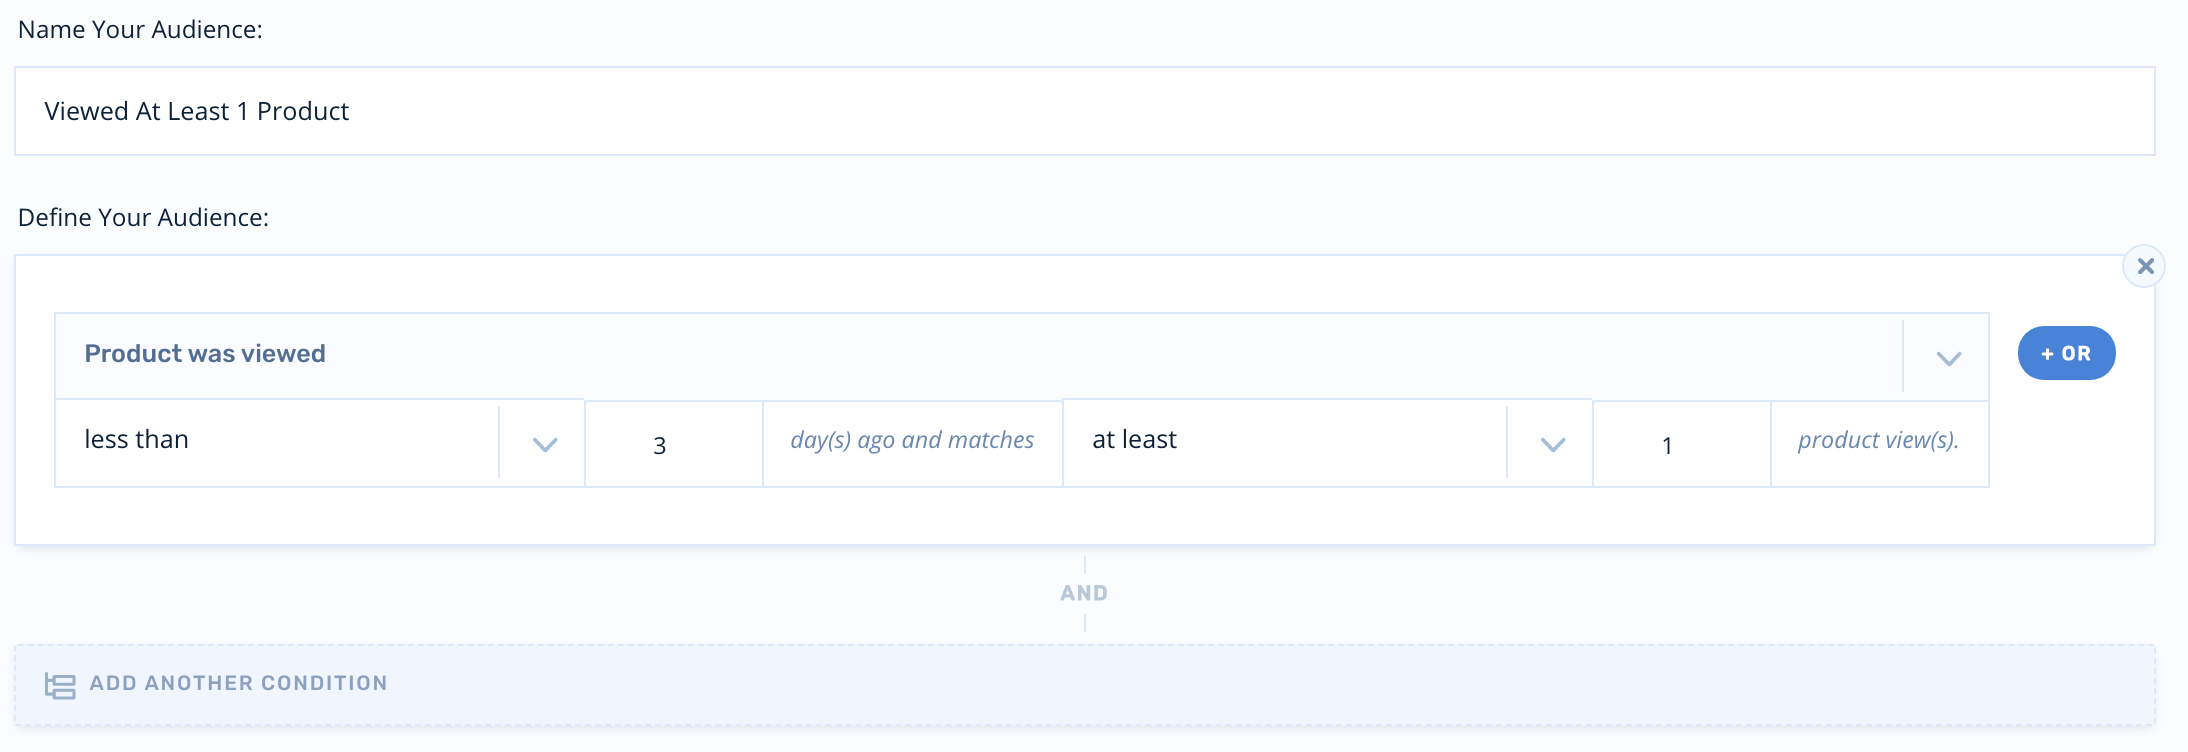
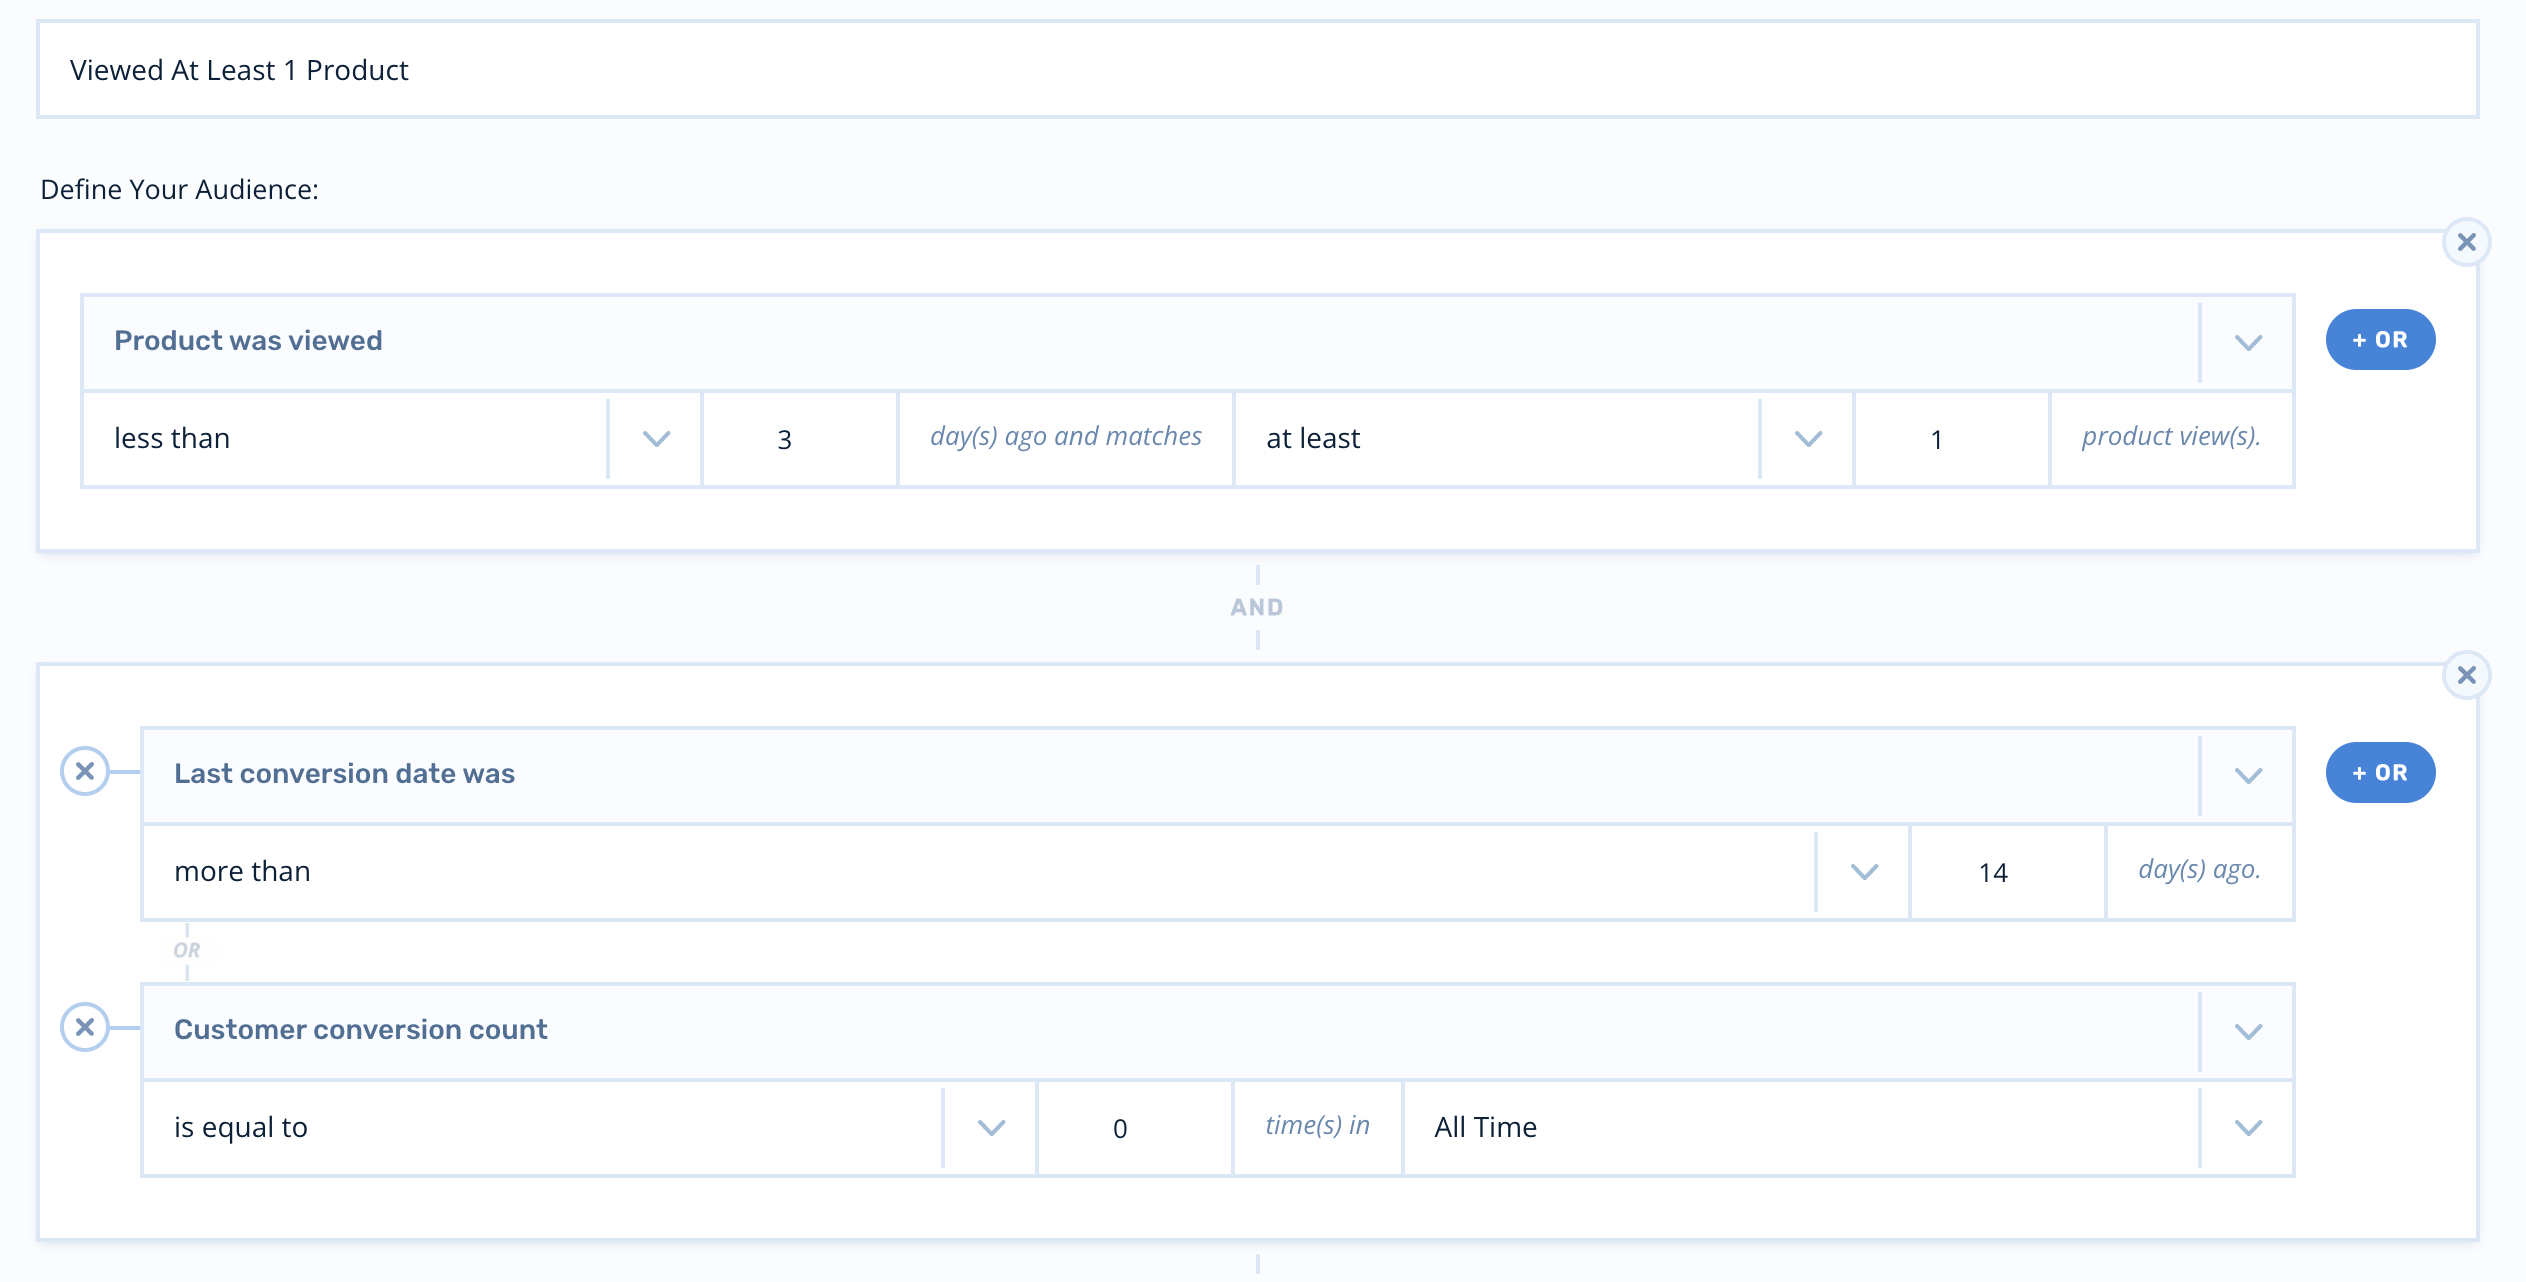
For this task, we're going to use the Product was viewed filter. We're going to set the timeframe to 3 days and we're going to require at least 1 product page view:
Then, we're going to filter any recent buyers using the Last conversion date was filter. We'll also account for customers with 0 conversions on record using the Customer conversion count filter:
QA Audiences
If you'd like to test your journey prior to going live with customers on production, you can add an audience that is purpose-built specifically for QA.
Positioning Nodes
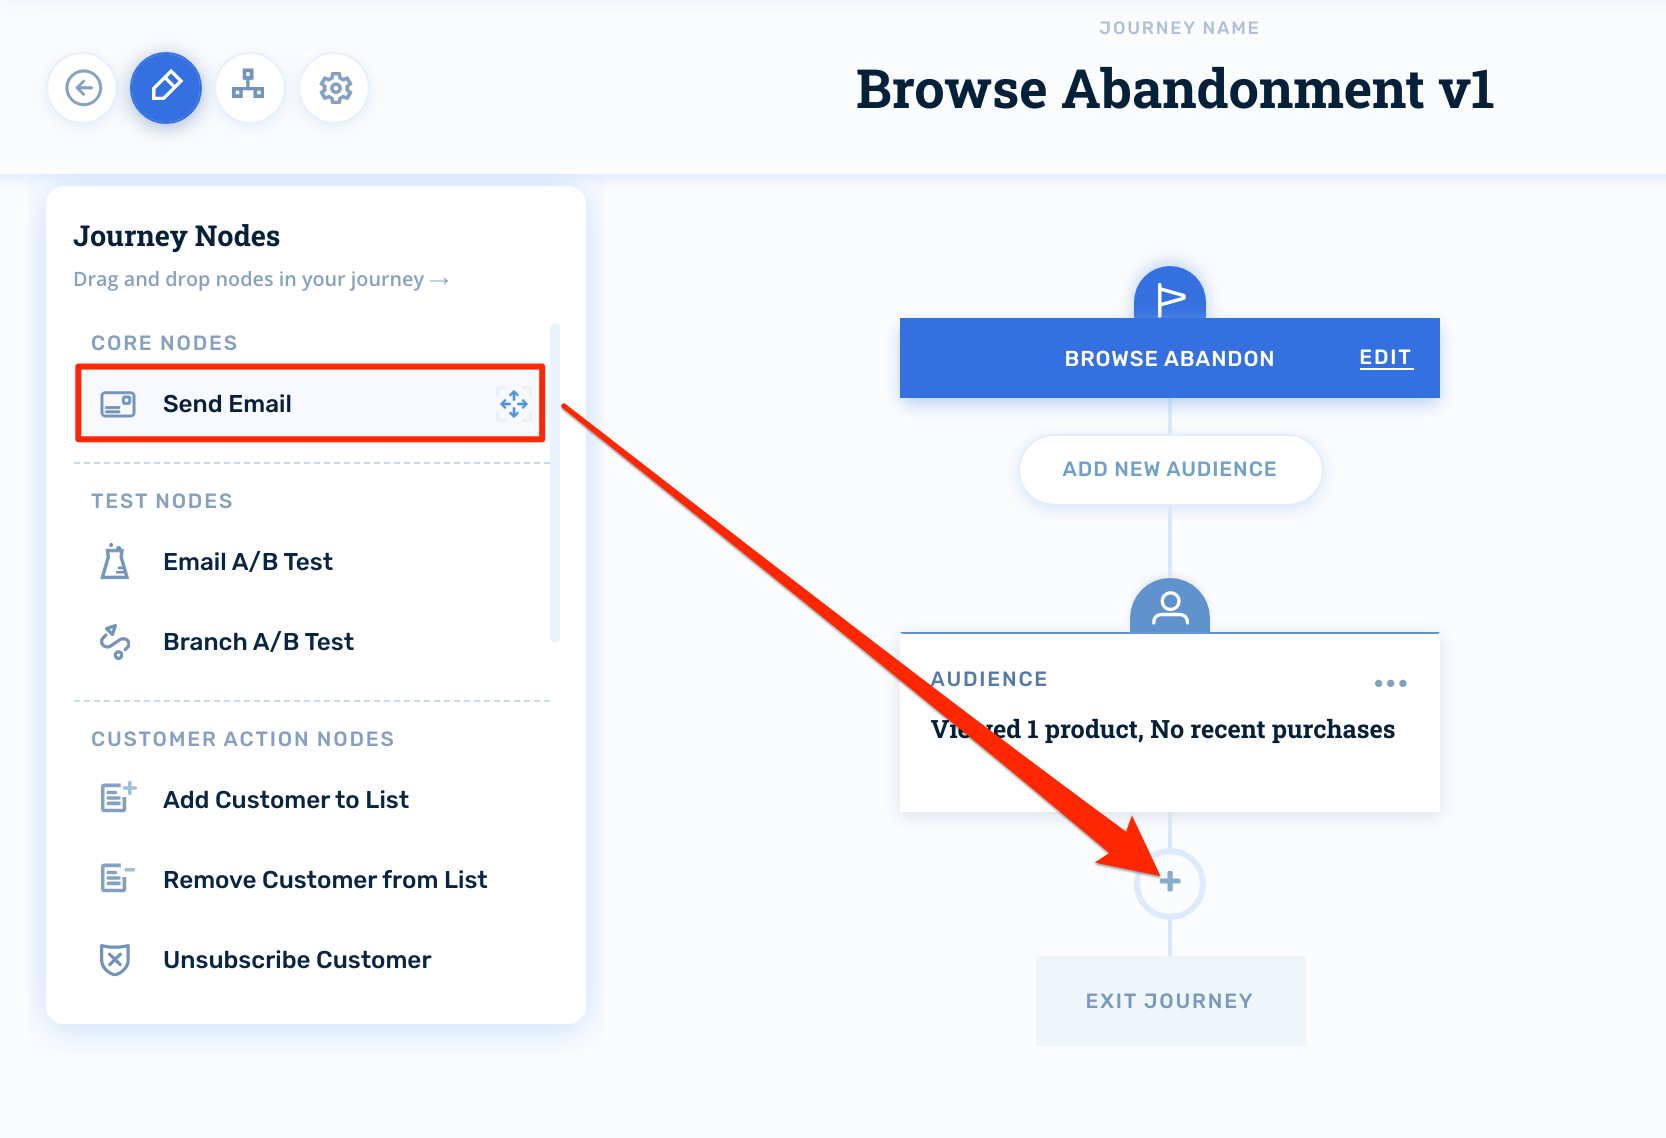
Now that our audience is set, let's set up some email nodes. Click the Journey Nodes icon, select Send Email and drag into position below the audience.
Configuring Email Nodes
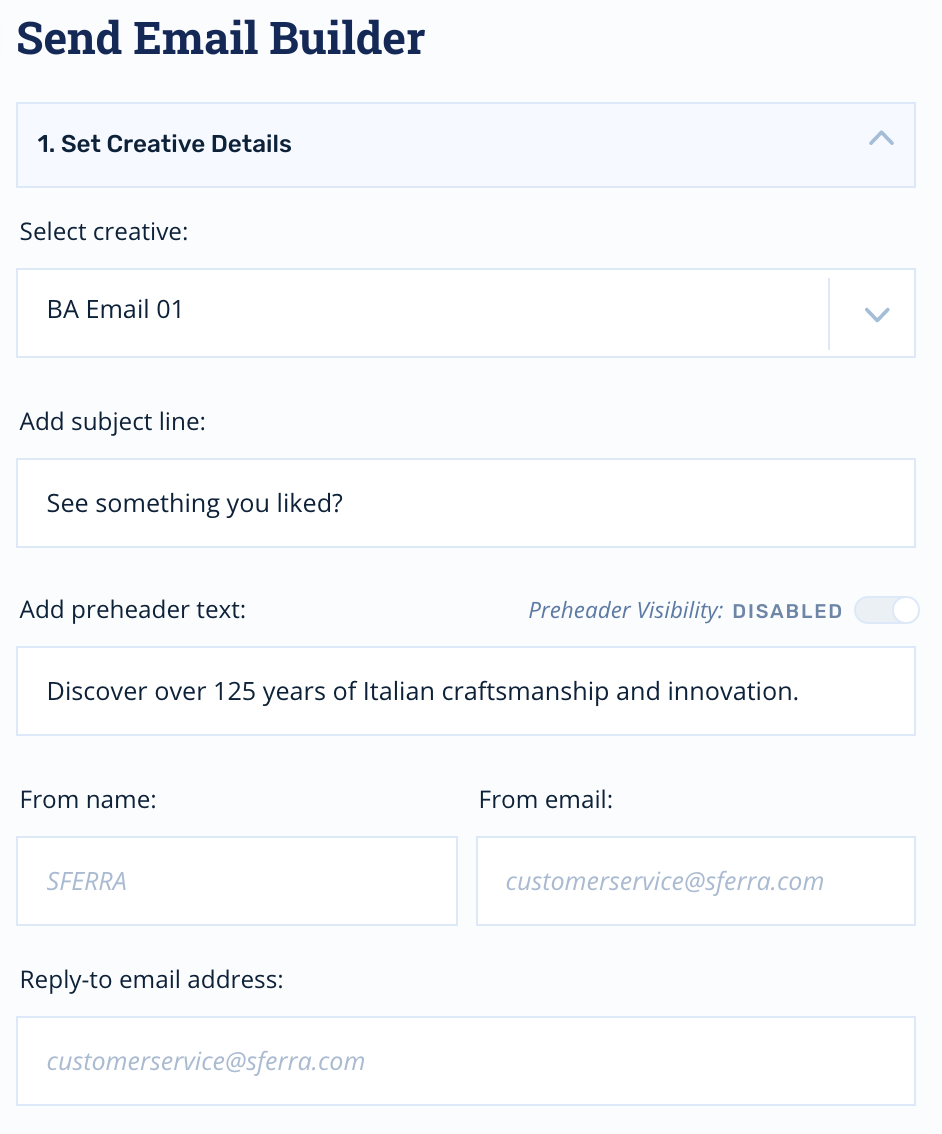
First, you'll select your creative. Then, you'll configure your subject lines and preheaders.
The email node will inherit the default sender information from your account, but you can override this on a per-email basis if you wish:
Wait Time
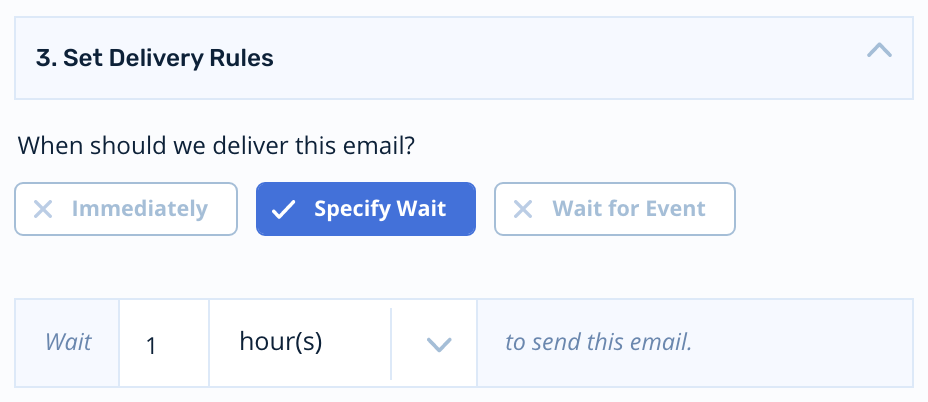
Since this is a one-step journey, we'll just need to set a wait time on the first email. This wait time determines when the node will process relative to the previous node.
So, if you set the wait time on the first email to 1 hour, the node will process 60 minutes after the customer matches your audience filters:
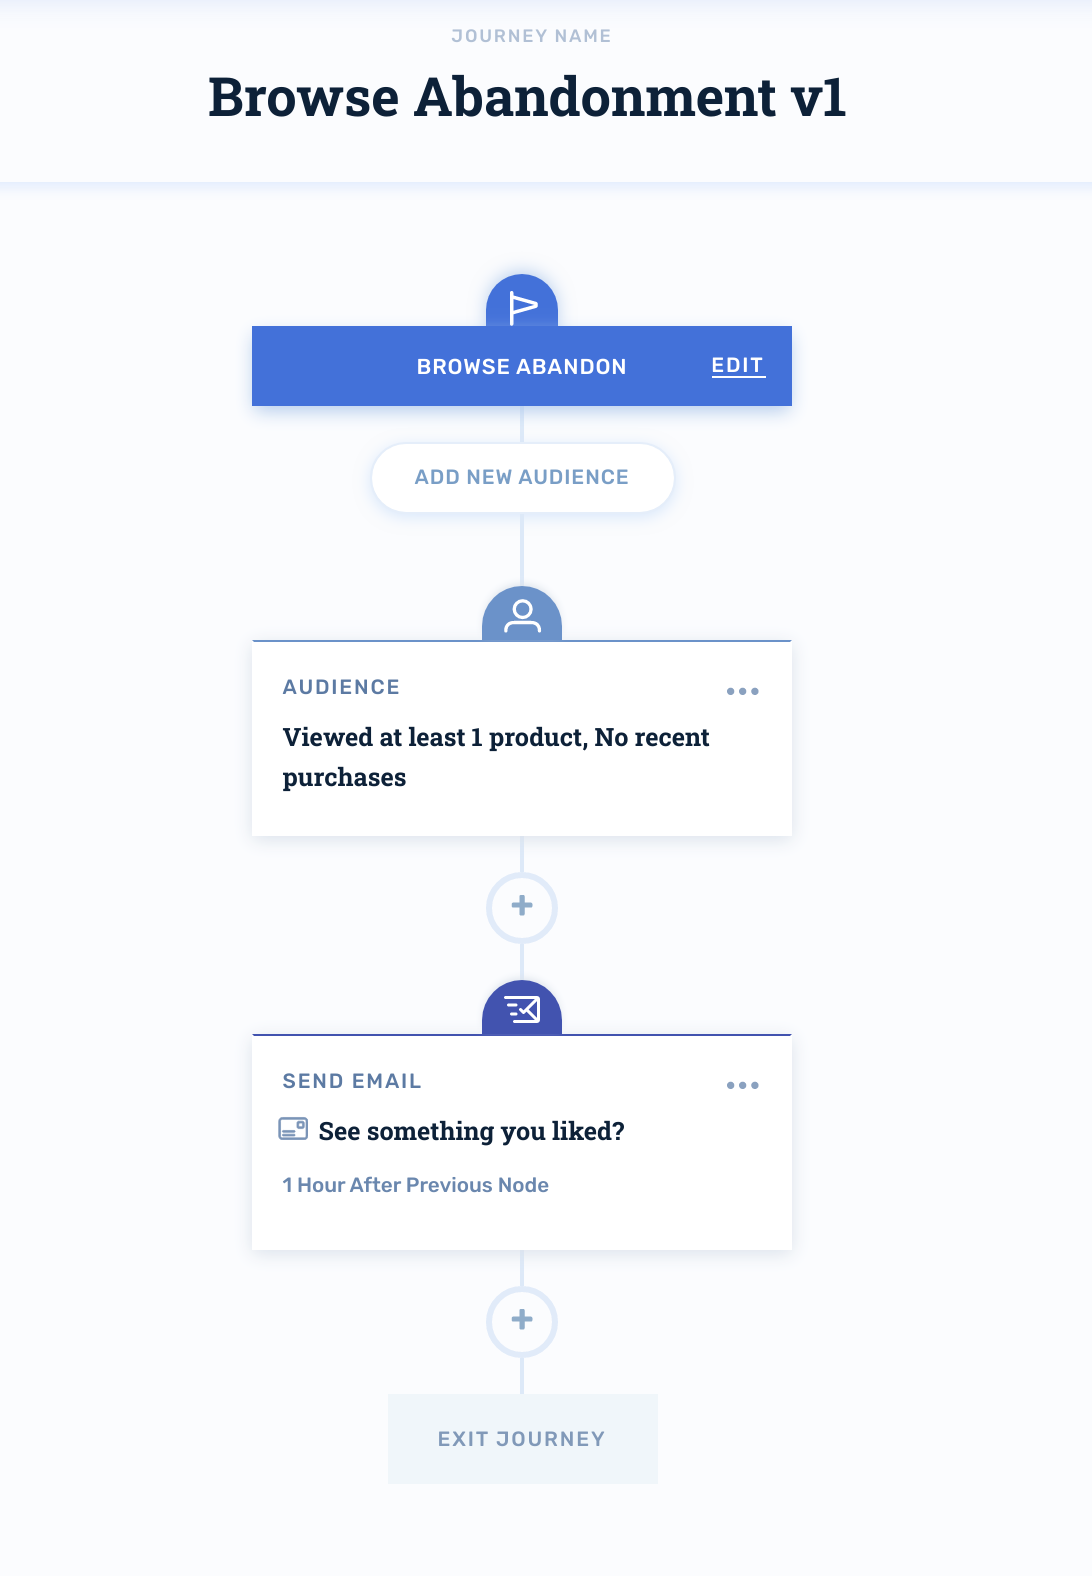
Once you've positioned the nodes and set your wait times, your abandoned browse journey will look like this:
Activating the Journey
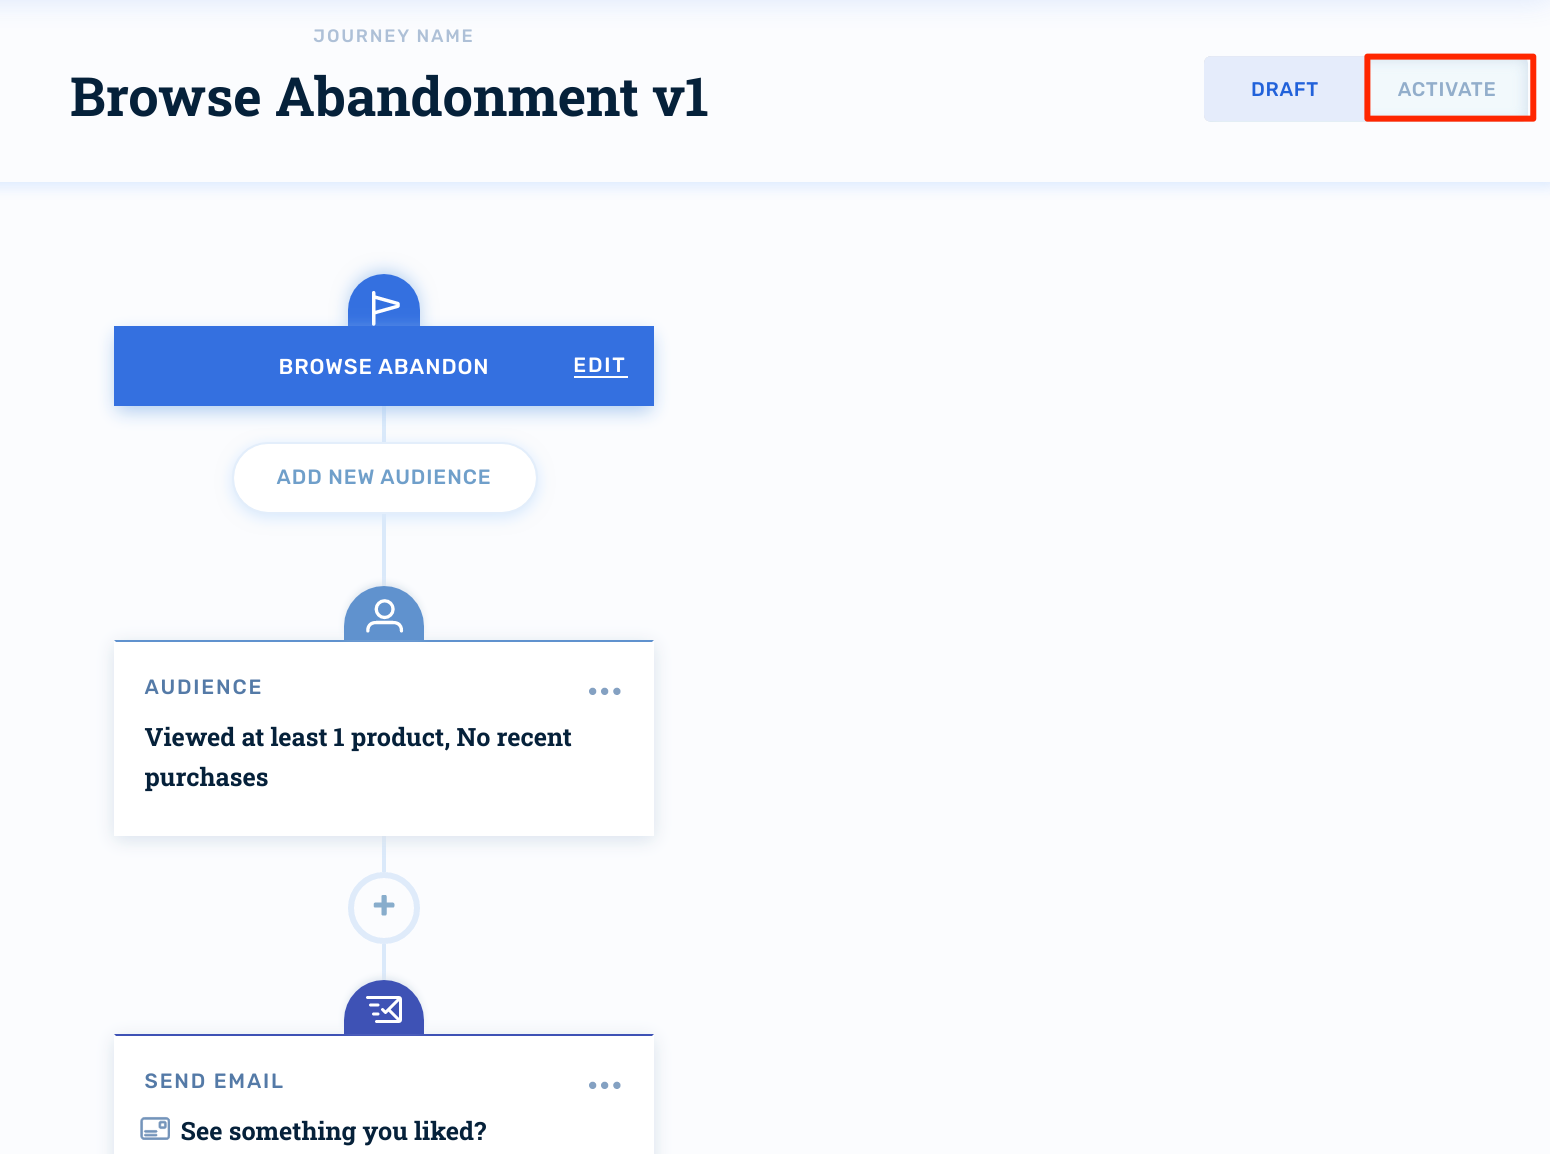
When you're ready to turn your journey on for production audiences, click Activate in the upper-right hand corner:
Updated 4 months ago
