Broadcasts Overview
In this article, we'll walk through the process of building a broadcast send with the intention of delivering it to a list of subscribers.
Getting Started

Building and sending a Broadcast email in Rejoiner is a straightforward process. To get started, log in to your Rejoiner account and click on Broadcasts in the main navigation.
Before getting started on creating your Broadcast, you should have a piece of Creative that has already been developed.
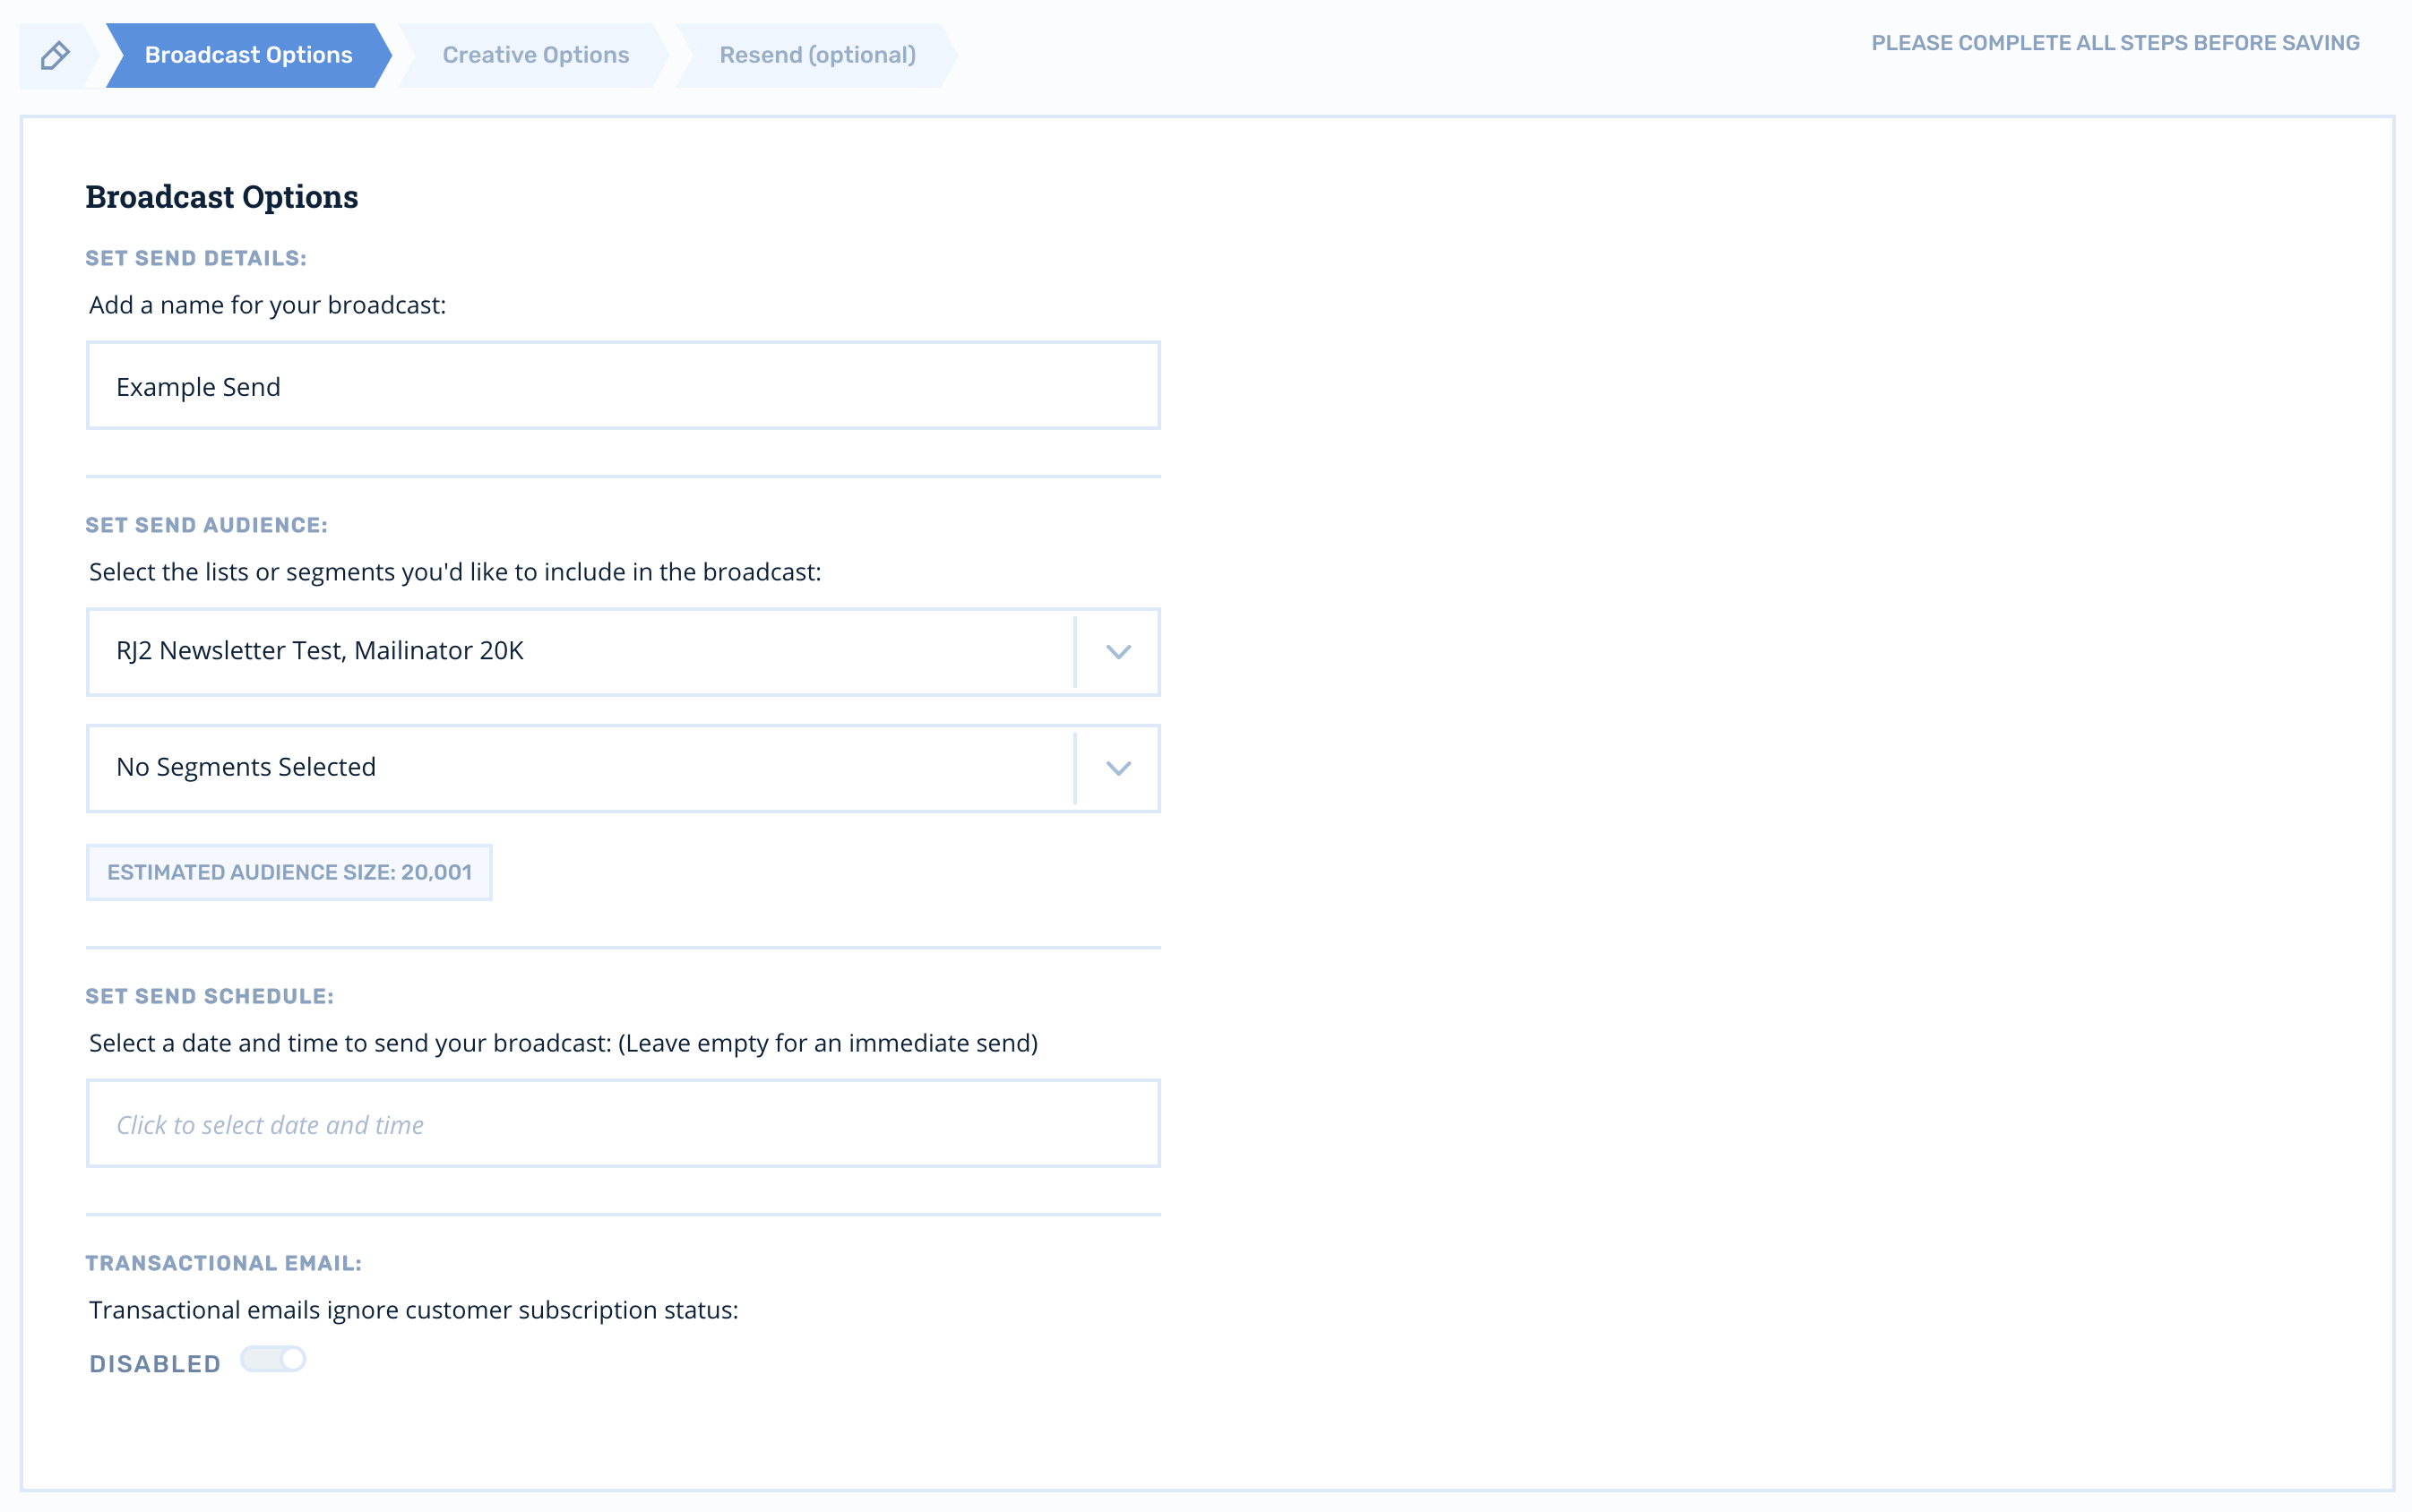
Broadcast configuration has 3 main steps: Broadcast Options, Creative Options, and Resend (optional).
Building a Broadcast
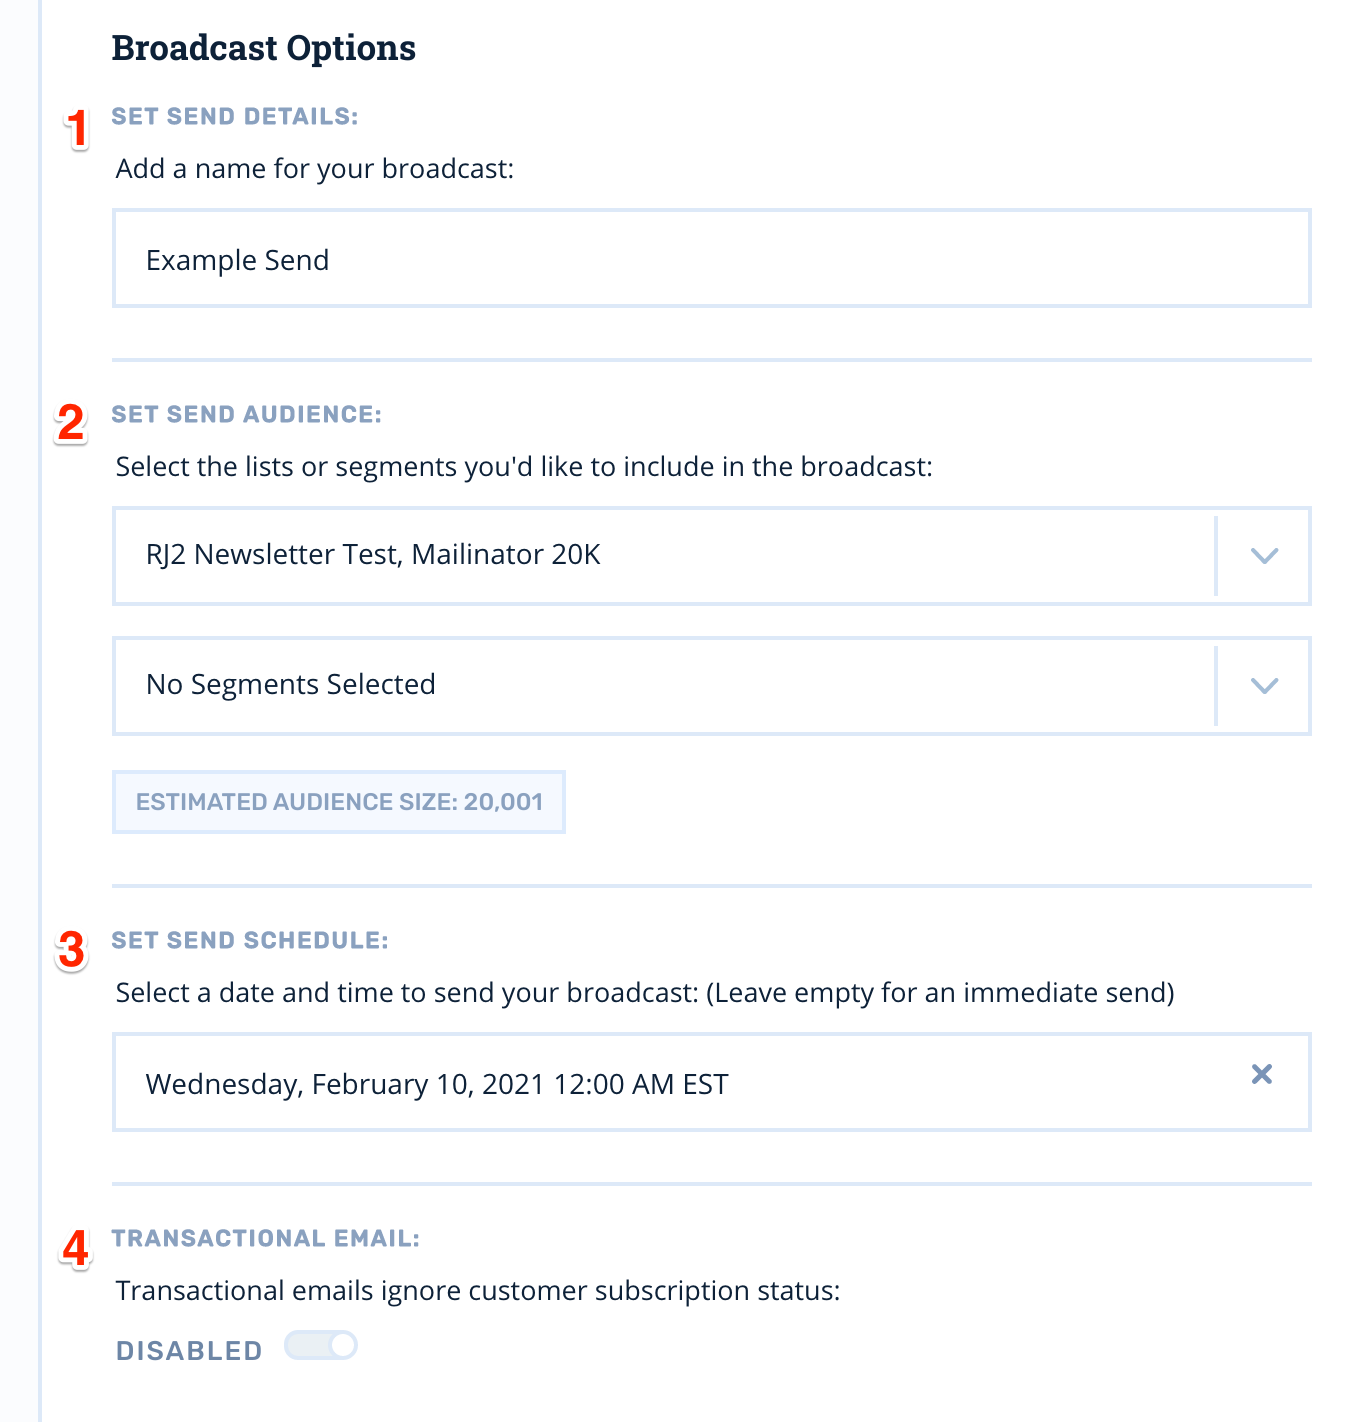
The Broadcast Options page is the first step in developing your Broadcast. Its 4 options are:

-
Set Send Details: Add a name for your broadcast. You should name your broadcast something that is specific and clear. For example, rather than using some generic like, “Winter Sale”, try using a standard format like, “Newsletter 2021/01/01 Winter Sale Gloves”. A quick glance at this name will make it easy to understand the essence of your Broadcast.
This will also make it easier to come up with future Broadcast names. If you’ve already set up your Google Analytics integration, this Broadcast name will be used for the utm_campaign parameter.
-
Set Send Audience: Select the lists or segments you'd like to include in the broadcast. If you select both a List (or multiple Lists) and a Segment (or multiple Segments), an email will be sent to both qualifying groups.
Rejoiner has automatic deduping so you do not need to be concerned about sending twice to a customer that exists on 2 different groups of Lists or Segments.
-
Set Send Schedule: Select a date and time to send your broadcast. If you’d prefer to send this email immediately, leave this option blank.
-
Transactional Email: Transactional emails ignore customer subscription status. By default, this toggle is disabled. You should never enable this toggle for a non-transactional email. Doing so could have large negative repercussions for your sender reputation, Rejoiner account status, and email channel as a whole.
Once you’re finished with configuration, click on Creative Options in the upper right.
Configuring Broadcast Creative
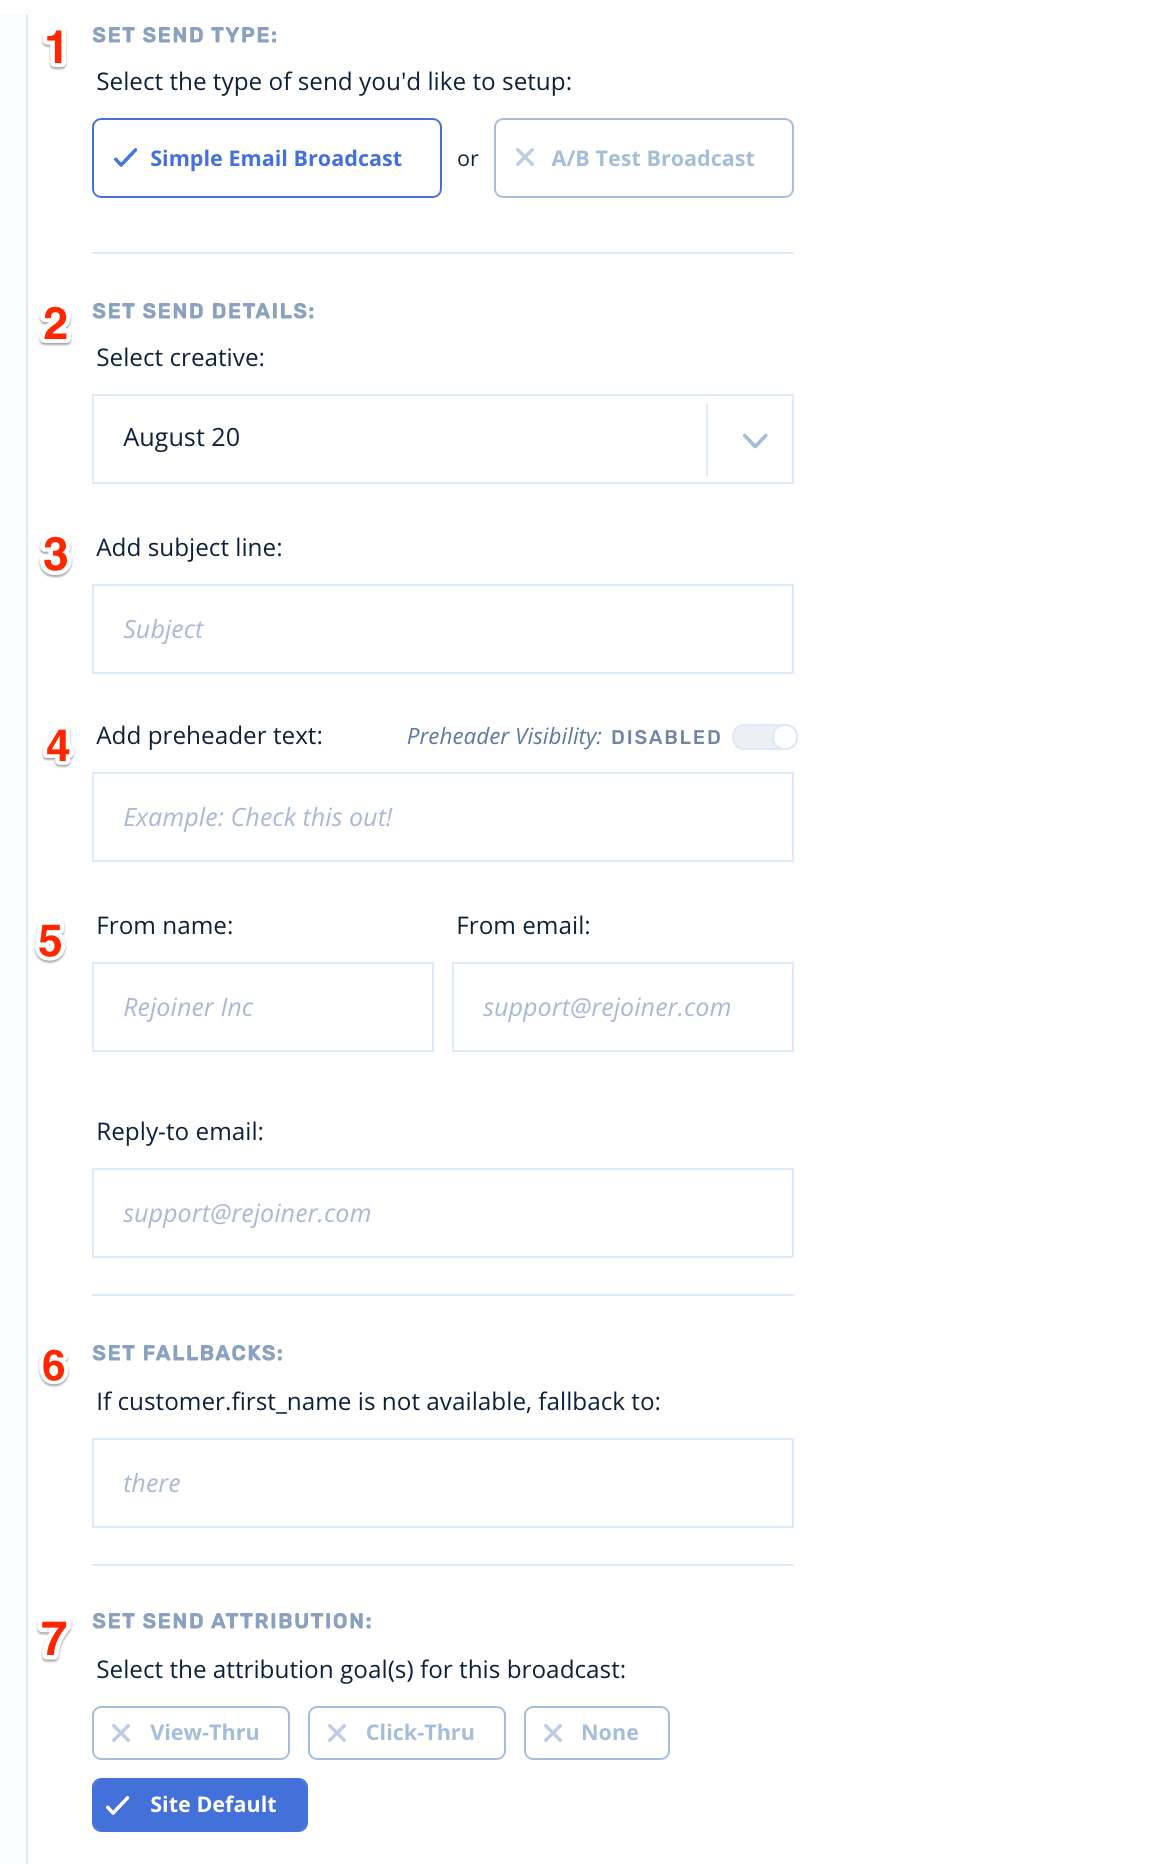
The Creative Options page is where you will select the type of send you’d like to broadcast as well as other creative details.

-
Set Send Type: Select the type of send you'd like to set up. You can either send a Simple Email Broadcast or an A/B Test Broadcast. Settings for an A/B Test Broadcast will be covered below.
-
Select Creative: Choose from your list of available email Creative. Every email that has been created in Rejoiner is available via the dropdown menu.
-
Add Subject Line: Write the Subject Line that your customers will see in their inbox.
-
Add Preheader Text: Write the Preheader Text (the short line of text that appears after the subject line in an email inbox). If you’d like the Preheader Text to show up in the actual email, toggle the Preheader Visibility option.You can set default styling for your preheader text in your Email Settings.
-
From Name, From Email, Reply-to Email: Write the From Name, From Email, and Reply-to Email that you would like to use for this send. By default, your Broadcast will be sent with your account-wide sender details. You can modify your sender details under Email Settings.
-
Set Fallbacks: If the
{{customer.first_name}}variable is used in your email creative, set a fallback for customer’s whose first_name variable we do not have on file. For example, the snippet, “Dear{{customer.first_name}}" would fall back to “Dear Friend” if you A) set the fallback value to “Friend” and B) sent an email to a customer whose first name you don’t have. -
Set Send Attribution: By default, your broadcast will use the account-wide Attribution and Tracking settings. However, you can override these settings for this specific broadcast by selecting different Attribution models and Tracking settings. You can modify your Attribution Model under Attribution Settings.
Pre-flight
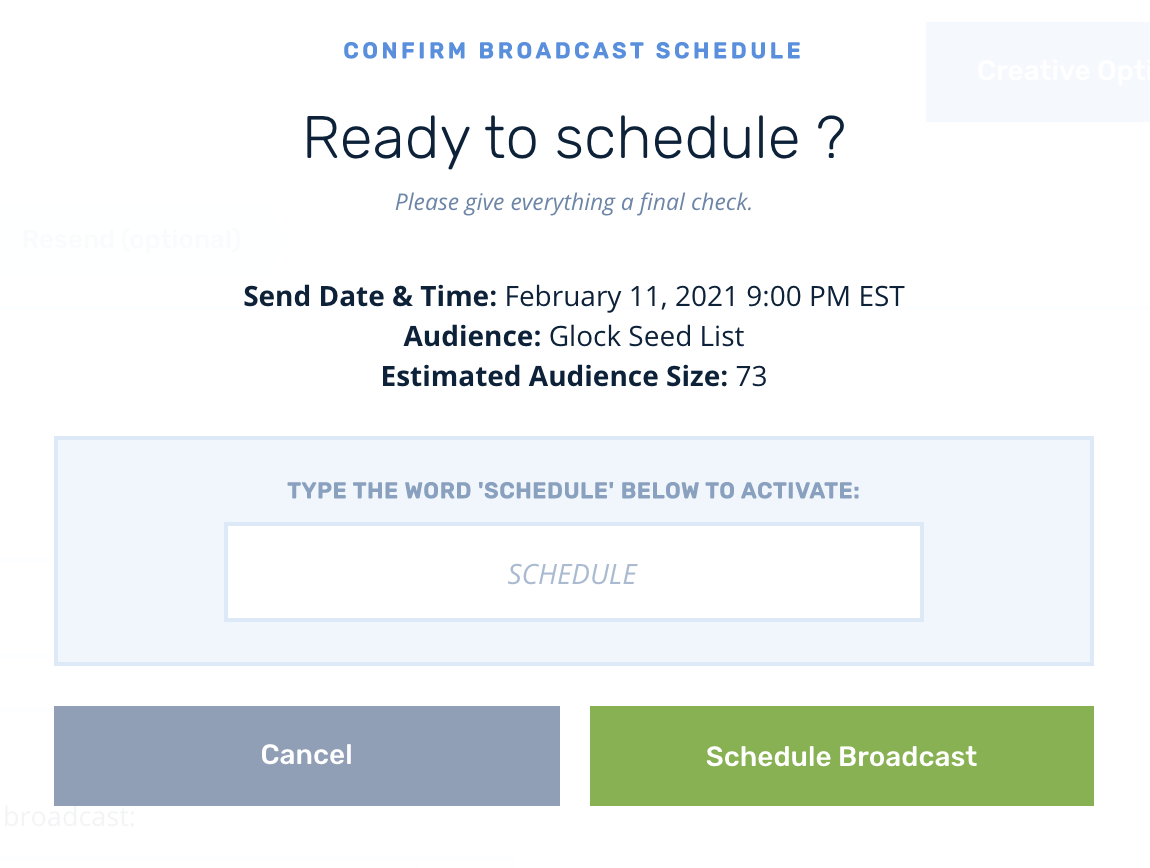
Prior to final confirmation, run through a final pre-flight checklist using the broadcast confirmation modal as a guide:
- Am I scheduled correctly?
- Are the correct audiences selected?
- Does the estimated audience size make sense?

Updated 3 months ago
