Double Opt-in
In this tutorial, we'll walk through the process of setting up a double opt-in journey that requires the subscriber to reaffirm their intent to join your list.
Strategy
This guide is focused on the operational aspects of configuring a double opt-in. If you're still deciding between single and double opt-in, start with these strategy-focused resources:
- Single Opt-In or Double Opt-In: Which Is Right for You?
- What is a Double Opt-In, and Should I Use One?
Creative
You'll build your templates using our Advanced HTML/CSS Editor or the Drag and Drop Editor.
Use Cases
This guide is focused on confirming consent for new subscribers. In other words, a customer has joined one of your lists and you want to obtain a double confirmation of their wish to do so.
The same methodology which we're exploring here can also be used to re-affirm consent for existing subscribers. The only difference is that you would deliver this kind of re-consent email using a Broadcast vs. an Added to List triggered journey as we'll demonstrate below.
Merge Tag
We recommend sending a subscription confirmation email in close to proximity to the moment a subscriber has been added to your list(s). Let the subscriber know more about your brand, what benefits they can expect, how you will respect their attention, and provide a method for confirming the opt-in.
To do so, you can add a button or a text link that uses the {{opt_in_url}} template tag. Below you will see an example of its implementation:
<a href="{{opt_in_url}}" target="_blank">Confirm Your Subscription</a>Upon clicking any link with the above opt-in template tag, your subscribers will be redirected to a page that acknowledges their provided consent.
Rejoiner will also flag them as opted-in. Opted_in customers can be further segmented using Journey Audiences or Segments.
Configuring the Journey
First, click Journeys in the main navigation. Then, click Add New Journey.
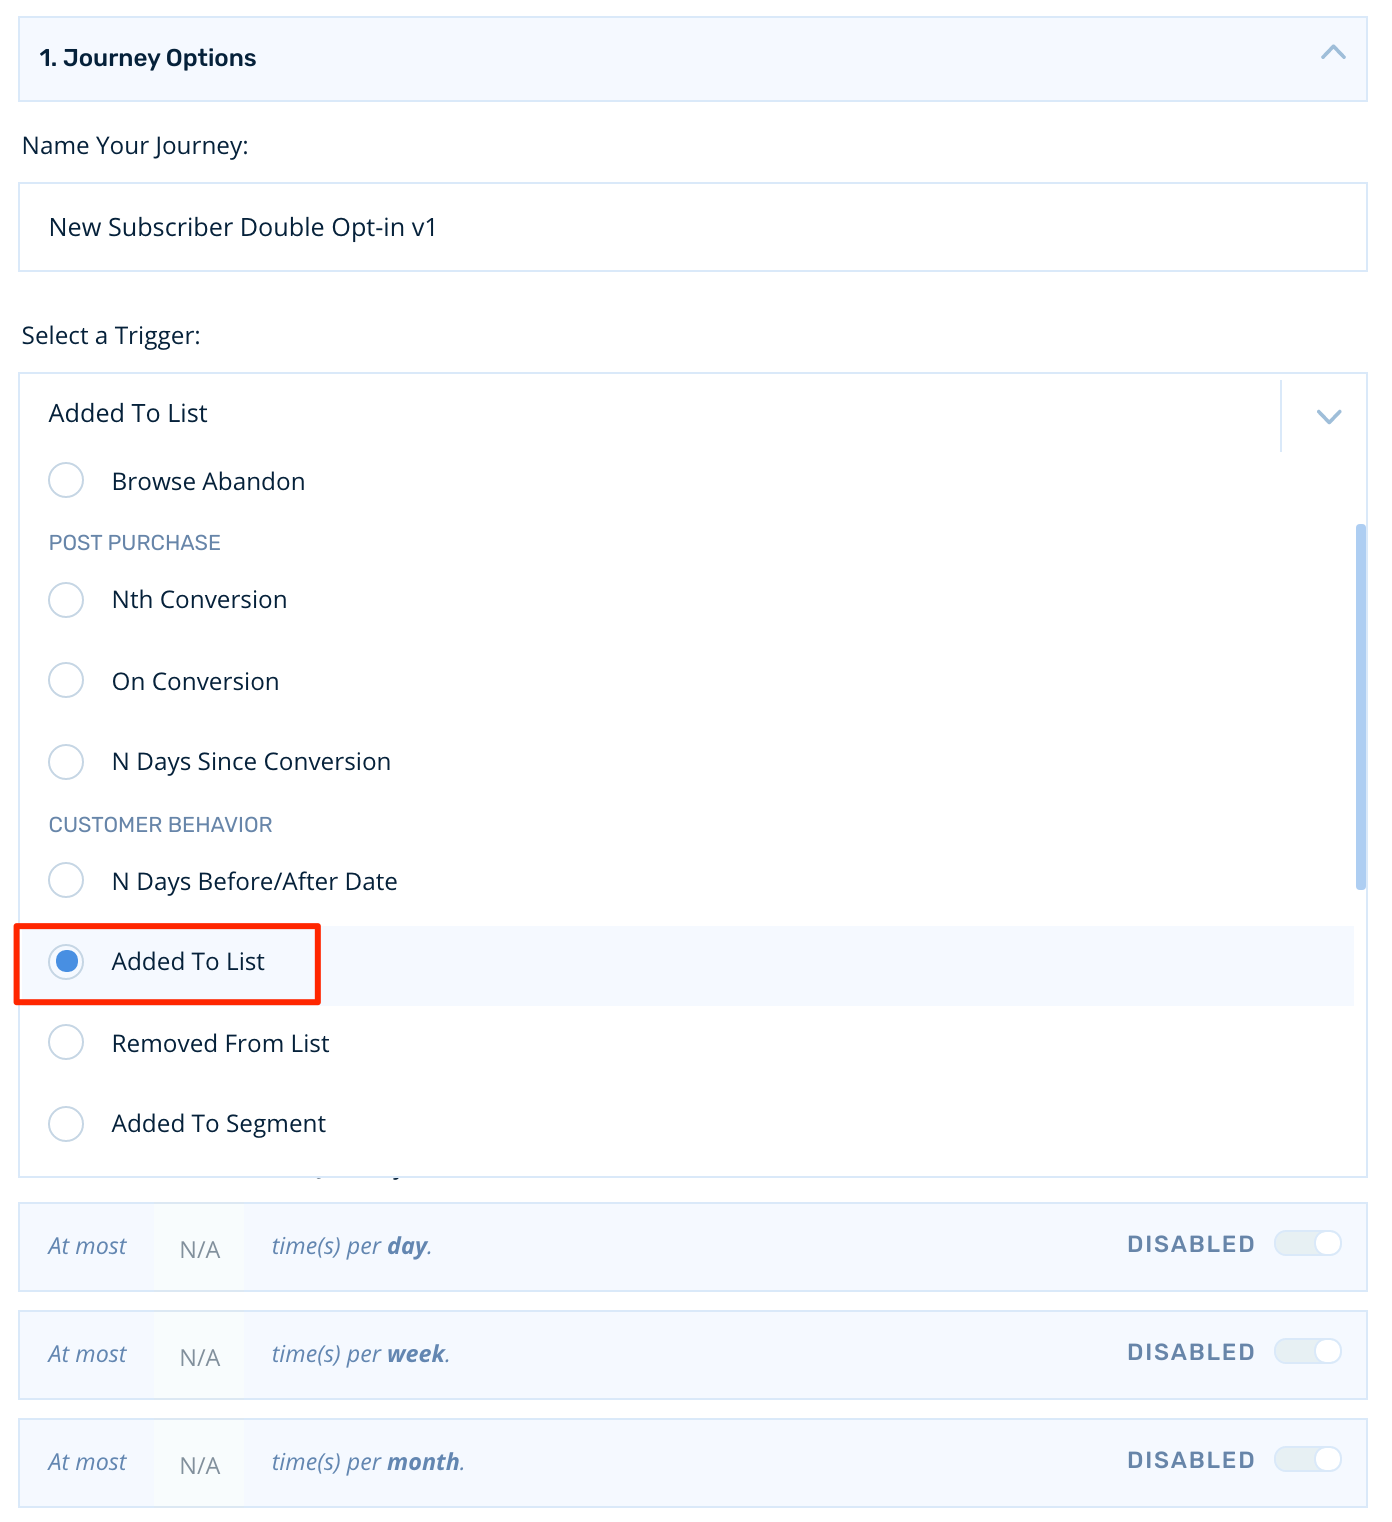
Start by naming the Journey something like, "New Subscriber Double Opt-in v1".
Then, select the Added to List trigger:
Building the Journey
Targeting Your Audience
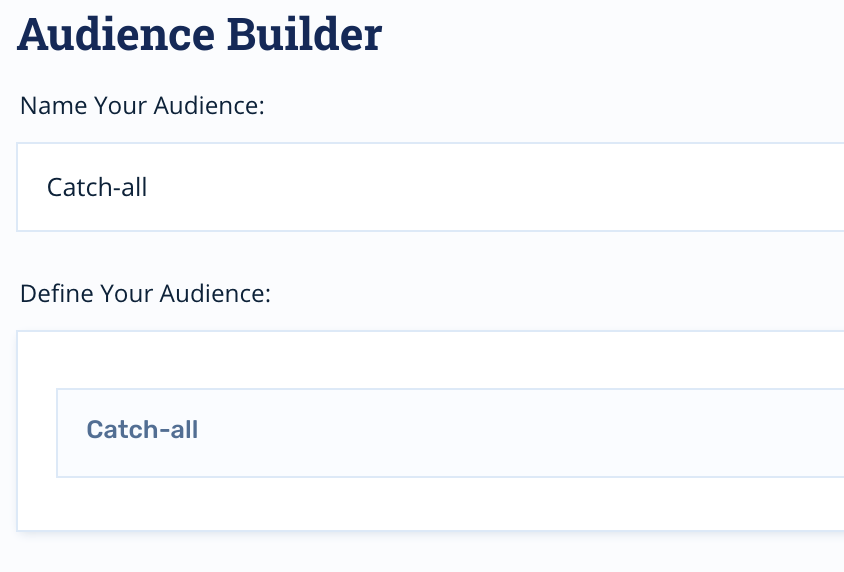
First, click Add New Audience
For this example, we'll assume that all subscribers must go through the double opt-in process which makes a Catch-all audience appropriate for this task.
Positioning Nodes
First, we'll need to pull a Fork into the journey:
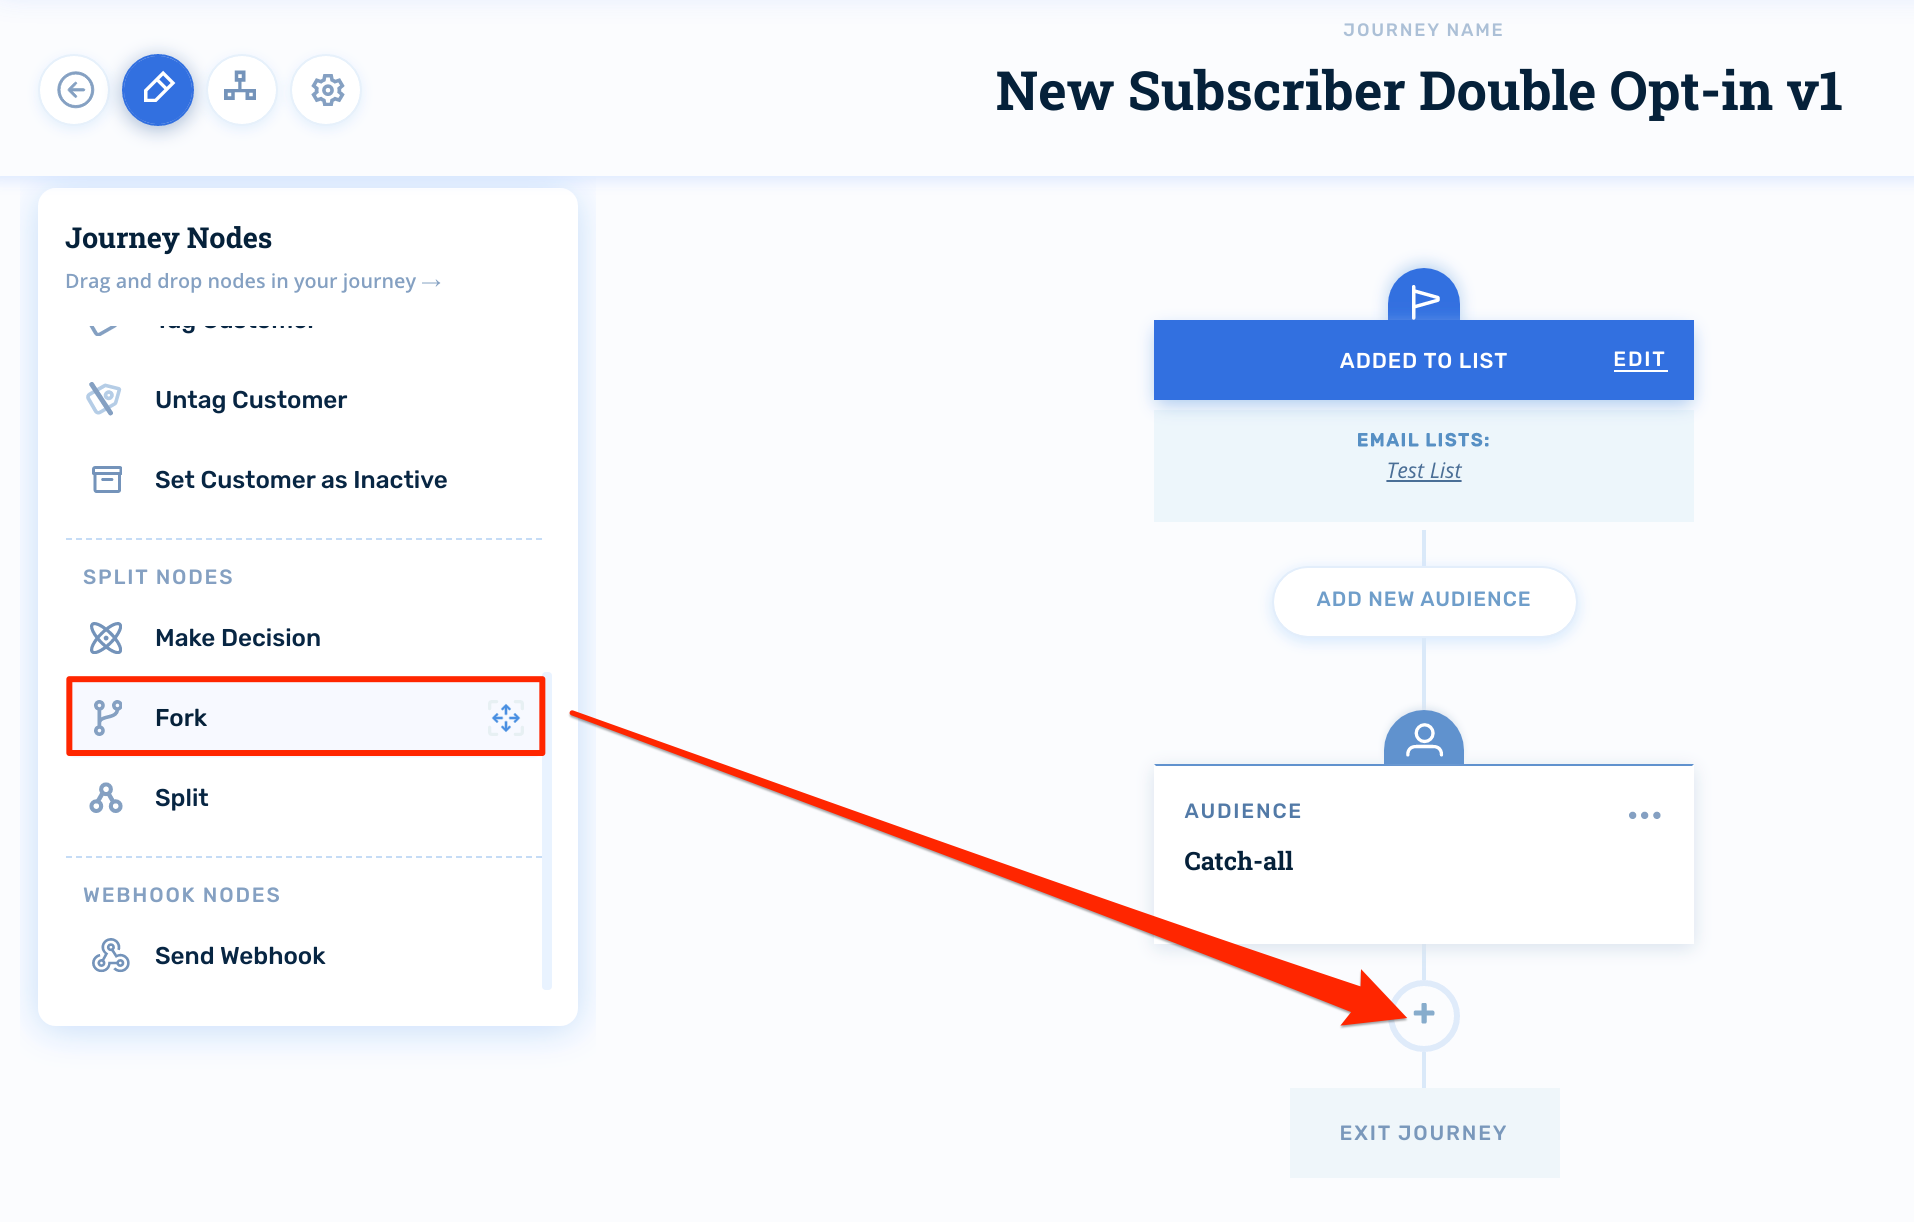
This will enable us to have the customer enter into two parallel branches at the same time.
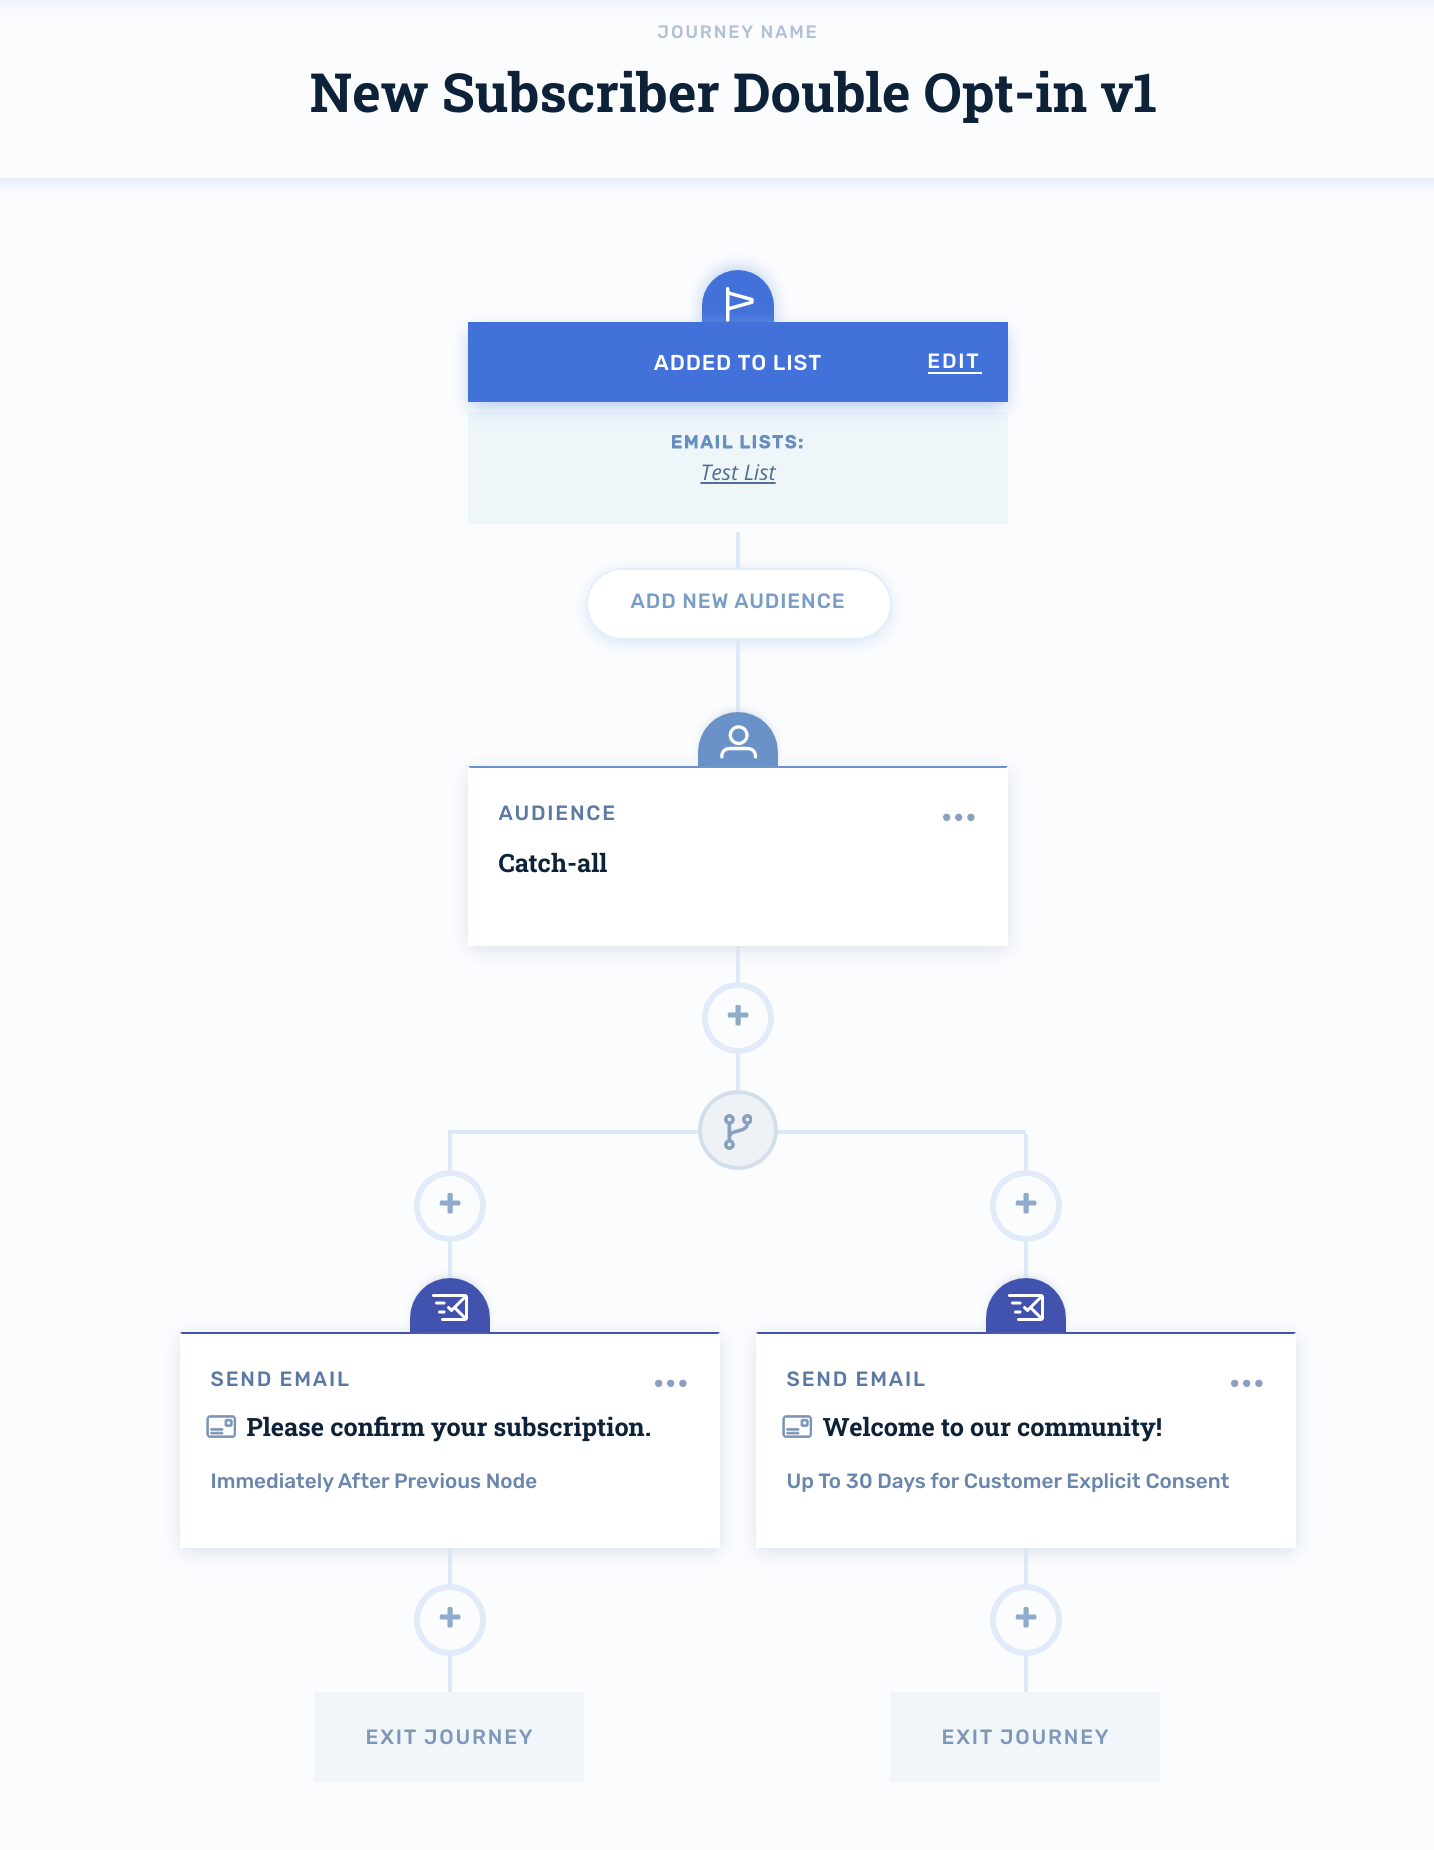
The first branch will deliver the double opt-in confirmation email and the parallel branch will wait for the customer to click on a link that confirms their consent with the opt_in_url merge tag.
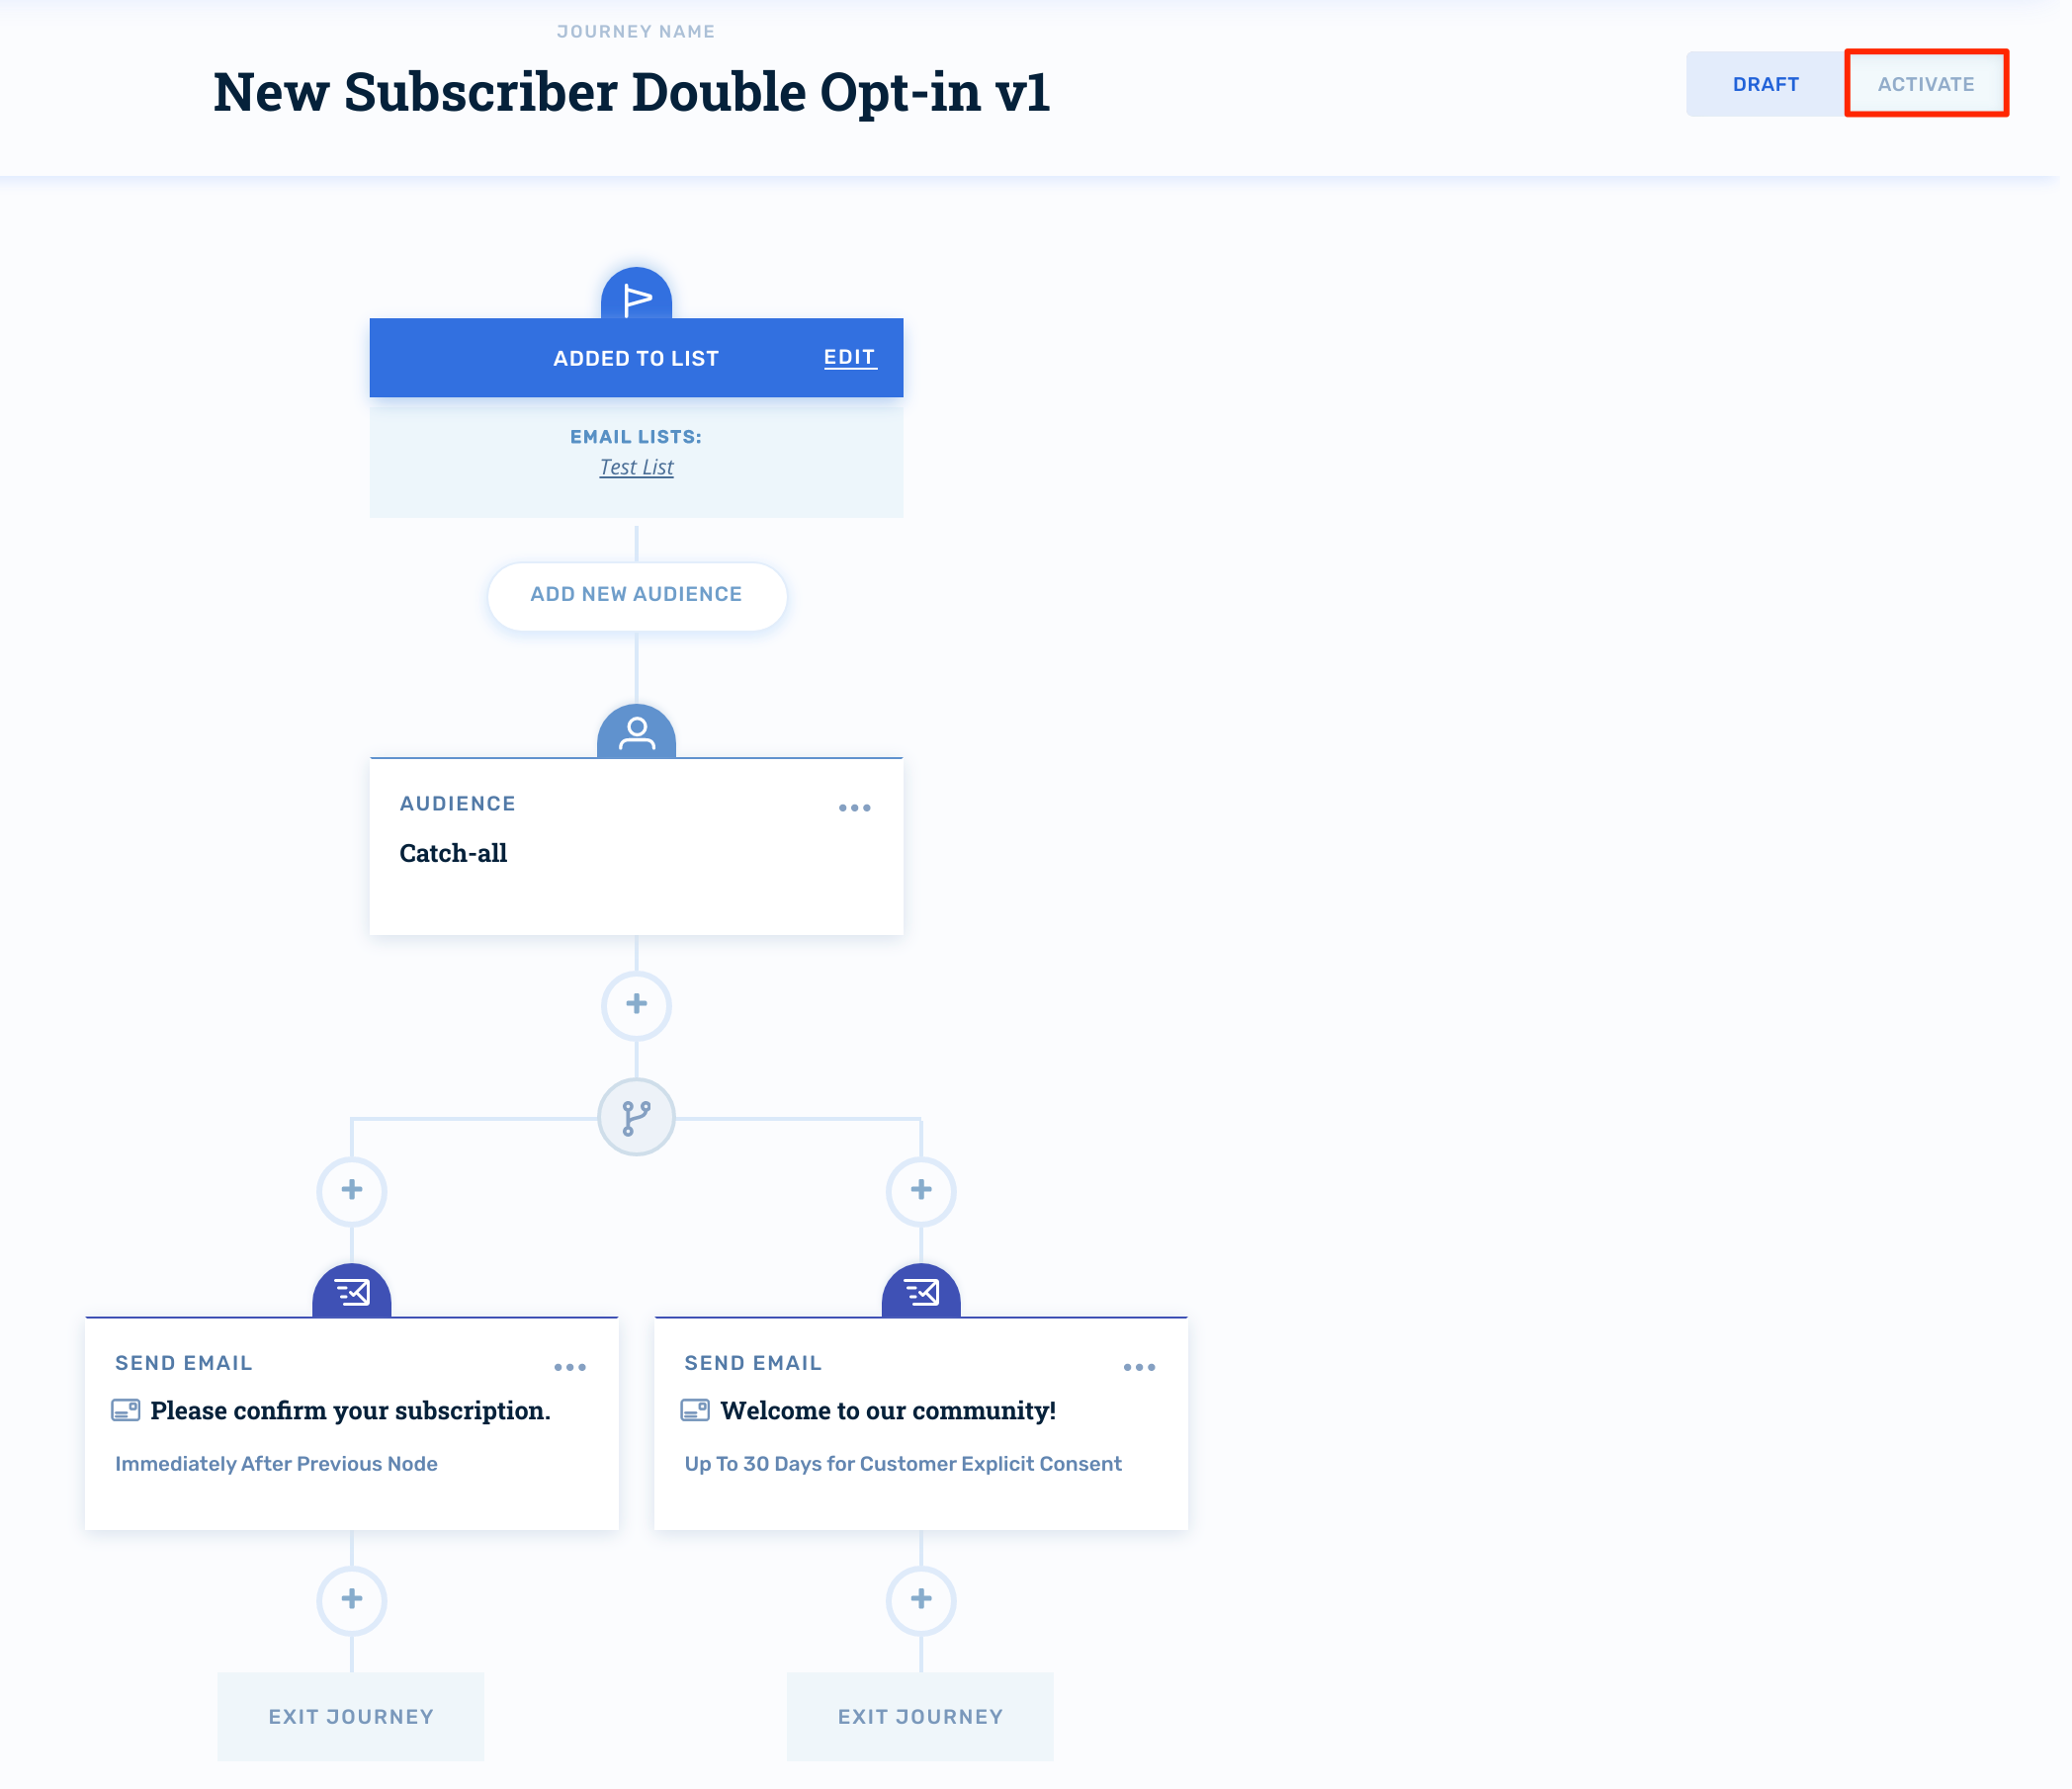
Once you've set up the Fork and your two email nodes, the journey will look like this:
Conditional Wait
In order for all of this to work as expected, we'll need to pay special attention to the conditional wait on the second email node. In our example, this is the email we want to send once the customer has completed the double opt-in step.
To modify the wait condition, edit the email node's options by clicking on the three dots in the upper right-hand corner of the node:
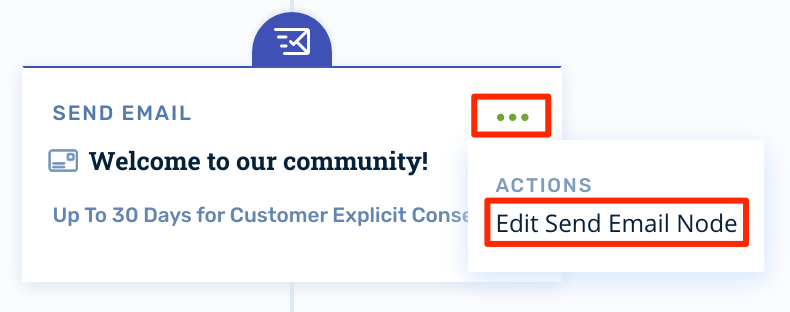
Next, set the node's Delivery Rules to Wait for Event. In the example below, we've set the conditional wait to watch for Explicit Consent for a period of 30 days.
If the customer doesn't provide explicit consent within 30 days, they will exit the journey:
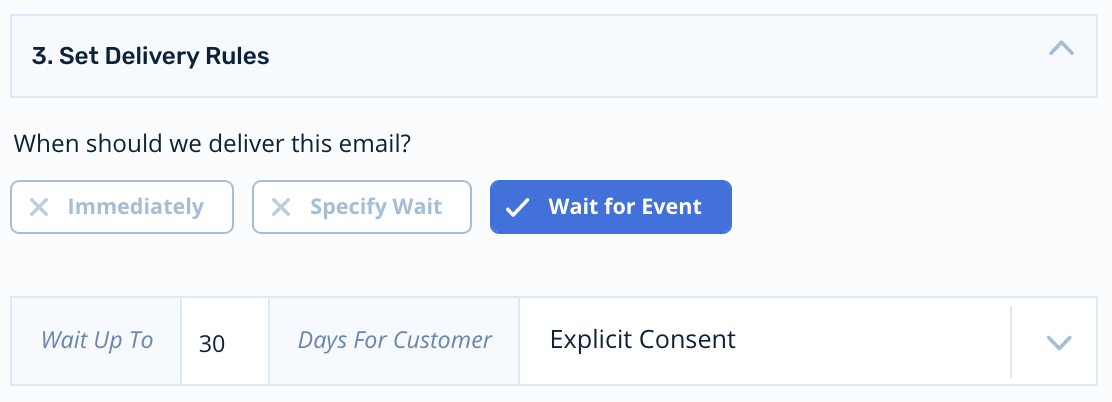
If and when the customer does provide double opt-in confirmation, they will continue down the second branch.
Activating the Journey
When you're ready to turn your journey on for production audiences, click Activate in the upper right-hand corner of the journey builder.
Updated 4 months ago
