New Subscriber Welcome
In this tutorial, you'll learn how to set up a new subscriber welcome journey that triggers when new subscribers join your list.
Strategy
This guide is focused on the operational aspects of configuring a new subscriber welcome journey in Rejoiner. If you're re-thinking your overall strategy, start with this resource:
Creative
You'll build your templates using the Advanced HTML/CSS Editor or the Drag and Drop Editor.
Configuring the Journey
First, click Journeys in the main navigation. Then, click Add New Journey.
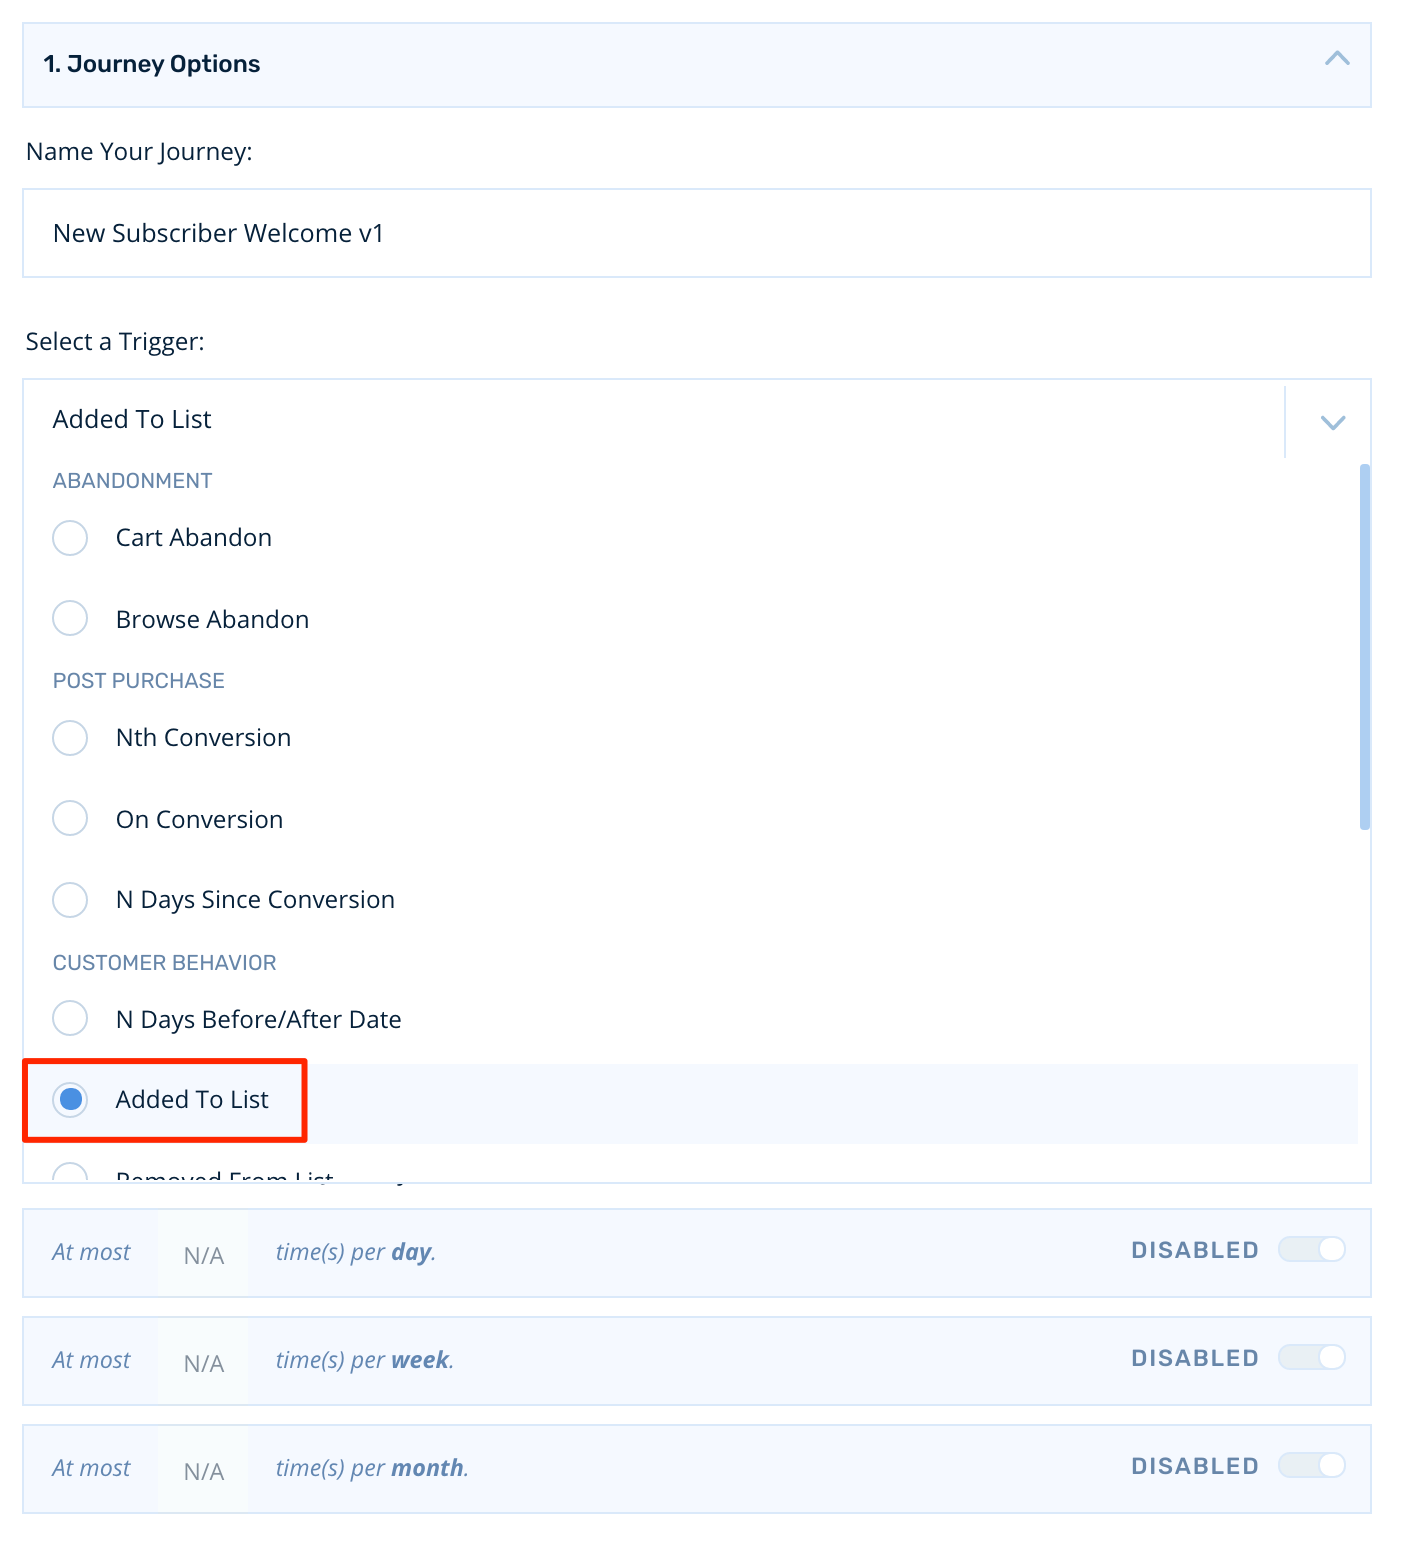
Start by naming the Journey something like, "New Subscriber Welcome v1".
Then, select the Added To List trigger:
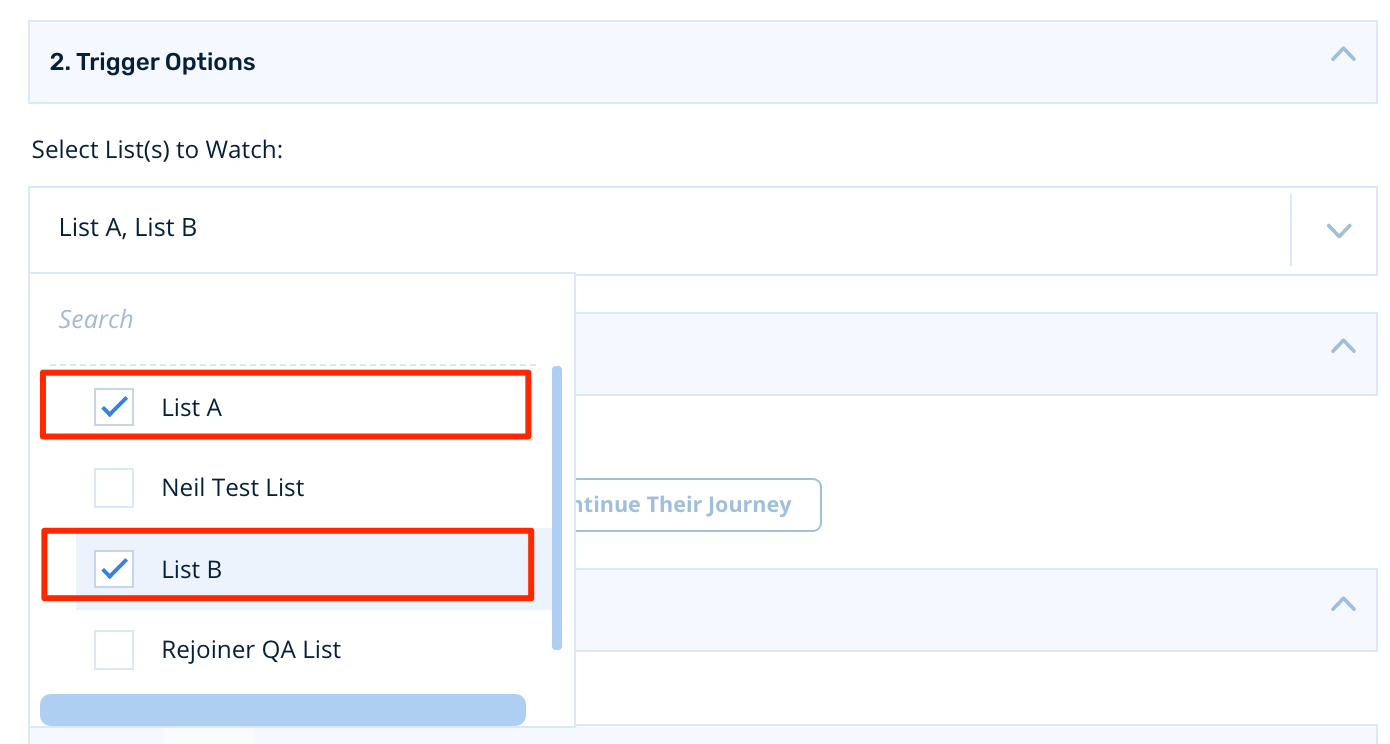
A single Added to List trigger can observe as many lists as you'd like to include. Add a checkmark next to each of the lists you'd like to trigger off of.
Conversion Rules
We want the new subscriber welcome journey to end if the customer converts, so we'll leave the conversion rules setting in its default state. The customer will exit if they purchase during the journey

If the customer was added to your list as a result of a purchase, they will enter the journey. You can prevent this with additional filtering in the audience if you wish.
Frequency Capping
Subscribers can only join your list once, so frequency capping isn't relevant for this trigger.
Building the Journey
Targeting Your Audience
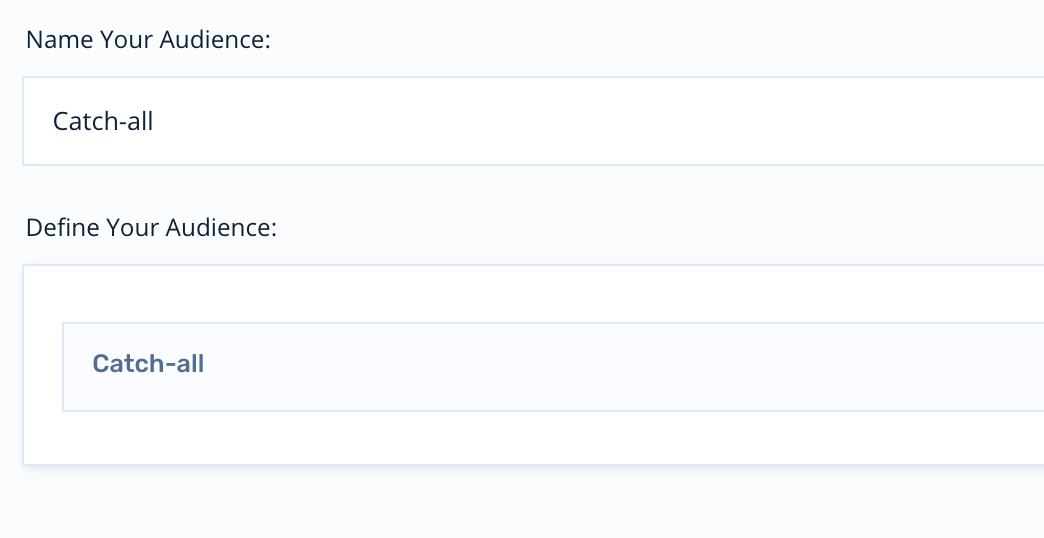
To start, click Add New Audience.
For new subscriber welcome journeys, we recommend starting with a Catch-all audience. This means that all customers who enter their journey will flow through the same audience.
QA Audiences
If you'd like to test your journey prior to going live with customers on production, you can add an audience that is purpose-built specifically for QA.
Positioning Nodes
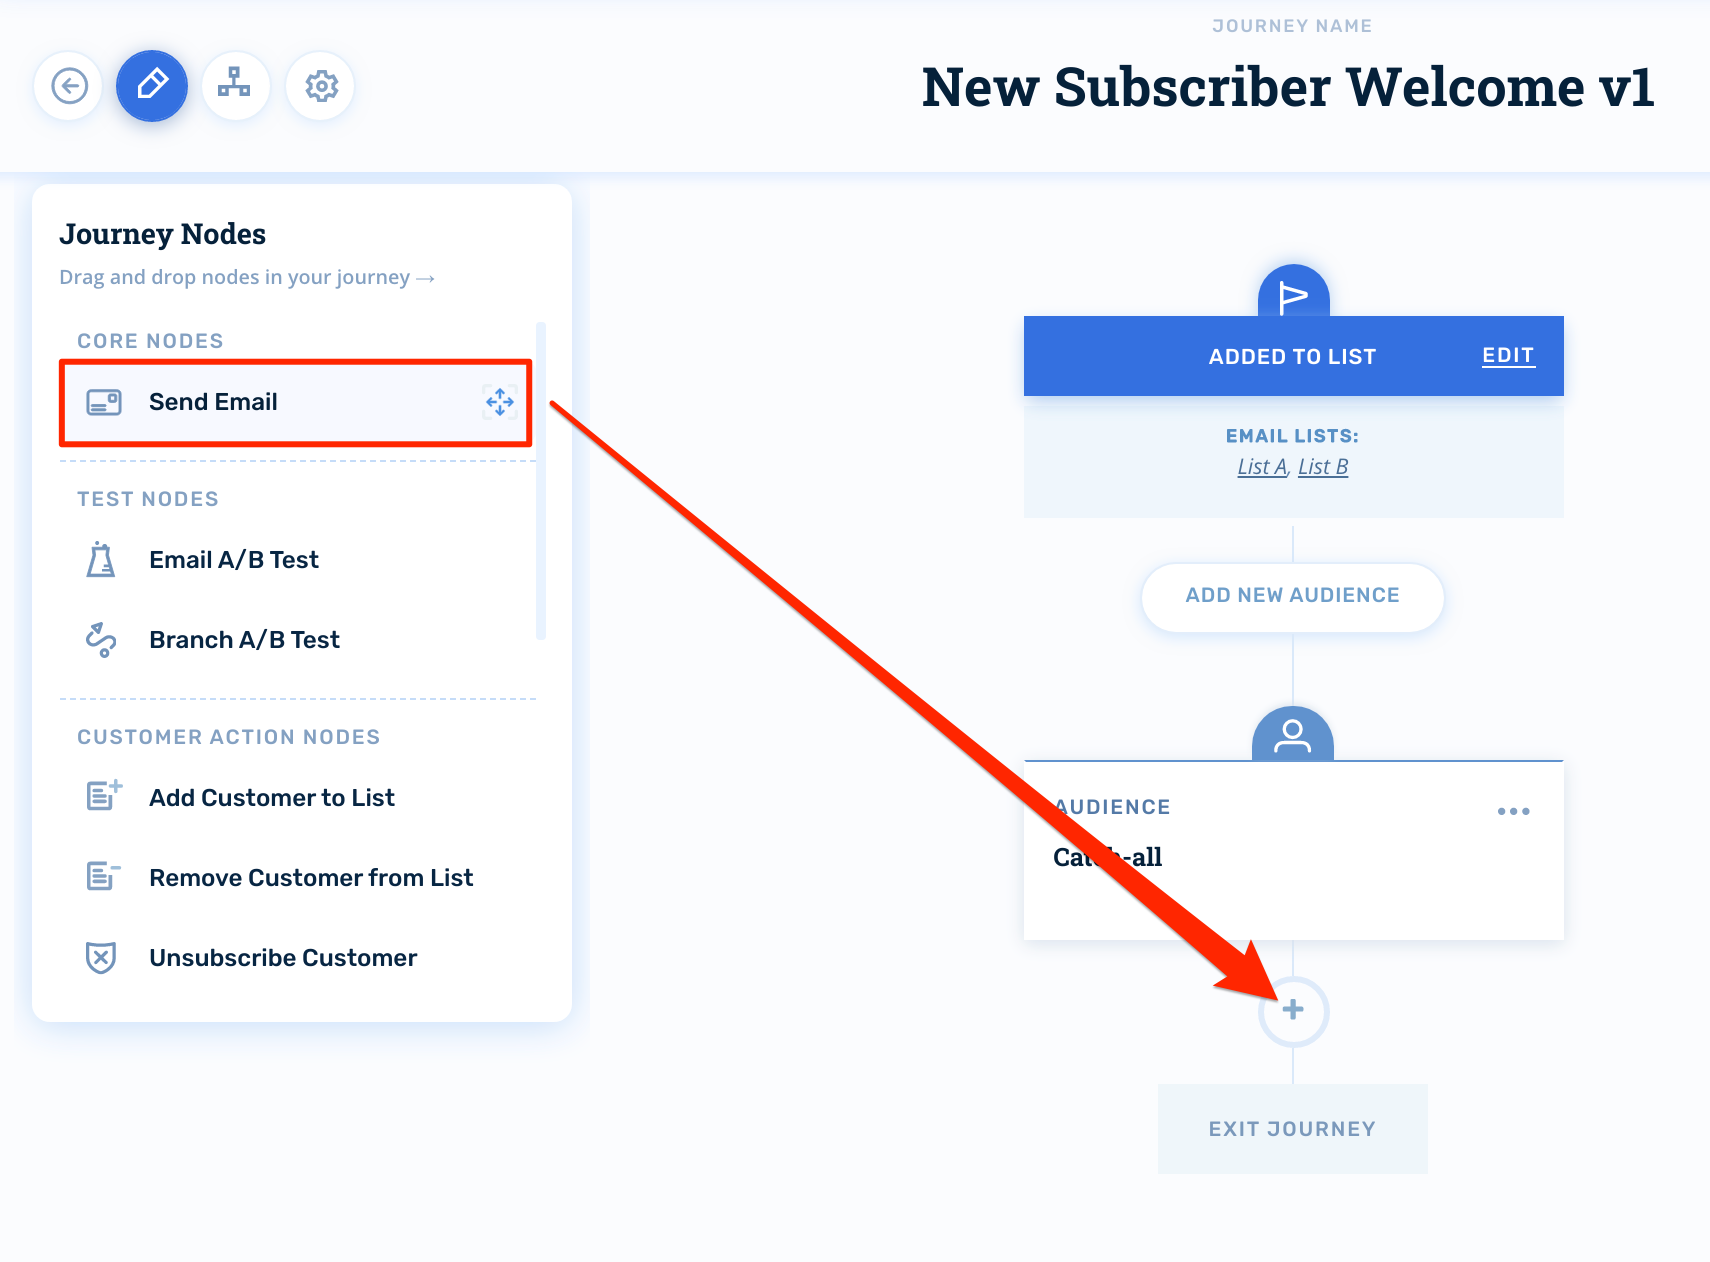
Now that our audience is set, let's set up some email nodes. Click the Journey Nodes icon, select Send Email and drag into position below the audience.
Configuring Email Nodes
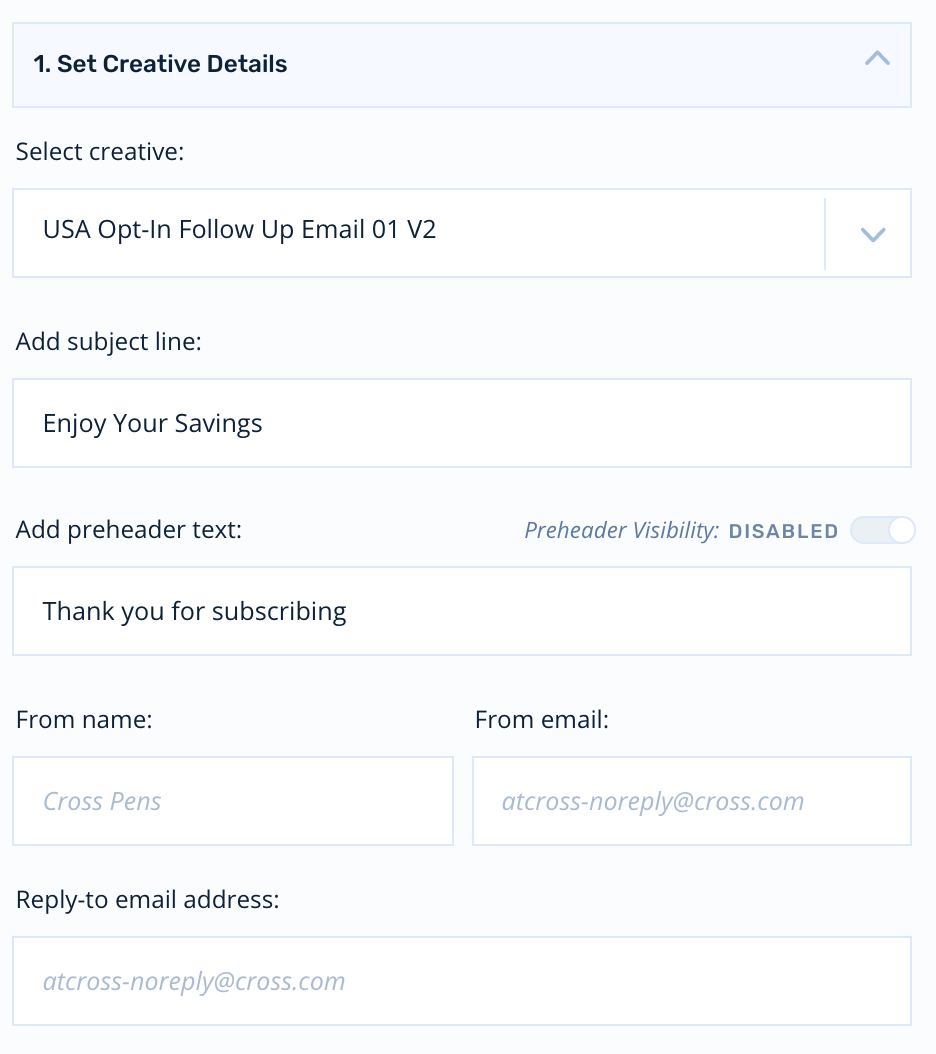
First, you'll select your creative. Then, you'll configure your subject lines and preheaders.
The email node will inherit the default sender information from your account, but you can override this on a per-email basis if you wish:
Wait Time
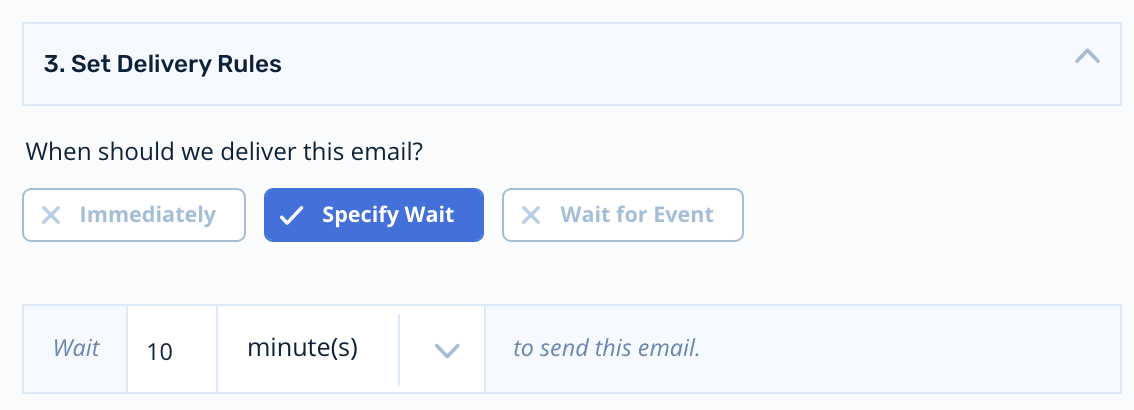
Since this is a one-step journey, we'll just need to set a wait time on the first email. This wait time determines when the node will process relative to the previous node.
So, if you set the wait time on the first email to 10 minutes, the node will process 10 minutes after the customer matches your audience filters:
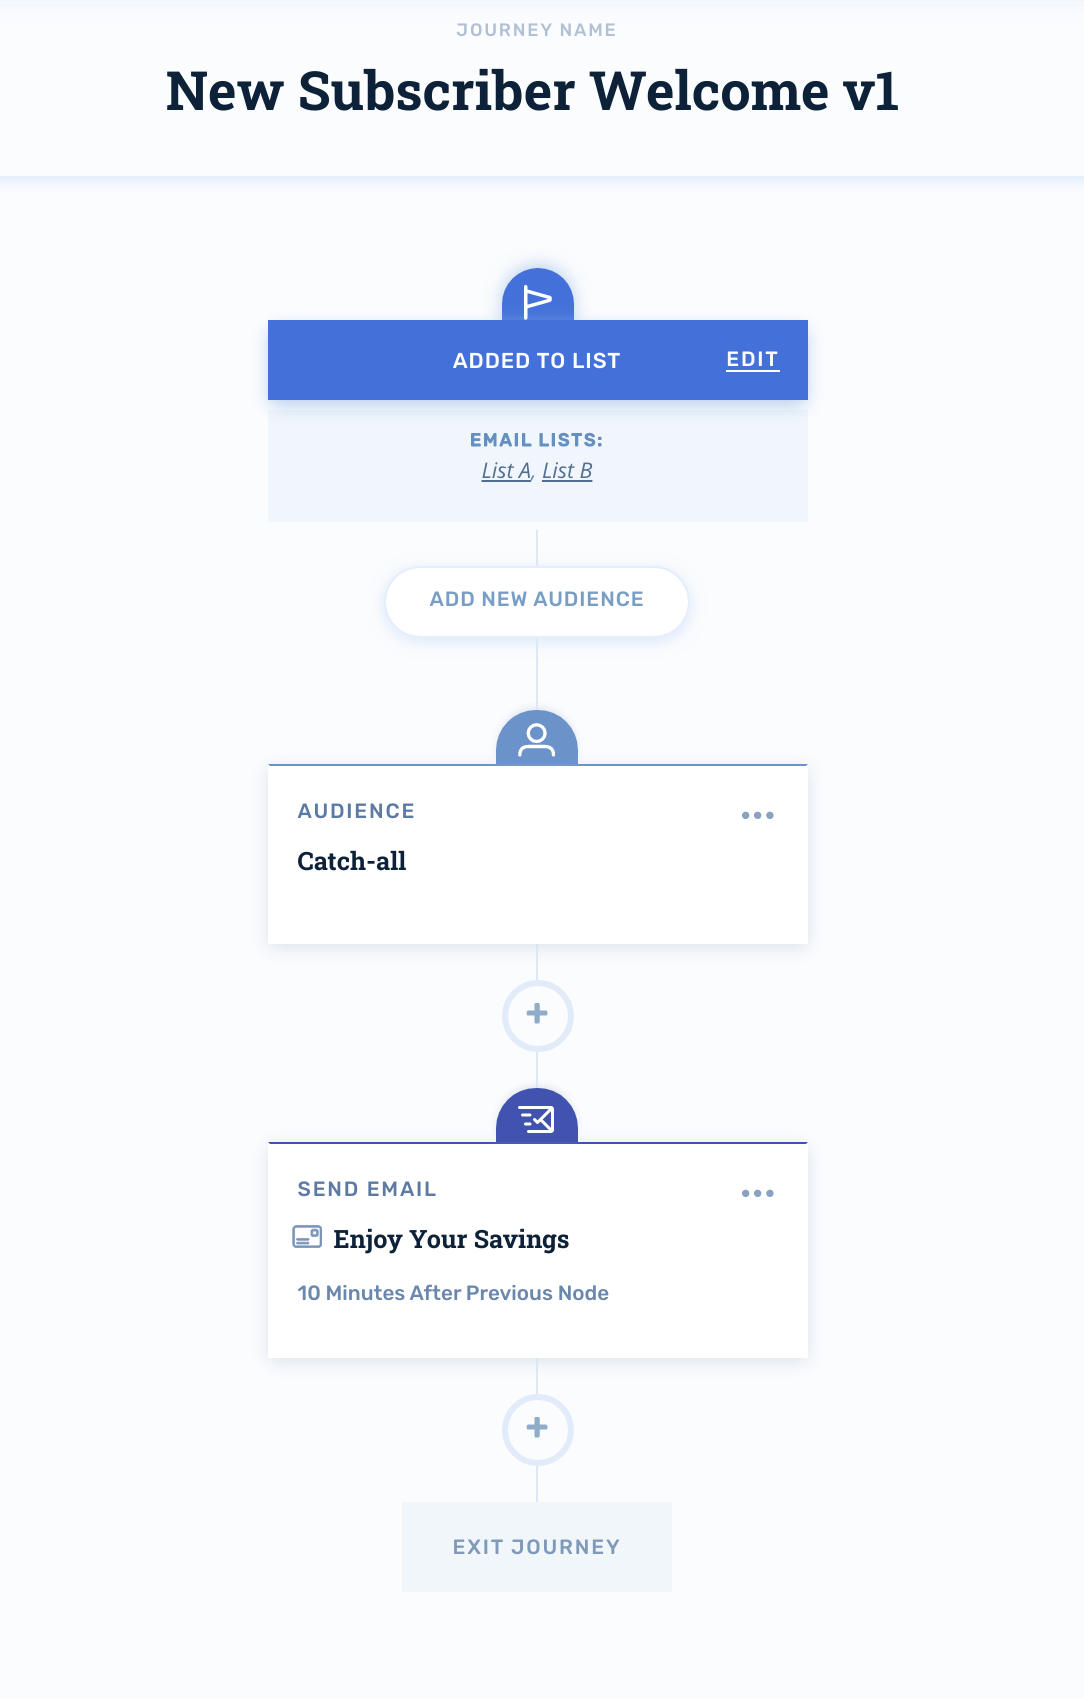
Once you've positioned the nodes and set your wait times, your new subscriber journey will look like this:
Activating the Journey
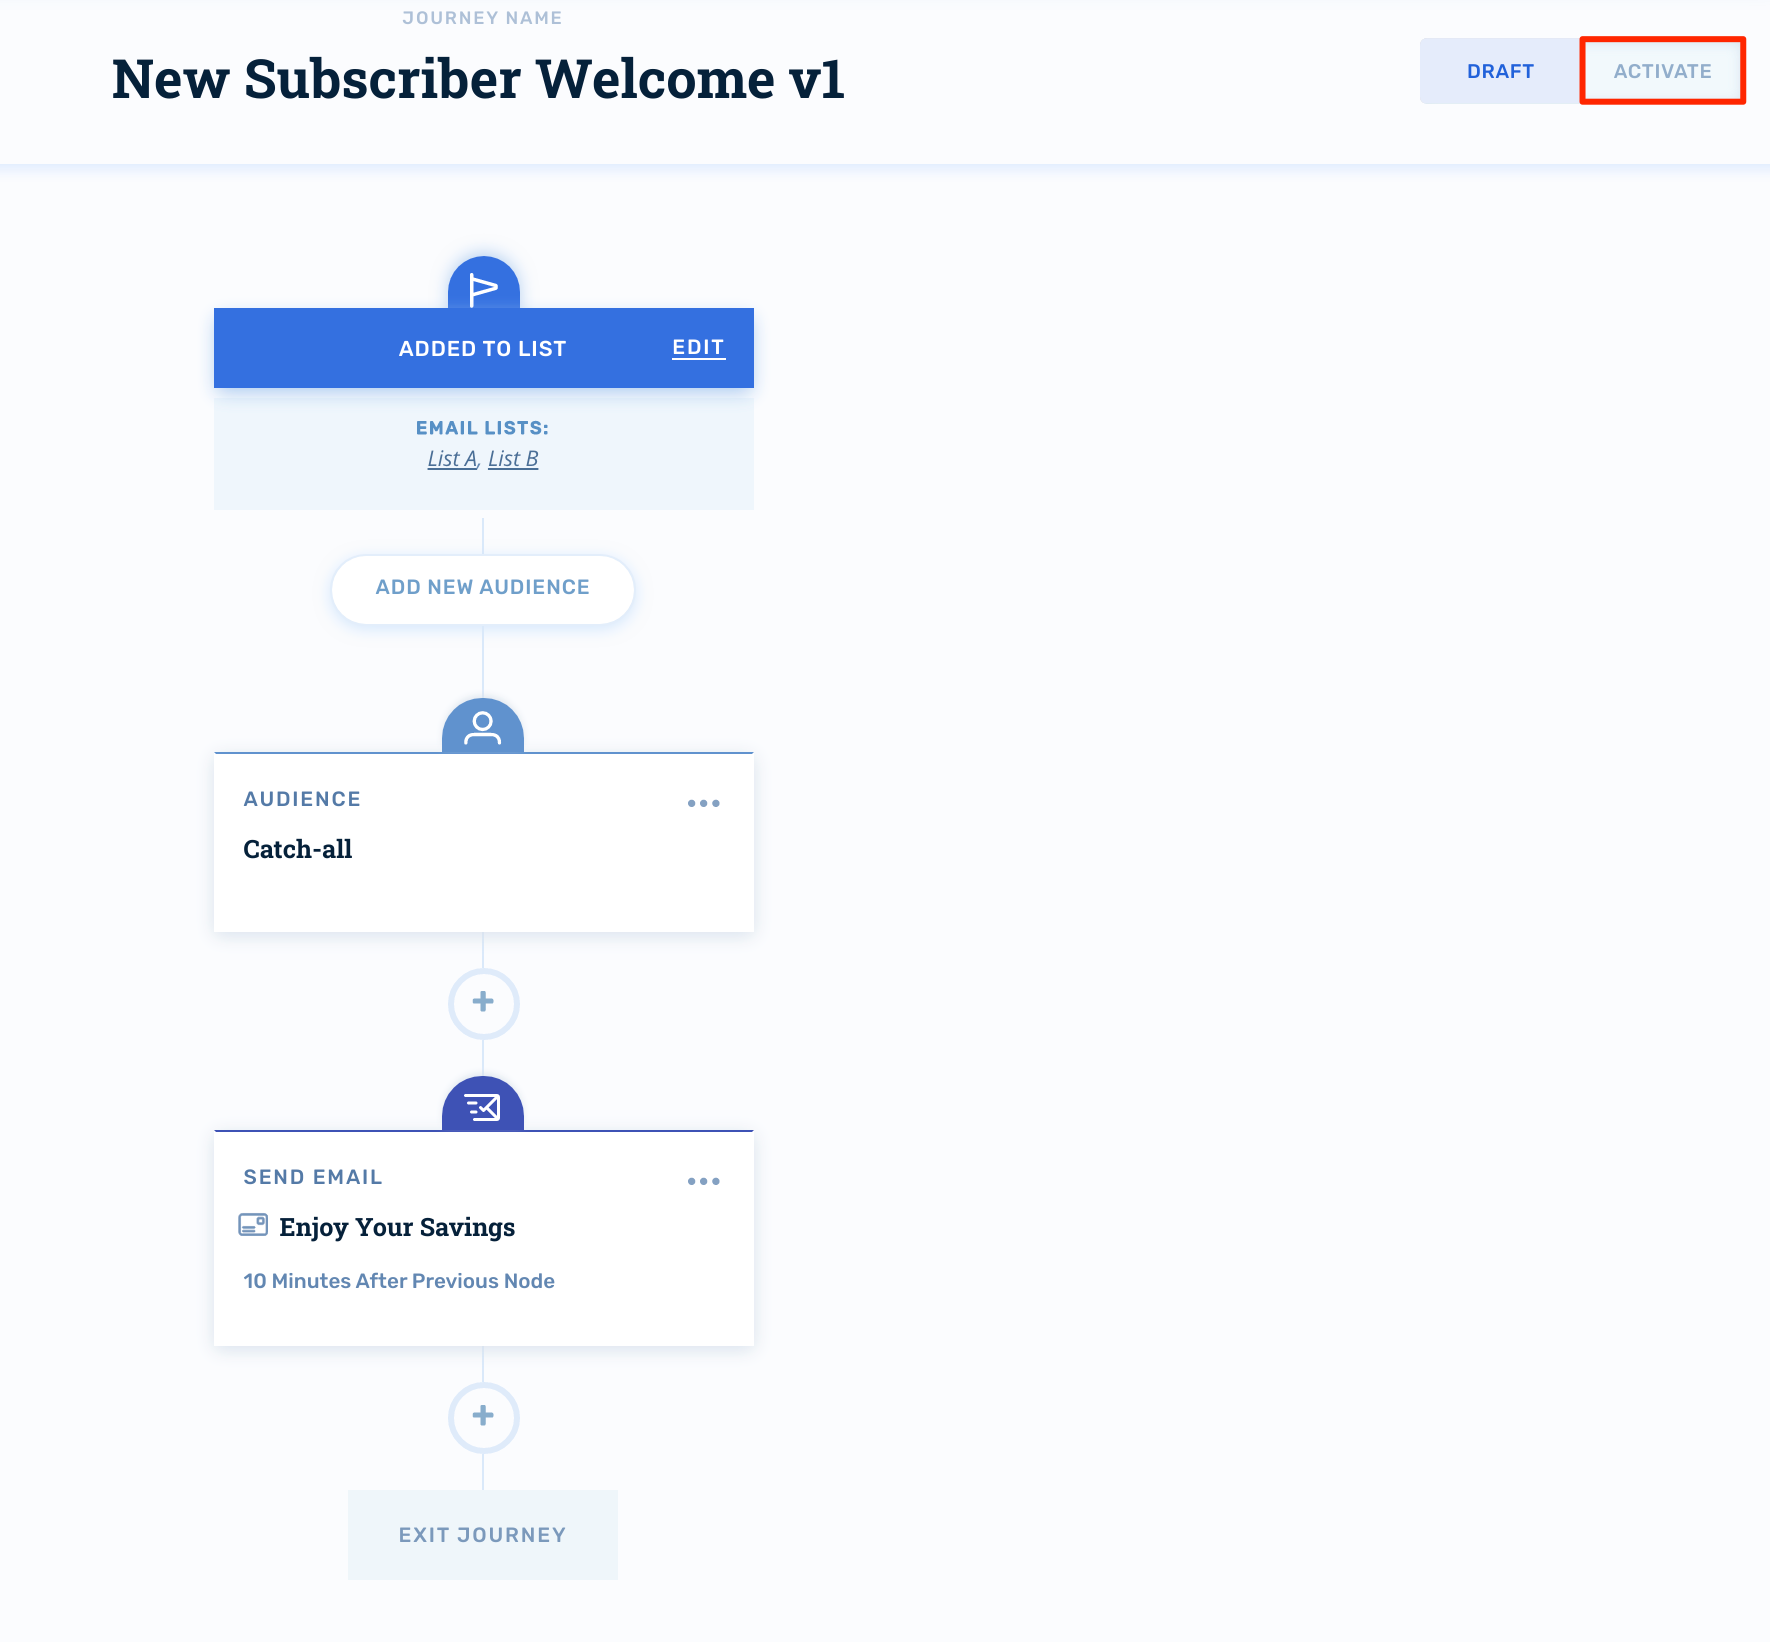
When you're ready to turn your journey on for production audiences, click Activate in the upper-right hand corner:
Manual Journey Triggering via List Addition
You might occasionally want to "insert" a group of emails into a pre-existing New Subscriber Welcome Journey (or any other Journey for that matter). This can be accomplished while Adding a New List or Adding Contacts to a List. Regardless of which method of list addition you’re using, the steps are comparable.
While you are in the process of adding subscribers to a list, you’ll be prompted with an option to “Insert customers in a Journey?”. By default, this option is left unchecked.
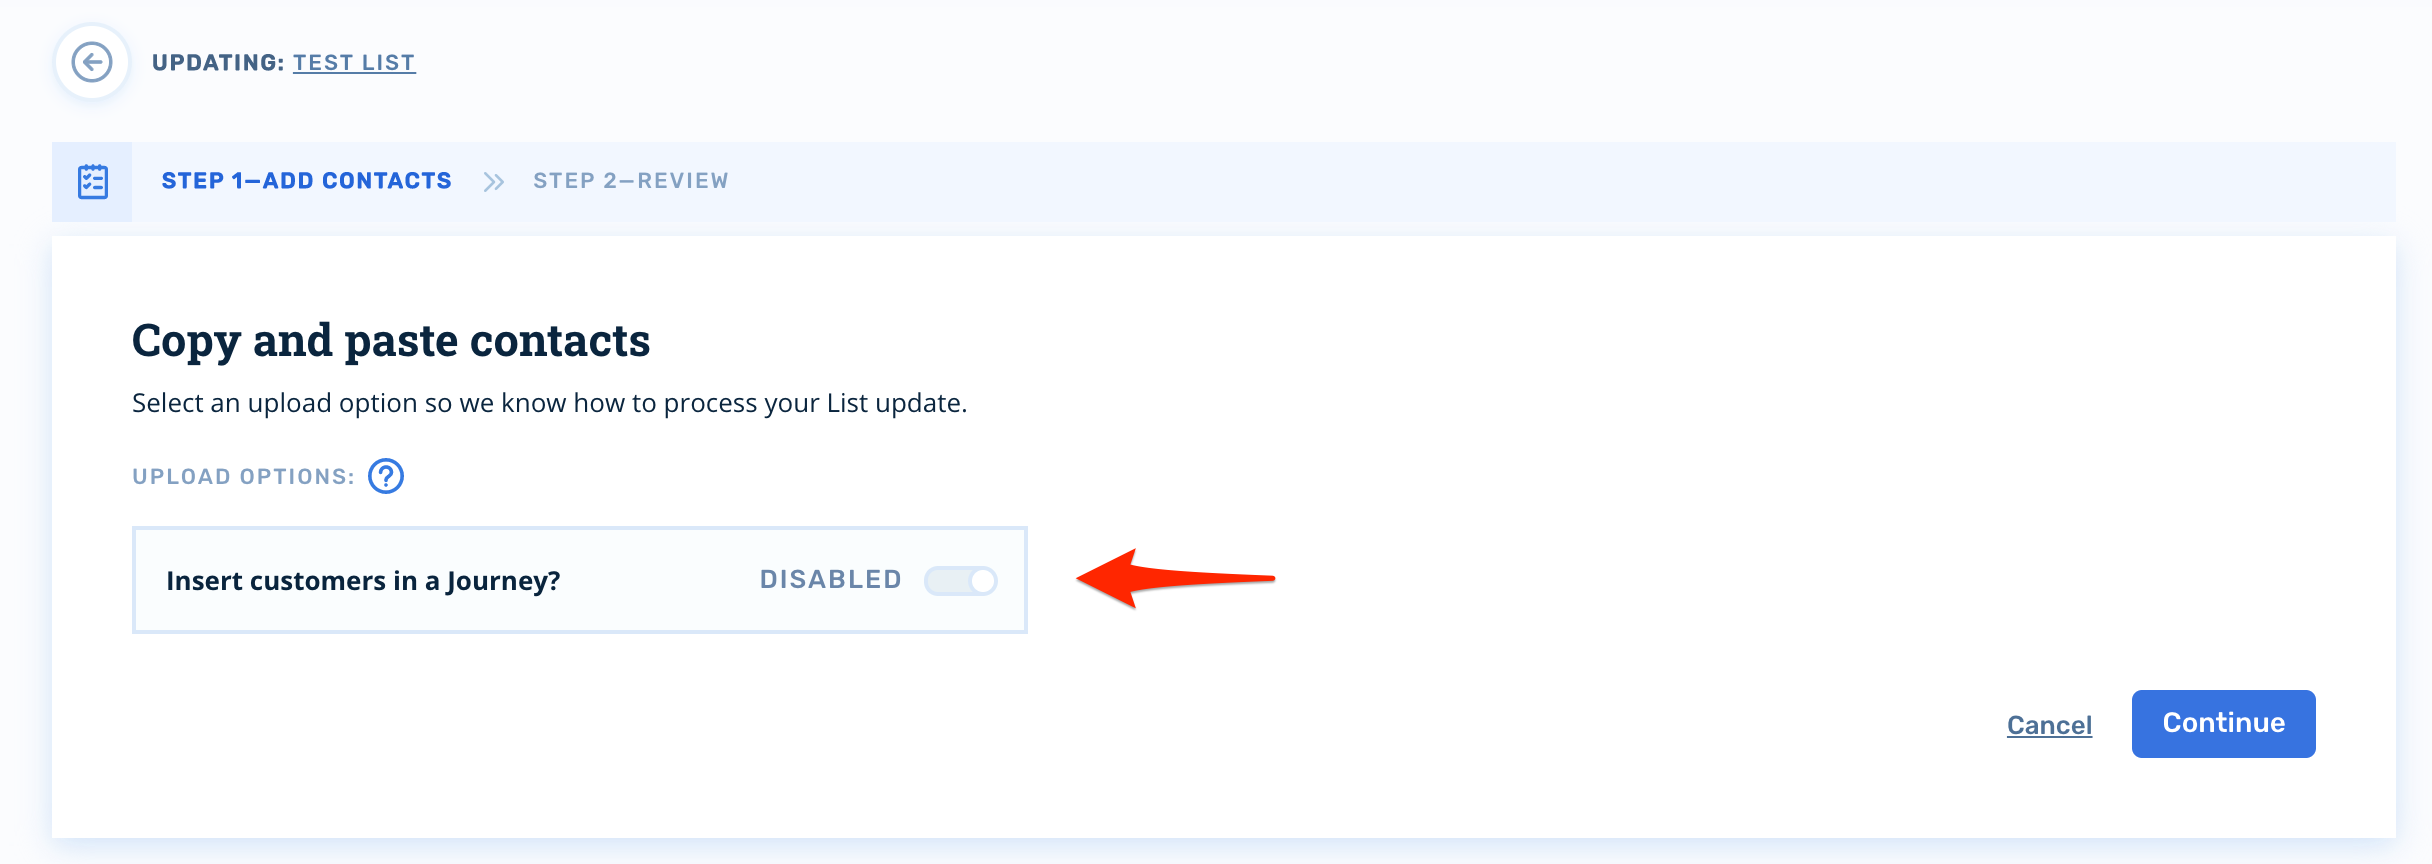
By toggling this option to “Enabled”, you’ll be presented with a list of available Journeys to insert these customers into. Select the Journey of your choice and click “Continue”.
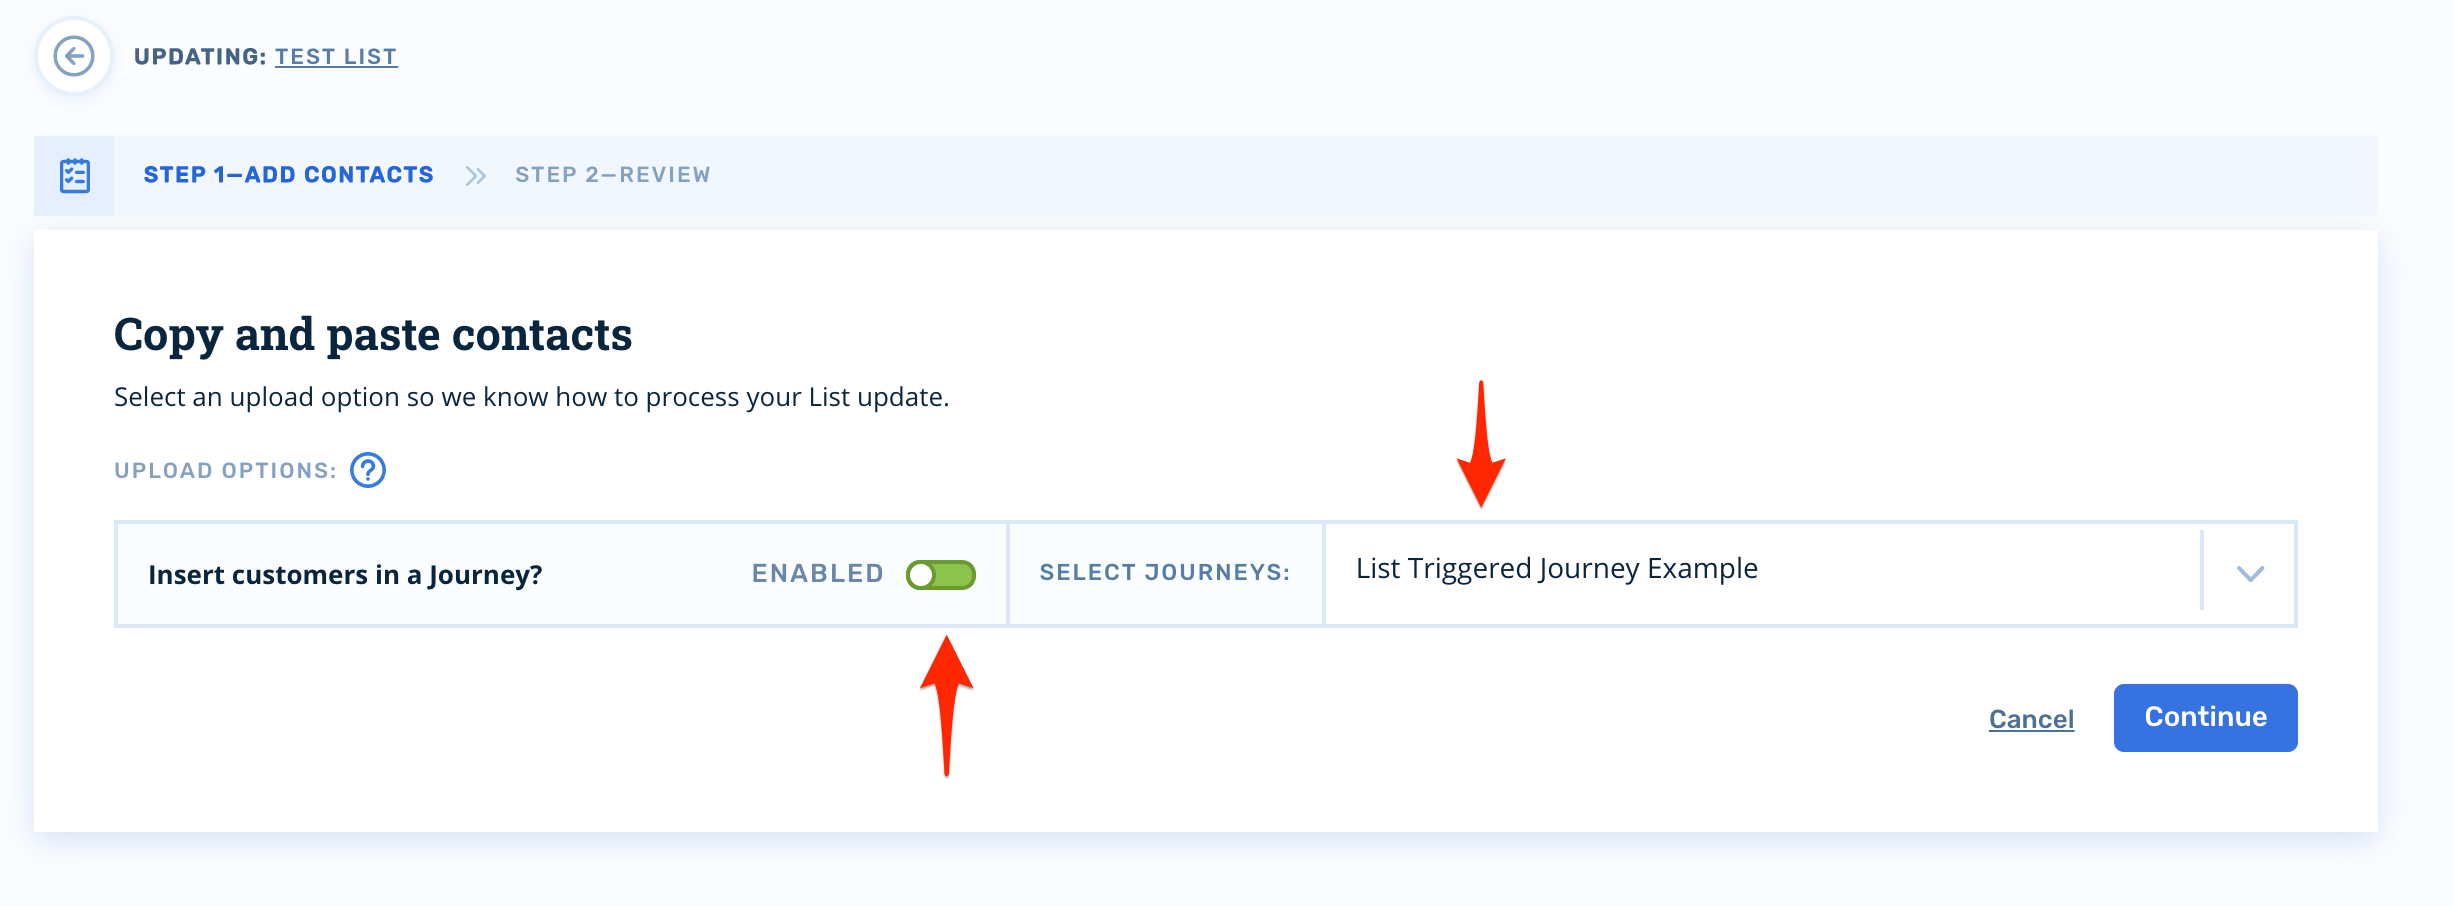
The final review step will allow you to see whether or not you successfully enabled the “Insert customers in a Journey?” option and the corresponding Journey you selected.
Updated 4 months ago
