
WooCommerce
Installing the Rejoiner WooCommerce Add-on
-
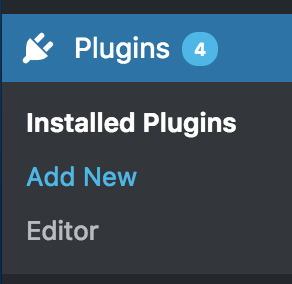
Go to your store's admin and then on the left side nav look and click in Plugins.
-
Click on Add New.
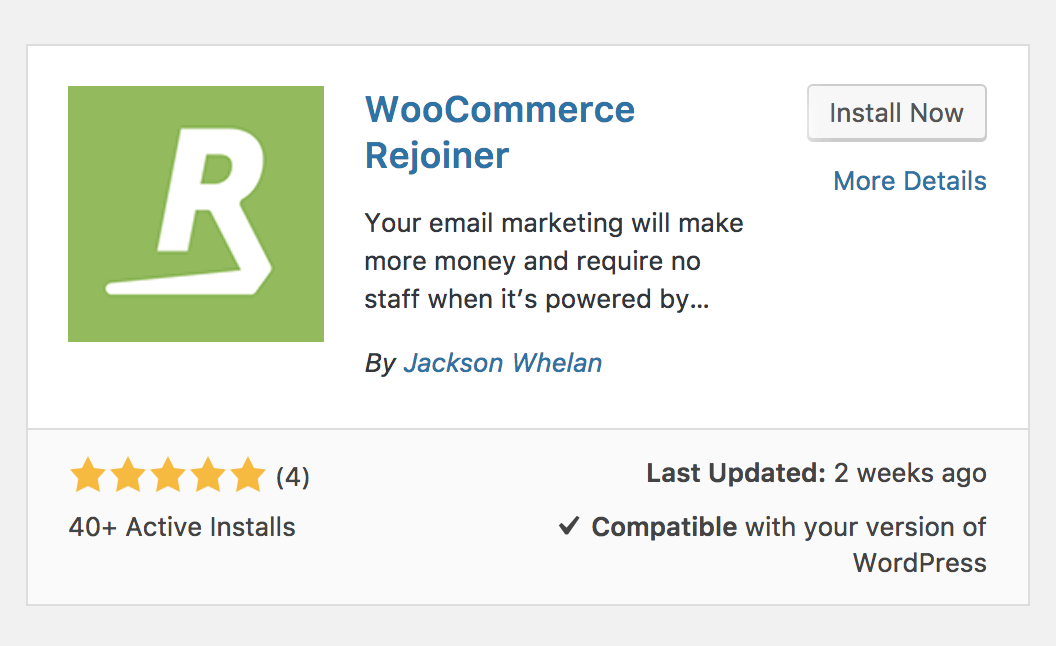
- On the search bar, type in rejoiner to look for our extension.

- Next, you will see the following result show up. There, you will want to click on Install Now button.
-
This will install the plug in, but you will still need to activate it and connect it to your Rejoiner account.
-
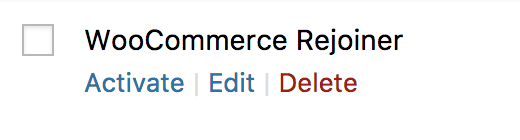
To activate it, simply go back to your plugins listing. Look for WooCommerce Rejoiner and click on the Activate link.
Configuring the Add-on
-
Activate the WooCommerce Rejoiner plug-in to your WooCommerce instance.
-
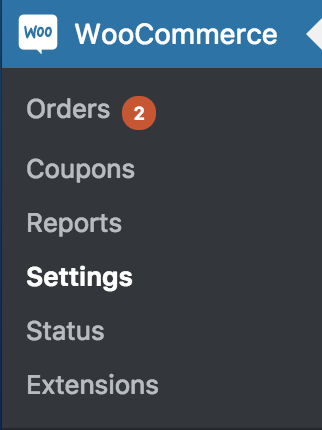
Look for WooCommerce Settings in the left side nav.
-
Then click on the Integration tab, click on the Rejoiner link.
-
Enter your Rejoiner Site ID, Domain & API Key. (You can find these in your Rejoiner dashboard under Settings.)

- Finally, make sure you save your settings by clicking on the Save Changes button at the bottom of your Integration tab.

Adjusting Product Image Sizing
The standard image size (width and length) you are passing us will vary according to your Wordpress theme. However, sometimes you will want to pass us larger image sizes in order to avoid pixelated images showing in your creative–this also helps with rendering images for retina display devices.
Please follow the instructions below to modify the image size you are passing us.
-
Go into your theme's functions.php file.
-
Next, add the following code into your file.
// Use this filter to specify the image size to be passed to rejoiner.
add_filter( 'wc_rejoiner_thumb_size', 'my_wcrj_thumb_size' );
function my_wcrj_thumb_size( $size ) {
    return array( IMAGE WIDTH HERE, IMAGE HEIGHT HERE );
}- Next, substitute the text
IMAGE WIDTH HEREandIMAGE HEIGHT HEREwith the correct width and height you want to use.
Note: You can return a named image size, eg: 'medium' or an array of dimensions, eg: array ( 800, 600 )
An example of the code snippet using width and height:
// Use this filter to specify the image size to be passed to rejoiner.
add_filter( 'wc_rejoiner_thumb_size', 'my_wcrj_thumb_size' );
function my_wcrj_thumb_size( $size ) {
    return array( 800, 600 );
}
An example of the code snippet using named image size: (You must add single quotes to the named image size)
// Use this filter to specify the image size to be passed to rejoiner.
add_filter( 'wc_rejoiner_thumb_size', 'my_wcrj_thumb_size' );
function my_wcrj_thumb_size( $size ) {
    return array( 'medium' );
}-
Next, save your theme's functions.php file.
-
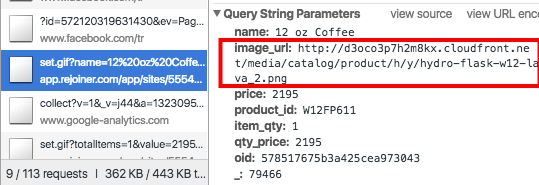
To confirm that the change has taken place, verify the image size using the set_cart_item call, which looks like so in your Chrome Dev Tools.
-
Next, copy the
image_urladdress in a new browser tab -
Lastly, right-click the image and select "inspect" to see the actual image dimensions.
Sync Purchasers to a Rejoiner List
Our integration with WooCommerce allows you to push all customers who complete a purchase to a specific Rejoiner List.
List RequiredYou will need to create a List for these customers in your Rejoiner account before employing the steps below.
- Go to your Admin and on the left side nav look for WooCommerce, then click on Settings.
- Next, click on the Integration tab.

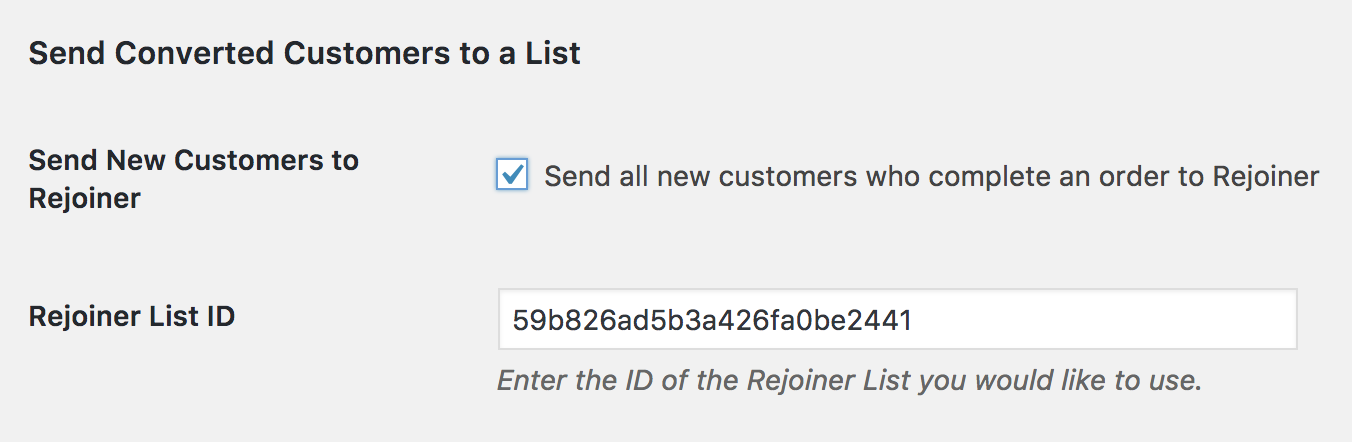
- There you will see a section named Send Converted Customers to a List. We will want to select the Send all new customers who complete an order to Rejoiner option, in order to enable this feature.

- Once it's been selected, simply add the List ID of your Rejoiner List in the input below it.
- Finally, make sure you save your changes by clicking on the Save Changes button at the bottom of your Integration tab.
Tracking Accepts Marketing Preference
Our integration with WooCommerce allows you to push all customers who opt into your marketing to be sent to a specific Rejoiner List. This will then allow you to send against that list in order to respect your customers' wishes.
Enabling this feature creates a simple checkbox for your customers to opt into your marketing. The checkbox then gets added into several parts of your store in order to be able to maximize this feature.
List RequiredYou will need to create a List for these customers in your Rejoiner account before employing the steps below.
- Go to your Admin and on the left side nav look for WooCommerce, then click on Settings.
- Next, click on the Integration tab.
- There you will see a section named Accept Marketing Feature. We will want to select the Yes, enable Rejoiner to gather marketing permissions from customers at checkout option, in order to enable this feature.

- Once enabled, we can update the remaining options of this feature.

- We recommend you update the Opt-In Field Label in order to set up the text you'd like to use for your opt-in checkbox.

- The next option is the Opt-In Status. This simply refers as to whether the checkbox should be selected or unselected by default. We recommend you leave it unselected, or as per the options shown below, leave it as Disabled by default.

- Next, you should add the List ID of the Rejoiner List you want to send your subscribers to.

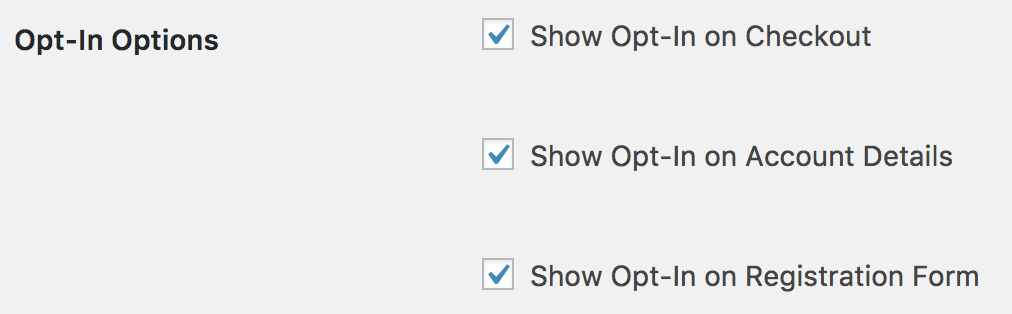
- Finally, we need you to decide where Rejoiner should inject the opt-in checkbox on your site. We recommend you select all the options given in your Opt-In Options section as pictured below:
- Finally, make sure you save your changes by clicking on the Save Changes button at the bottom of your Integration tab.<
Dynamic Coupon Codes
Our Webhooks feature will allow you to generate unique coupon codes in your WooCommerce account for users in your Rejoiner journeys.
To facilitate this, you will need to add a Send Webhook node, which initiates the process, and you will need to generate keys for access to your WooCommerce store's REST API.
Generate Keys
You will need to generate a Consumer Key and Consumer Secret in WooCommerce.
You will use these values when configuring the Send Webhook node.
Configure the Send Webhook node
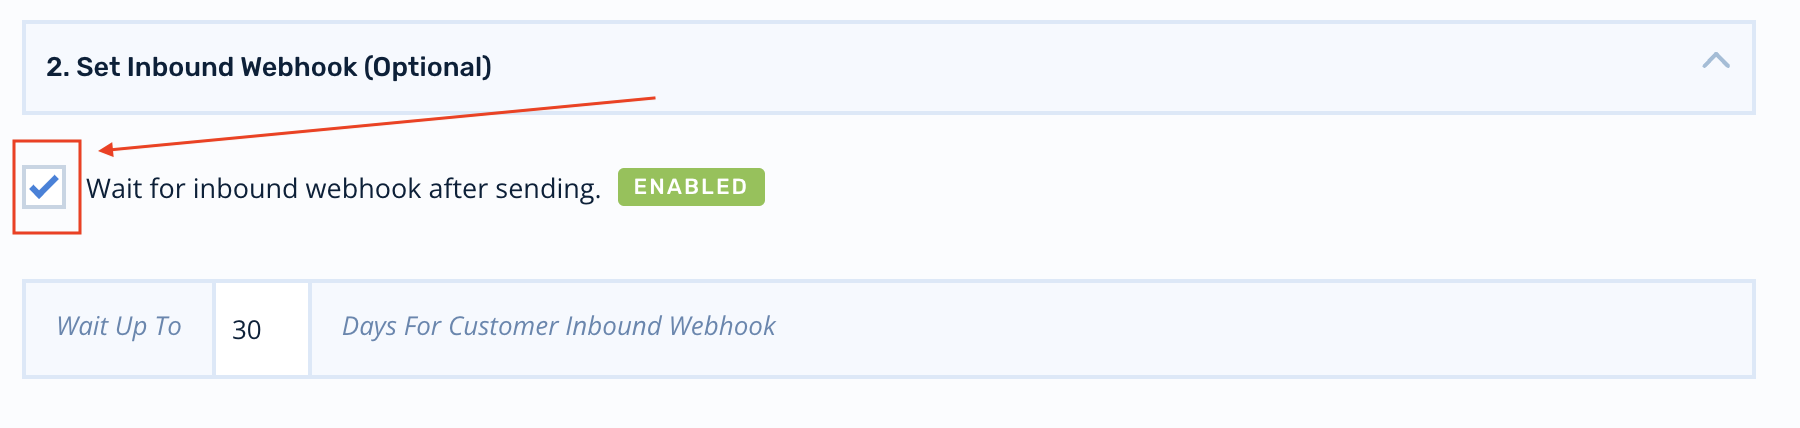
- For the
Set Webhook URLvalue, use:
https://integrations.rejoiner.com/platforms/woocommerce/webhooks/rejoiner/coupons- Make sure to enable Wait for inbound webhook after sending. This is required to make the discount code available in the journey.
- Then use
Add New Metadata Keyto add the following keys:
| Key | Description |
|---|---|
site_url | The should be the URL for your WooCommerce site where the coupon code API requests should be sent, e.g. https://www.yourstore.com (Do not include any paths such as /wp-admin, etc.) |
consumer_key | From the REST API key you generated. |
consumer_secret | From the REST API ket you generated. |
Add metadata keys for the Coupon Properties
Additionally, you must add additional metadata keys with corresponding values to configure the properties of the coupon you want to generate using attributes as defined by the WooCommerce Coupons API.
See: https://woocommerce.github.io/woocommerce-rest-api-docs/#coupon-properties
For example, if you wanted to create a coupon code that gives 10% off the order, you would use these values:
| key | value |
|---|---|
discount_type | percent |
amount | 10 |
The discount code will be available as a
{{ session.metadata.discount_code }}template tag in any subsequent nodes in the journey, as the discount code will now be part of the user's session metadata for the rest of the journey.
Generated code character set and patterns
By default, the generated code uses upper case alphanumeric characters and follows a pattern of ####-####-####-####.
This can be overridden by sending additional metadata parameters on the Send Webhook configuration.
Charset
You can pass a charset metadata key with values of:
| value | charset |
|---|---|
| numbers | 0123456789 |
| alphabetic | abcdefghijklmnopqrstuvwxyzABCDEFGHIJKLMNOPQRSTUVWXYZ |
| alphanumeric | 0123456789abcdefghijklmnopqrstuvwxyzABCDEFGHIJKLMNOPQRSTUVWXYZ |
Or you can simply pass a set of specific characters to create your own charset.
Pattern
You can pass a pattern metadata key which uses hash (#) as a placeholder for random characters from whatever charset is used. For example, ##-###-### with the alphanumeric charset might result in a code such as P7-ofW-Ka.
Valid SSL certificates
The coupon generation requests will fail if your WooCommerce store website does not have a valid SSL certificate. If you need to override this protection, e.g. for testing in a staging environment, you may pass a verify_ssl metadata key with value of false to allow it.
Updated 9 months ago